Waldorf IRIDIUM Quick Start Manual
Hide thumbs
Also See for IRIDIUM:
- User manual (215 pages) ,
- Quick start manual (36 pages) ,
- Quick start manual (18 pages)
Table of Contents
Advertisement
Quick Links
Advertisement
Table of Contents

Subscribe to Our Youtube Channel
Related Manuals for Waldorf IRIDIUM


Summary of Contents for Waldorf IRIDIUM
- Page 1 Quickstart Manual Für deutsche Version bitte umdrehen!
-
Page 3: Table Of Contents
Setup ........................... 9 LFO Section ...................... 2 9 Connections ......................9 Komplex Modulator ................... 2 9 The Rear Panel Connections ................. 11 Effects Section ...................... 2 9 The Modulations of Iridium ................ 3 0 First Start ........................14 Additional Modes .................... 3 1 Switching On / Off ..................... 14 Updating the System Software .............. 3 3 The Iridium Mode Pages ................. 14 Technical Data ..................... 3 4 About the Touchscreen Display . -
Page 4: Foreword
Foreword Foreword Hint Thank you for purchasing the Waldorf Iridium. You now own a high-class synthesizer featuring a wide range of Waldorf Music is not liable for any erroneous information unique sounds with approved Waldorf quality – made in contained in this quickstart manual. The contents of this Germany! manual may be updated at any time without prior notice. -
Page 5: Control Features & Connections
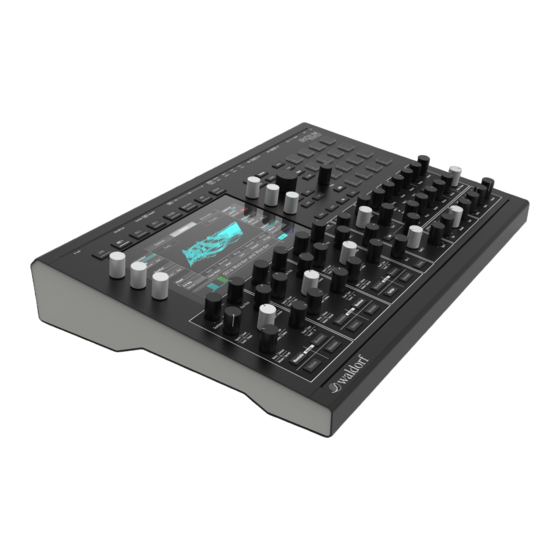
Control Features & Connections Control Features & Connections Front Panel 1) Touchscreen Display 4) Oscillator Section 7) LFO Section 2) Pad Section 5) Filters Section 8) Master Volume 3) Selection Dial & Mode Page Buttons 6) Envelopes Section Iridium Quickstart... -
Page 6: Rear Panel Connections
Control Features & Connections Rear Panel Connections Power Supply Jack & Power Switch Headphones Output with Volume control Stereo Audio Outputs & Stereo Audio Inputs CV/Gate/Clock Connections MIDI Thru, MIDI Out, MIDI In jacks USB 2.0 Connections MicroSD Card Port & Kensington Compatible Receptacle ® Iridium Quickstart... -
Page 7: General Safety Guidelines
General Safety Guidelines General Safety Guidelines Power Supply Only use the power cable that came with the Iridium. • Please read the following safety tips carefully! They Unplug the device when you are not using it for longer • include several precautions you should always ob- periods. serve when dealing with electronic equipment. Read all of the instructions before operating your device. Never touch the plug with wet hands. • Always pull the plug when unplugging the device - •... - Page 8 Use only a dry, soft cloth or brush to clean the device. • Never use alcohol, cleaning solutions or similar chemi- cals. They will damage the surface of the chassis. Proper Use This device is designed exclusively to produce low- frequency audio signals for the purpose of generating sound. Any other use is prohibited and voids the warranty extended by Waldorf Music. Waldorf Music is not liable for damages due to incorrect use. Most Iridium compounds are insoluble, which makes absorption into the human body difficult. Iridium Quickstart...
-
Page 9: Setup And Connections
Please ensure all the above items were included. If some- thing is missing, contact your local dealer. your computer (Windows or macOS). Thereafter, the Iridium becomes automatically available as a We recommend that you save the original packing material MIDI device. for future transport. 4. To play the Iridium you need a MIDI master key- board. Connect its MIDI Out jack to the Iridium ́ s Setup MIDI Input. Place the Iridium on a clean, even surface. 5. If desired, connect the Controller USB input to any suitable class-compliant USB hardware con- Connections troller to send MIDI data to control functions of the Iridium. - Page 10 8. Then switch on your computer (if connected), the trol all the way down to avoid damage due to on/off mixing console and finally the amplifier or active switching noise. The Iridium produces a high level monitor speakers. output signal. Please take care that the connected playback device is suitable for the high level of an The startup procedure is about 10-15 seconds. After electronic instrument. Never use the microphone or...
-
Page 11: The Rear Panel Connections
Master Volume control dial. dio signal into the Iridium. Use 2 TS mono jack cables to connect the Audio output to a Therefore, the signal can either mixer. The Iridium is a stereo instrument. There is no be routed through Iridium’s inherent mono output. Use your mixing console to approp- signal path for realtime live riately distribute the stereo channels in case. - Page 12 The only use case where transmission. you still would need a MicroSD card is doing a full system init as well as a rescue boot from MicroSD card. The Computer USB port connects the Iridium to your computer or iOS device with the following system requi- To use a USB drive, connect it to to the USB Controller rements: port.
- Page 13 Iridium: just connect the DIN MIDI out (or USB Controller port) to your external gear and use the Iridium knobs to control certian functions. For use with a computer we recommend the Computer USB port.
-
Page 14: First Start
First Start First Start The Iridium Mode Pages The Iridium offers mode pages in addition to the panel parameters or for global settings. To enter a desired mode Switching On / Off page, just press the corresponding mode button above or right from the touchscreen display. The following mode Iridium is equipped with a power pages are available: switch. - Page 15 Layer mode page (Levels, Pitch and Voices as- • signment) Global mode page (Scope, Pitch, Audio, MIDI, Set- • tings, System) Press a mode button several times to switch through the corresponding function tabs. All modes will be described in detail in the corres- ponding chapters of the main manual. The Play Button Section This section offers four buttons regarding playback and arpeggiator/sequencer functionality. Iridium Quickstart...
-
Page 16: About The Touchscreen Display
Mono and such. In case of an active split-mode, an appropriate icon of the split is displayed above the layer buttons. For a layered sound played by both layers simul- About the Touchscreen Display taneously, an icon is displayed above the layer buttons. The touchscreen display gives you an overview of the Below the sound name, Iridium´s tempo is displayed in actual Mode page, parameter changes, and delivers additi- Bpm and if it is generated internal or synced to an external onal information. To select a desired function, open a pop- tempo. up menu, or to edit a graphic (e.g. envelopes) just tap on it... - Page 17 You can also enter the sound number by tapping on the sound program number. You can filter sounds by attributes, banks, and authors. Use the three silver endless knobs to the left of the display. When set to All you have access to all existing sounds. Press the Next or Prev • buttons to load the next or previous sound pro- gram immediately. This function is available in nearly every mode and on every display page. The Load mode display page Iridium Quickstart...
- Page 18 The controls on the Iridium’s front panel offer direct On most display pages the Selection dial can be used • • access to the most important sound parameters. The to control the most important parameter – for example panel is divided into several sections, each containing Cutoff 1 on the Dual Filter page.
- Page 19 Saving Programs For each parameter the original value from the loaded patch is indicated by a vertical bar in the After you have finished editing a sound program you must main bottom area and in the encoder displays. save it if you intend to use it again. All of Iridium’s memory locations are available for this purpose. Some useful hint: Press a button above the display several times to switch through the corresponding function tabs.
- Page 20 1 to 4 on the touchscreen to open a pop-up menu selection list. Select the desired attribute. You can also add a new attribute by tapping on + next to the corresponding attribute name. It is strongly recommended to select an appropriate attribute for your sound. This helps you to lo- cate your sound later. Use the Prev/Next button or the Selection dial to select the desired sound program number, where the sound is saved to. Alternatively, tap on the number field at the bottom of the screen to enter the sound program number manually. Iridium Quickstart...
- Page 21 Press the Global button above the Selec- tion dial to enter the Global mode. Here you can make all settings regarding the overall tuning (Pitch tab). You will find an easy-to-use Audio Recorder (Audio tab). You can make can make further settings relating to the MIDI inputs and outputs as well as for the synchronisation (MIDI tab). In the Settings tab, you can make general settings relating to the dials, the display, and further options. An finally, the System tab gives you information about the software version. Here, you also can update the Irirdium firmware. Iridium Quickstart...
- Page 22 A Short Overview A Short Overview Waldorf Iridium consists of numerous sound-shaping components. Note that Iridium consists of two different types of com- ponents for sound generation and sound shaping: Sound synthesis: Oscillator models, Filters, Digital • Former, Amplifier, Effects. These modules represent the audio signal flow. Sound generation actually occurs within the oscillators. They can produce different sha- pes based on the selected model – e.g. classic wave-...
- Page 23 A Short Overview much more so than anything any sample playback-based Oscillator Section system could ever produce. Iridium offers three oscillators with different capacities: This principle offers powerful capabilities. To give some Wavetable Oscillator, Waveform Oscillator, Particle examples: Generator, Resonator, and Kernel synthesis. Each note on a keyboard can access a different wave of • If you press an active oscillator model button, the a wavetable.
- Page 24 1, 2, or 3. ponding oscillator 1, 2, or 3. The The whole oscillator section lights up in green. whole oscillator section lights up in blue. Iridium provides typical analog synthesizer waveforms (sawtooth, triangle etc.) plus other classic waveforms like There are two different ways of sample playback: normal square (which is the father of the pulse waveform) and the playback and granular playback.
- Page 25 The Resonator can also feed with one or more samples increased to produce a richer sound. (instead of using a noise impulse). You can load one single sample as well as multi samples that were mapped over the keyboard range. For a better understanding on how the Resonator works, we recommend to initialize a sound pro- gram and start with a default Resonator. Try out all parameters to become familiar with the functiona- lity of this powerful sound creation tool. Iridium Quickstart...
- Page 26 A Short Overview ons for velocity, various key tracking possibilities, plus The Kernel Synthesis Mode presenting feedback, level, pitch, and wavetable position as modulation targets in the Iridium’s Modulation Matrix. Press the Wavetable Meanwhile, kernel pitch can be set in relation to note pitch, and Wave- as well as being set to fixed frequency in audio or LFO form button range. Pitch envelopes could be also applied to each kernel simultaneously to activate the Kernel mode for the individually using the Iridium’s Modulation Matrix.
- Page 27 As you may know, Iridium can play back samples via the storage device and load them in the Iridium’s Flash Particle generator or as an exciter for the Resonator. memory. Here the samples are stored permanently and can be used for loading and further editing. Out of the box Iridium is delivered with a bunch of audio samples, but you can also use your own samples to create Record own audio samples: you can use the Audio • interesting sounds.
- Page 28 Oscillator Mixer (OSC MIX) Section Envelopes Section In the Oscillator Mixer section you control the volumes of Iridium’s envelopes allow you to manipulate sound para- the three oscillators. If an oscillator volume dial is turned meters via rate or timed modulations. Iridium offers six fully counterclockwise, no signal is passed. Press the Rou- independent programmable envelopes for every sound ting button to enter the Routing display page. program: •...
- Page 29 Effects Section Iridium offers five effect units with a bunch of different effect types. Press the Effect button to open the Effects display page. Keep in mind that the five effect units provide insert effects with a serial routing. That means that the signal will first go through Effect 1, then through Effect 2 after that, and so on.
- Page 30 Direct Panel Modulations means, for example, that if you have set up a Delay for Effect 2 and you also select a Delay for Iridium offers an easy way to determine modulation by Effect 4, Effect 2 is set to Off. All parameter edits using the dials on the panel. This modulation assignment made will be adopted. This enables you to per- can be called up in different ways: form an insert swapping of effects.
- Page 31 Arp & Seq Tab can set up 20 sound programs per Set for faster selection. Here, you can press the Arp button to open the Arpeggia- You can define up to six Sets, which means that you have tor display page or press the Seq button to open the Step fast access to 120 sound programs with just two taps. Sequencer display page. An arpeggiator is a device that splits an incoming chord into its individual notes and repeats them rhythmically. Iridium Quickstart...
- Page 32 A Short Overview Different sequence modes can be defined for the arpeggia- Running or vice versa) and play one or more notes on tor to cover a wide range of applications. In addition to the your keyboard or on the pads. synthesis features Iridium offers a programmable arpeg- giator. It can play a wide range of different rhythm pat- XY Pad Tab terns. This page provides a X-Y pad, a two-dimensional controller The Step sequencer is programmable and you can use up based on two selected modulation parameters. to 32 steps per measure. For each step the note length, First you need to define the X and Y controller within the velocity, and pitch can be defined. You can also create four...
- Page 33 Please make sure to download the following files: iridi- um.update.bin To update Iridium’s system software: Copy the .bin file onto the top-level of a suitable • MicroSD card or a USB storage device. Insert the MicroSD card into Iridium’s card slot or • connect the USB device to the Controller USB port. Press the Global button to enter the Global page. • Tap on the System tab to open the System sub pa- •...
-
Page 34: Technical Data
A Short Overview Technical Data Power Supply Supply Voltage Input 100 – 240 V AC / 50-60 Hz Nominal Voltage Output 12 V DC Maximum current consumption: 1 A max. Maximum power consumption: 50 W Dimensions and Weight Width: 440 mm Depth: 305 mm Height (including knobs): 85 mm Total weight: 5,4 kg Iridium Quickstart... -
Page 35: Product Support
A Short Overview Product Support Service & Repair Iridium does not contain any user-serviceable parts. If your Iridium develops a fault or needs servicing, please refer to a Waldorf authorised service center. For more information, please ask your musicians dealer or your local Waldorf distributor. Any Questions? If you have any questions about your Waldorf product, feel free to contact us. We’re here to help. Visit our support area at waldorfmusic.com Use the support form at our website. This is the most efficient and fastest way to contact us. Your questions will...
Need help?
Do you have a question about the IRIDIUM and is the answer not in the manual?
Questions and answers