Table of Contents
Advertisement
Quick Links
Advertisement
Table of Contents

Related Manuals for Waldorf Q Synthesizer


Summary of Contents for Waldorf Q Synthesizer
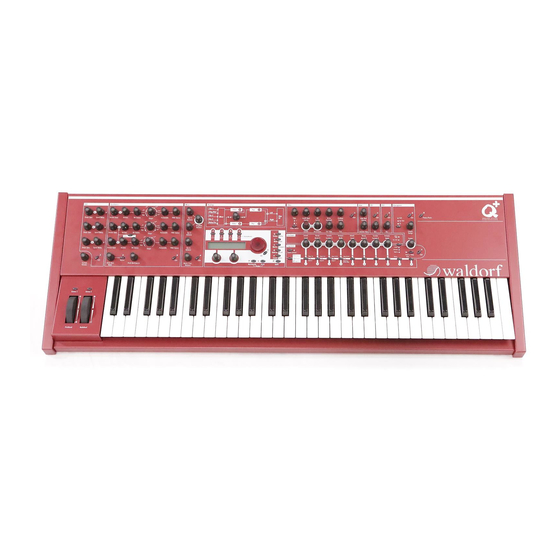
- Page 1 User´s Manual for the Q Synthesizer Q Keyboard/Q Rack/Q+...
- Page 2 ➤ Vielen Dank für den Kauf dieses Waldorf Produktes. Es zeichnet sich durch Thank you for choosing this Waldorf product. It is a dependable device and Zuverlässigkeit und Langlebigkeit aus. Dennoch können Material- oder is designed to last. However, the potential for defects in material or Verarbeitungsfehler nicht völlig ausgeschlossen werden.
- Page 3 Produktunterstützung / Product Support Wenn Sie Fragen zu Ihrem Waldorf Produkt haben, gibt es vier If you have any questions about your Waldorf product, feel free to contact us Möglichkeiten, uns zu kontaktieren: via one of the four options listed below.
-
Page 4: Foreword
Foreword – Development Foreword Thank you for purchasing the Waldorf Q, the Q Rack or the Q+. You now own a synthesizer featuring a wide range of unique sounds from analog to digital. To ensure your instrument functions properly and enjoys a long life, please read and heed the instructions in this manual. -
Page 5: Control Features And Connections
Master Section with display, page dial, value Controller Section with pitchbend wheel, dials, Instrument Select and function buttons. modulation wheel and two assignable buttons. Envelopes, Sequencer and Program Select Keyboard Section Section. Contains all knobs and buttons Waldorf Q User’s Manual... -
Page 6: Frontpanel Q Rack
Routing Section. Contains the Filter Routing associated with the Effects. Control. Arpeggiator Section. Contains all knobs and Master Section with display, page dial, value buttons associated with the arpeggiator. dials, Instrument Select and function buttons. Power button with standby LED. Waldorf Q User’s Manual... -
Page 7: Rear Panel
Sub Out 2 jacks. Deliver a stereo line level Card slot. Holds a card of type Q-Card 256 or output signal for connection to a mixing desk or higher (located at the front of the Q Rack) amplifier. Waldorf Q User’s Manual... -
Page 8: Table Of Contents
Xphorm – Interpolating between two sounds..62 Demo Playback..........24 Xphorm Edit Menu........63 The Master Section..........25 Triggering of Voices........... 64 Selecting Programs ..........25 Sound Edit Menu .......... 64 Selecting Programs with the Page Dial .... 26 Waldorf Q User’s Manual... - Page 9 Glossary............161 Low Frequency Oscillators (LFO) ...... 128 Controller Numbers......... 165 Low Frequency Oscillator Panel Controls..128 LFO Edit Menu ........... 129 MIDI Implementation Chart......169 Modulation Matrix .......... 131 CE Declaration..........170 Matrix Edit Menu........131 Waldorf Q User’s Manual...
-
Page 10: Introduction
Introduction About this Manual This manual was written to help you to become familiar with the Waldorf Q. It will also aid experienced users with routine tasks. Since this manual is valid for the keyboard- as well as the rack-version, we will separately point out the particular differences. -
Page 11: What To Read
There are people who read a manual cover to cover while others don’t even touch it. The latter is the worst choice, especially when the manual describes a Waldorf instrument. To ensure that everyone finds the information he needs to work with the Q, we collected the following information to tell you which chapters you should read at the very least. - Page 12 Channel Based MIDI Program Change Messages Messages Poly Pressure Messages Sostenuto Pedal Messages Footswitches Pedals Influencing and Editing all chapters Sounds over MIDI Other Functions Updating the System Software Table 1: Suggested chapters for advanced users Waldorf Q User’s Manual...
-
Page 13: If You Are A Synthesizer Hotshot
Do you already own any Waldorf synthesizers so that you are familiar with their structure and terminology. Then make sure to read at least the following chapters. They describe the extraordinary features and functions of the Q. -
Page 14: General Safety Guidelines
Maintenance • Do not open the device or remove the cover. Refer all service and repair tasks to qualified personnel. The interior of the chassis contains no components that require user maintenance. Waldorf Q User’s Manual... -
Page 15: Proper Use
This device is designed exclusively to produce low-frequency audio signals for the purpose of generating sound. Any other use is prohibited and voids the warranty extended by Waldorf- Music AG. Waldorf-Music AG is not liable for damages due to incorrect use. -
Page 16: Setup And Connection
Setup and Connection – Inventory Setup and Connection Inventory The Waldorf Q comes complete with: • the Q/Q+ or the Q Rack • power supply cable • this manual Please ensure all the items above were included. If something is missing, contact your local dealer. - Page 17 Connect the power supply cable that came with the Q with the Power Supply ³ jack. Plug the other side of the power supply cable into a suitable AC power outlet. The Q should power up itself. If not, switch on the Q with the Power button Waldorf Q User’s Manual...
-
Page 18: Audio Connections
(44.1 kHz, 16 Bit signal). You can use this output to connect the Q to a digital mixing console or to record the sound signal on a DAT machine or hard disk recording system. The signal on the digital out connector is always identical to the Main Out jacks ¿. Waldorf Q User’s Manual... -
Page 19: External Input
• Input Voltage Range: 0 to 5V It doesn’t matter if the incoming CV is linear or logarithmic, this can be adjusted in the Global menu as well as the initial offset and the overall gain. Waldorf Q User’s Manual... -
Page 20: Overview
The simple rule of thumb says: the less complex the sound, the higher the available polyphony. If you select a sound that uses the analog filter the polyphony for this sound is reduced to 16 voices because of the 16 hardware analog filter. Waldorf Q User’s Manual... -
Page 21: Memory Card
You can expand the number of program locations by using a memory card of the type Q-Card 256. It is possible that there are cards with more memory available for the Q as technology moves on. Please ask your Waldorf dealer or check our website for further infomation. Picture 4: Q-Card ☞... -
Page 22: Basic Operation
The Q has a special shutdown feature that prevents data loss by accidentally pressing the power button. ☞ To switch the Q off: • Press and hold the Power button . The display now shows a countdown message from 10 to 0: Waldorf Q User’s Manual... -
Page 23: Panic Function
If you got a clue what the Q is capable of, it is time to leave the Demo Playback and to start exploring it yourself. ☞ To exit the Demo Playback Mode: • Press Multimode and Peek simultaneously. The Q returns to normal operation. Waldorf Q User’s Manual... -
Page 24: The Master Section
We will come to that later. For now, you only need to know: The buttons Inst. 1…Inst. 4 are used to switch between these Instruments. Each Instrument holds a Sound that can be selected in various ways. Waldorf Q User’s Manual... -
Page 25: Selecting Programs With The Page Dial
Single Mode: Inst:1 Sound:A001 Zeitlos Multi Mode: Inst:1 Multi:A001 Abfahrt Selecting Programs with the Number Buttons You can also use the Sequencer section’s number buttons to select a program. The following picture shows the number buttons: Waldorf Q User’s Manual... - Page 26 Program (name may be different depending on the factory set in your Q). Single Mode: Inst:1 Sound:A001 Zeitlos Multi Mode: Inst:1 Multi:A001 Abfahrt Drum Maps are located at number 01 to 20 of bank D. You can´t select higher a program number for this program type. Waldorf Q User’s Manual...
-
Page 27: Bank Hold
Release the Select button again. Selecting Programs on Memory Cards When a memory card of type Q-Card 256 is inserted, the total memory of the Q is expanded by: • 100 Sounds • 20 Drum Maps • 10 Multis Waldorf Q User’s Manual... -
Page 28: Category Search
Category Search doesn’t change any program numbers. It only filters out all patches not belonging to the selected category. Scrolling through patches with this function is much faster because only patches belonging to the selected category are visible. Waldorf Q User’s Manual... -
Page 29: Instruments And Sounds
To replace one Sound of a Layer: Press the Instrument button Inst. 1…Inst. 4 that holds the Sound you want to replace. The LED above the Instrument button lights up fully. Select a Sound for this Instrument. Waldorf Q User’s Manual... -
Page 30: Editing Sounds In Layers
This buffer holds the currently selected Multi in Multi mode. • 1 Drum Map edit buffer: This buffer holds the currently edited Drum Map in single or multi mode. • 16 Sound edit buffers: Each buffer holds an edited Sound. Waldorf Q User’s Manual... -
Page 31: Editing Panel Parameters
You can adjust the time a parameter is shown in the display in the Global menu. The standard setting is 1.5 seconds but when you’re new to the Q you should raise the time to about 5 seconds. Waldorf Q User’s Manual... -
Page 32: Editing Alternative Panel Parameters
Selection buttons are used to switch a part of the panel to control different aspects of the sound. They don’t have a direct influence on the edited Sound, but their status is saved with the Sound to recall Waldorf Q User’s Manual... -
Page 33: Editing Display Menu Parameters
The Sound parameters refer to a Sound program. If you are in Single Mode, you will edit the currently played program. If you are in Multi mode, the Sound program for the currently selected Instrument will be edited. Waldorf Q User’s Manual... -
Page 34: Viewing Parameters Without Change - Peek
If you want to compare a Sequencer Pattern, select the Step Sequencer Edit menu. • If you want to compare a Drum Map, select the Drum Map Edit menu. Press Shift + Compare. The display now shows a c after the program number: Waldorf Q User’s Manual... -
Page 35: Recalling Edited Programs
If you want to store a Drum Map, select the Drum Map Edit menu. Press Shift + Store to activate the Store page. The display shows the Store page where you can select the destination and the program name: Waldorf Q User’s Manual... - Page 36 By pressing any button before performing the last step, you can discard the Store process at any time. Use the Store function also if you want to copy programs. There is no need to edit a program before storing it. Waldorf Q User’s Manual...
-
Page 37: Multi Mode
Multi Mode The Waldorf Q offers a 16 part Multi mode. As soon as you want to arrange keyboard layers for a live performance or want to do multi track recordings in a studio, you should start to program your own Multis that you can use to quickly switch between completely different setups. -
Page 38: Instrument Settings
In a Multi-Program you can use only one Drum Map at a time. When you’re assigning a Drum Map to an instrument, any other instrument using a Drum Map will be restored to the normal program assignment. Waldorf Q User’s Manual... - Page 39 Q receives any MIDI messages at all. • 1…16 means that the selected Instrument receives and sends on this MIDI channel. This setting is recommended for a Multi that should be used for multi track playback with a software sequencer. Waldorf Q User’s Manual...
- Page 40 To prevent this, the Q automatically sends out MIDI note messages on the Global channel. Reasonably the Status-Parameter of the Q Rack doesn’t include Local and Loc.+Midi as it doesn’t have a keyboard. Waldorf Q User’s Manual...
- Page 41 These buttons are available for the Q Keyboard only. The Q rack is able to receive the button data. Enable / Disable Program Change (Prg.Chg) Determines whether the chosen instrument transmits and receives program change data (Enable) or not (Disable). Waldorf Q User’s Manual...
- Page 42 Hi Velo HiVelo is the counterpart to LowVelo. Only notes with a velocity lower or equal to the selected value are passed through. Set this parameter to 127, if you want to turn velocity switching off. Waldorf Q User’s Manual...
- Page 43 Modifiers or the Modulation Matrix. The highest possible Controller number is 120 because all higher numbers are reserved for non-real-time purposes. If global is selected, the corresponding settings for Ctrl W...Z made in the global parameter section are used. Waldorf Q User’s Manual...
-
Page 44: Multi Settings
0 to 127. VU Mode The VU Mode graphically shows all incoming Midi signals and current signal volume as a bargraph (like on a signal analyzer.) This allows you to check which instruments are receiving Midi messages. Waldorf Q User’s Manual... - Page 45 LFO that are set to clocked. Please read the chapter “The Tempo” on page 56 for further information. The Multi Tempo parameter is controlled by the Tempo dial on the front panel, so it doesn’t need to have an entry in the Multi parameter pages. Waldorf Q User’s Manual...
-
Page 46: Step Sequencer
This is very important when the sequencer is running. As soon as you select at least one step, the step sequencer is armed to record notes. Waldorf Q User’s Manual... -
Page 47: Deselecting All Steps
Select any number of steps. Press Pause. Programming a Pause in fact deletes all notes of the selected steps. There is no specific “delete notes” function because the Pause function is meant to do this task. Waldorf Q User’s Manual... -
Page 48: Holding Notes Over More Than One Step
☞ To change the modulation signal values of selected steps: Select any number of steps. Press the Control Select button until the parameter that you want to change is shown. Waldorf Q User’s Manual... -
Page 49: Once
If one or more steps are selected, the playback position is shown with dimmed LED. Tempo see Sound Tempo Controls the tempo of the step sequencer. Bank Select Button (Pattern/Sound/Multi Button) The Bank Select Button is used to select step banks or to deselect all steps. Waldorf Q User’s Manual... -
Page 50: Sequencer Rotaries
The row of LED to the right of the eight controls shows which parameter is currently edited. Sequencer Edit Menu The following parameters can be accessed via the display menu. Press the Sequencer section’s Edit button to activate the display menu. Waldorf Q User’s Manual... - Page 51 Note Length is set in the same manner as Modulation Signals. The only difference is that you can’t change more than one step at a time because you would destroy the rhythm of the sequence pattern. Waldorf Q User’s Manual...
- Page 52 Sets the basic key from where transposes start. This feature is useful when you i.e. have a sequence in C major where the first note is an E. Setting Transpose Key to C3 assures that the sequence really plays in C major when you hit a C. Waldorf Q User’s Manual...
- Page 53 As soon as you turn one of these controls, the Step Lengths or Note Lengths of all steps are set to this value. This is a handy feature when you e.g. want to set all steps to 16th notes. Waldorf Q User’s Manual...
-
Page 54: Sound Parameters
Sound Parameters – Overview of Functions Sound Parameters Overview of Functions The Waldorf Q consists of numerous sound-shaping components. The following overview gives you an idea of how the individual components interact: Audio Signal MIDI Clock Step Sequencer Arpeggiator Trigger... -
Page 55: The Tempo
Multi to get back to the stored tempo. • Auto-Thru means that the Q automatically syncs to incoming MIDI Clock and always sends out MIDI Clock, no matter if it received it or if it generated the tempo base itself. Waldorf Q User’s Manual... -
Page 56: Modulation Speed Levels
Summed Audio Input Signal LFO1 LFO 1 Signal LFO2 LFO 2 Signal LFO3 LFO 3 Signal FilterEnv Filter Envelope Signal AmpEnv Amplifier Envelope Signal Env3 Envelope 3 Signal Env4 Envelope 4 Signal Table 3: FM Sources Waldorf Q User’s Manual... -
Page 57: Fast Modulation
F1 FM, F2 FM FM Amount modulation of Filter 1…2 F1 Drive, F2 Drive Drive of Filter 1…2 F1 Pan, F2 Pan Pan of Filter 1…2 Volume Amplifier output volume Table 5: Fast Modulation Matrix destinations Waldorf Q User’s Manual... -
Page 58: Standard Modulation
F1 Pan, F2 Pan Pan of Filter 1…2 Volume Amplifier output volume LFO1Speed, LFO2Speed, LFO3Speed Speed of LFO 1…3 FE Attack Attack rate of Filter Envelope FE Decay Decay (and Decay 2) rate of Filter Envelope Waldorf Q User’s Manual... - Page 59 MIDI foot control (controller #4) BreathCtr MIDI breath control (controller #2) Control W, X, Y, Z assignable MIDI controller W, X, Y, Z Ctr Delay Modifier Delay Modif. #1...#4 Modifier result #1...#4 minimum constant for minimum modulation (equals 0) Waldorf Q User’s Manual...
- Page 60 Step sequencer step length S.Notelen Step sequencer note length Voice Num Note number of played voices Voice %16, %8, %4, %2 Number of played voices Unisono V Number of played unisono voices Table 8: Standard Modulation Matrix sources Waldorf Q User’s Manual...
-
Page 61: Xphorm - Interpolating Between Two Sounds
The Mod Matrix Amounts aren't xphormed because it is very likely that the sources and destinations are different in the xphormed patch. Switch parameters that aren't xphormed: • LFO Shapes, Sync, Clocked • Osc Shapes, Sync and Mod Sources • Mixer Input settings for N/E • Filter Types and Mod Sources Waldorf Q User’s Manual... -
Page 62: Xphorm Edit Menu
If you like that, keep it, if not, select a different sound or change one of the sounds so that it uses the same switch parameter settings. • Use the left display dial to select Bank A…X from which the Sound program is taken. • Use the right display dial to select the Sound program 001…100. Waldorf Q User’s Manual... -
Page 63: Triggering Of Voices
Controls the detuning of the Unison voices. Each voice is detuned differently, with Unisono Detune, you control the overall amount. Unisono Detune suits perfect for thickening the tone. Also Step Sequences and Arpeggios profit from the detune function. Waldorf Q User’s Manual... - Page 64 Afterwards the release phase is active. This setting is only active as long as the Parameter Mode is set to Mono (only Envelope 4). Otherwise the envelope behaves as being set to Normal. Waldorf Q User’s Manual...
-
Page 65: Oscillators
What he implemented into his synthesizer were the still well-known waveforms sawtooth, square and triangle. For sure, this is only a minimal selection of the endless variety of waveforms, but the Waldorf Q gives you exactly these waveforms at hand. Plus other classic waveforms like pulse (which is the father of the square waveform) and the sine wave (which is also part of each other waveform). - Page 66 The same is true for a brass instrument. The string in this case are the lips while the bow is the air. The lips are moved by the air to a certain extent and abruptly move back to their original position. Waldorf Q User’s Manual...
- Page 67 They consist of a tube that can contain a certain amount of air. The player blows air through the tube in a way that the air starts to vibrate. This vibration is almost completely symmetrical resulting in a hollow timbre. Waldorf Q User’s Manual...
- Page 68 When the pulse width is changed, the waveform starts to sound thicker. This happens because the effect is very similar to what you would get when you have two oscillators running with slightly different frequencies. They interfere and create irregular holes in the resulting waveforms. Waldorf Q User’s Manual...
- Page 69 It could act as a suboscillator wave, to emphasize certain frequencies or to frequency modulate other oscillators. The triangle wave sounds like a wood wind instrument, i.e. a clarinet. It can also be used for mallet instruments like vibraphone, xylophone etc. Waldorf Q User’s Manual...
-
Page 70: Wavetable Synthesis
A wavetable is a table of pointers to up to 128 waves, among which you can move at will. If you like the sound and possibilities of the wavetable synthesis you should try out the Waldorf Microwave II, XT or XTk. These are pure wavetable synthesizers. Also the Waldorf PPG Wave 2.V as a VST Instrument is capable of this synthesis. -
Page 71: Oscillators Panel Controls
MAXIMUM to the respective oscillator pitch with a negative amount. Semi -12...+12 Sets the pitch of the oscillator in semitone steps. The standard setting for this parameter is 0, but there are cases where different values are interesting as well. Waldorf Q User’s Manual... - Page 72 Sets the type of waveform to be generated by the Oscillator. The parameter is called Shape instead of “waveform”, because it doesn’t necessarily set only one waveform, but sets a specific oscillator model that could produce a number of waveforms depending on other settings. A good example for this Waldorf Q User’s Manual...
- Page 73 127 is equivalent to 50%. You determine the startpoint of the wavetable at Alt1 or Alt2 with the Pulsewidth knob, at which 0 selects the first of 128 Waveforms. If you select any waveform other Waldorf Q User’s Manual...
- Page 74 Note that you can apply unipolar and bipolar modulation sources . For example, set Pulsewidth to 64, which is almost the middle of the wavetable and apply a slow running LFO to PWM Source to sweep through the whole wavetable. Waldorf Q User’s Manual...
- Page 75 Using additional pitch modulation by envelopes, LFO or pitchbend will bring further movement into sync sounds. The following picture illustrates the principle of oscillator synchronization in a simplified way: Waldorf Q User’s Manual...
- Page 76 If you want to modulate the pitch of individual oscillators, you can do so with the Fast Modulation Matrix or Standard Modulation Matrix that can be accessed through the Matrix menu. See the respective section on page 131 for details. Waldorf Q User’s Manual...
-
Page 77: Oscillators Edit Menu
Tune Mode Tune Mode global The Tune Mode determines if the sound uses the normal global tuning or the HMT tuning. For more information about HMT refer to the page 156. The following parameters are available: Waldorf Q User’s Manual... -
Page 78: Glide
Glissando makes the normal Glissando effect in the same manner by changing the pitch in semitones. • Fingered Gliss is similar to Glissando but generates a pitchchange only when notes are played coherent (legato). Glide / Active off / on Enables or disables the Glide effect. Waldorf Q User’s Manual... -
Page 79: Mixer
Filter 2 and decrease the amount of signal that feeds Filter 1. If set to mid, both filters will receive the same signal level. If set to F2 63, the signal is sent to Filter 2 only. Waldorf Q User’s Manual... - Page 80 This is logical because when you use i.e. one oscillator set to 100Hz and the second set to 101Hz, the resulting ring modulation is 201Hz and 1Hz. And 1Hz is very low. Waldorf Q User’s Manual...
-
Page 81: Mixer Edit Menu
RingMod Balance (Q Rack only) See Additional Controls on the Q Keyboard. Noise / Ext. (Q Rack only) See Additional Controls on the Q Keyboard. Noise / Ext. Balance (Q Rack only See Additional Controls on the Q Keyboard. Waldorf Q User’s Manual... - Page 82 ExtLeft selects the Left input signal as input for the respective filter. • ExtRight selects the right input signal as input for the respective filter. • ExtL+R feeds the summed signal of the left and right input into the respective filter. Waldorf Q User’s Manual...
-
Page 83: Routing
Filter 1 is routed to the filter’s panning unit. This setting is equivalent to a parallel routing of two filters, each filtering the input signals independently. • After passing the panning units, both signals are summed up again and sent to the Amplifier and FX sections. Waldorf Q User’s Manual... -
Page 84: Filter
The following picture shows the effect of the resonance parameter on the filter’s frequency curve: Level Resonance Frequency Cutoff Picture 24: Low Pass Filter Resonance Waldorf Q User’s Manual... -
Page 85: Selecting And Editing Filters
CutoffMod Source. I.e., If both filters are selected for editing and Type is moved, the same filter type is assigned to Filter 1 and Filter 2. This is performed because altering selective parameters in relation does not make any sense. Waldorf Q User’s Manual... -
Page 86: Filter Panel Controls
Determines the amount of influence the filter envelope has on the cutoff frequency. For positive settings, the filter cutoff frequency is increased by the modulation of the envelope, for negative settings, the cutoff frequency is decreased. Use this parameter to change the timbre of the sound over Waldorf Q User’s Manual... - Page 87 Lower values will add some harmonics to the signal, resulting in a warm character. Increasing the value will bring in more and more distortion, suitable for harder lead sounds and effects. Waldorf Q User’s Manual...
-
Page 88: Filter Edit Menu
See Additional Controls on the Q Keyboard above. FM Source See Additional Controls on the Q Keyboard above. PanMod See Additional Controls on the Q Keyboard above. PanMod Source See Additional Controls on the Q Keyboard above. Waldorf Q User’s Manual... -
Page 89: Filter Types
The band pass filters 24dB BP and 12dB BP remove frequencies both below and above the cutoff point. As a result, the sound character gets narrow. Use these filter types for programming effect and percussion-like sounds. Waldorf Q User’s Manual... -
Page 90: 24Db High Pass And 12Db High Pass
The notch filters 24db Notch and 12dB Notch are the opposites to the band pass types. They dampen frequencies around the cutoff point. Frequencies below or above the cutoff point are passed through. Use these filter types for programming effect sounds. Waldorf Q User’s Manual... -
Page 91: Comb+ And Comb
Q through Cutoff while the amount of colorization is set by the Comb filter feedback, which is controlled in the Q through Resonance. Level Resonance Frequency Cutoff determines number of teeth Picture 31: Comb + Filter Type Waldorf Q User’s Manual... - Page 92 Instrument you use it. • The Comb filter works per voice rather than per Instrument. This means that each voice has its own Chorus and therefore could generate a different Chorus effect. You can easily Waldorf Q User’s Manual...
- Page 93 Now you need to know how to set up Cutoff. Filter Cutoff is scaled in semitone steps and you only have to find the Cutoff value where the filter oscillates with standard pitch. The following table gives you these settings: Waldorf Q User’s Manual...
- Page 94 Cutoff Mod or the Mod Matrix use an external input signal to feed the analog filter 16 analog filters are available, so to make use of the increased Q+ polyphony, we recommend to use a mixture of analog/digital sounds in multimode. Waldorf Q User’s Manual...
-
Page 95: Amplifier
Picture 34: Volume influence of different Velo parameter settings Additional Controls on the Q Keyboard -64…+63 AmpMod Determines the amount of volume modulation. see Table “Fast Modulation Sources” on page 58 AmpMod Source Selects the source of the volume modulation. Waldorf Q User’s Manual... -
Page 96: Amplifier Edit Menu
The following parameters can be accessed via the display menu of the Q Rack only. Press the Amplifer section’s Edit button to activate the display menu. AmpMod See Additional Controls on the Q Keyboard. AmpMod Source See Additional Controls on the Q Keyboard. Waldorf Q User’s Manual... -
Page 97: Effects
FX1/2 Type Bypass / Chorus / Flanger / Phaser / Delay / Overdrive / Five FX / Vocoder / Reverb / Tap Delay /5.1 Delay /5.1 D.Clk Sets the type of effect produced by the selected effect unit. All further parameters depend on the selected effect type. Waldorf Q User’s Manual... -
Page 98: Bypass
With extreme settings you can hear a whistling sound which is very characteristic for a Flanger effect. A Mix setting of 48 to 96 produces the strongest effect because both the unaffected signal and the processed signal are mixed together. Waldorf Q User’s Manual... -
Page 99: Phaser
Sets the modulation depth of the Phaser effect. Center | Spacing 0…127 Center Controls the basic delay length of the allpass filters. Lower settings produce a high pitched Phaser effect while higher settings enable the Phaser to also cover deep frequencies. Waldorf Q User’s Manual... -
Page 100: Delay
Clocked is set to on. When set to internal, the Tempo is synced to the Global Tempo which in turn is generated by the Q itself or evaluated from incoming MIDI Clock. See the chapter “The Tempo” for details. Waldorf Q User’s Manual... -
Page 101: Overdrive
|Post Gain 0…127 Drive Controls the amount of distortion the effect produces. Low values create no or only slight distortion while high values create heavier distortion. 0…127 Post Gain Controls the output level of the distorted signal. Waldorf Q User’s Manual... -
Page 102: Five Fx
Controls the amount of distortion of the signal. Please note that the signal might become a little louder when you increase this parameter. Ring Mod 0…127 Ring Mod | Source Controls the level of ring modulation between the input signal and a second signal that can be chosen with Source. Waldorf Q User’s Manual... -
Page 103: Reverb
0…127 Lowpass Determines the frequency where the higher frequency parts are divided from the effect signal. This parameter works in the same way as the lowpass filter in the Q´s sound synthesis. A natural reverb Waldorf Q User’s Manual... - Page 104 Determines how fast the room simulation dampens the higher reverb frequencies. Higher frequencies are not dampened not as much as lower frequencies. This phenomenon makes a natural echo sound somewhat hollow. Higher values of the Damping parameter mean more high frequencies will be dampened. Waldorf Q User’s Manual...
-
Page 105: Tap Delay
Panorama left / center / right Determines the panorama or stereo spread of the choosen delay step. In the lower display line you can change all panorama settings to c (center), l (left) or r (right). Waldorf Q User’s Manual... -
Page 106: 5.1 Surround Delay Types
| 100.0 % 1.4ms…1.48s Delay Sets the length of the SurroundDelay in milliseconds. Feedback 0…100% Controls the amount of signal that is routed back into the Delay line. Lower values therefore produce fewer echoes than higher values. Waldorf Q User’s Manual... - Page 107 0...127 Determines the volume of the effect signal for the left Rear Speaker (Sub Out 1 L). Delay S1L 0%...400% Determines the relative delay of the effect signal pertaining to the setting of the Delay parameter. Waldorf Q User’s Manual...
- Page 108 Sets the length of the delay tap in note values. A „t“ behind the number means a triplet note value while a „.“ Behind means a dotted note. All other parameter of the 5.1 D.Clk Delay are identical to the 5.1 Delay. Waldorf Q User’s Manual...
-
Page 109: Vocoder
3. Select a sound program. We recommend the use of sustained pad or string sound. 4. Select the Vocoder as effect type for FX slot 1 or 2. Initialize the vocoder effect by holding down the Shift button and pressing the corresponding FX Edit button. Waldorf Q User’s Manual... - Page 110 All other synthesis bands are spread equally between these two bands. When you set S. Offset (the low offset) to +63 and Hi Offset to -64, the synthesis frequency bands are arranged vice versa compared to the analysis bands, so you get a flipped Vocoder. Waldorf Q User’s Manual...
- Page 111 Selects the band that is emphasized or attenuated by Mid Level. The surrounding bands are scaled to match the level of the Middle EQ. -64…+63 Mid Level Emphasizes or attenuates the band selected with EQ Middle by ±18dB. Waldorf Q User’s Manual...
-
Page 112: Arpeggiator
“synchronize” yourself to e.g. a drummer. Just hit a new chord on each new bar. • If Hold is selected, the Arpeggiator splits up all played notes and generates a continuous arpeggio even when the chord is released. This gives you two ways of entering a chord: Waldorf Q User’s Manual... - Page 113 G3 E3 C3 | G2 E2 C2 | G1 E1 C1 | G3 C1 E1 G1 2 Oct Alt Down G2 E2 C2 | G1 E1 | C1 E1 G1 | C2 E2 Table 11: Arpeggio results depending on note input Tempo See Sound Tempo. Waldorf Q User’s Manual...
-
Page 114: Arpeggiator Edit Menu
Note that you can edit a ROM pattern in the Arpeggiator Edit Menu Step Data section to create your own rhythms based on an existing ROM pattern. As soon as you do so, the ROM pattern is copied to the User pattern and the previous User pattern is overwritten. Waldorf Q User’s Manual... - Page 115 Then the arpeggio is repeated. Waldorf Q User’s Manual...
- Page 116 If On is selected, the Note Off message of the previous note is allowed to be sent after a Note On message of the next note with the same pitch. This setting can be nice with arpeggios triggering sounds with slow attack. Waldorf Q User’s Manual...
-
Page 117: Arpeggiator Edit Menu Step Data
Arp Accent 01[--Ï-Ò------Í----] Sets the accent of a particular step. This accent is interpreted as velocity offset that is added or subtracted from the original velocity stored in the note list. However, the generated velocities can Waldorf Q User’s Manual... - Page 118 If - is selected, the Arpeggiator plays the same note as it had to play in the previous step • that was set to * or ˆ. With this setting, you can repeat a particular note of the note list several times. The note list is not advanced. Waldorf Q User’s Manual...
- Page 119 Values pointing to the right move the step forward so that it is played later. ¸ means that • the step is moved by a third, ˝ means that it is moved by two third and ˛ means that it is moved fully. Waldorf Q User’s Manual...
- Page 120 • If a vertical line (˚) is shown, the step is held as long as set in the Length parameter. Values pointing to the right (¸, ˝, ˛) make the notes of this step held longer. Waldorf Q User’s Manual...
-
Page 121: Envelopes
Envelope 3, the four rightmost dials are assigned to Envelope 4. Envelope Panel Controls ADSR / ADS1DS2R / One Shot / Loop S1S2 / Loop All Mode Switches between the various envelope types. The following chapters explain the types in detail. Waldorf Q User’s Manual... -
Page 122: Adsr Envelope
Determines the sustain level which is held until a note ends. 0…127 Release Once the note has ended, the release phase begins. During this phase, the envelope fades to zero at the rate determined by the Release value. Waldorf Q User’s Manual... -
Page 123: Ads1Ds2R Envelope
Determines the level which is held until a note ends. 0…127 Release Once the note is released, the release phase begins. During this phase, the envelope fades to zero at the rate determined by the Release value. Waldorf Q User’s Manual... -
Page 124: One Shot
Determines the decay rate or amount of time it takes for a signal to reach the Sustain level. 0…127 Sustain Sets a breakpoint level between the Decay and the Release rate. 0…127 Release The Release phase fades the envelope to zero after the Sustain level was reached. Waldorf Q User’s Manual... -
Page 125: Loop S1S2
Sets the second Sustain level. As soon as this level is reached, the loop starts by using the first Decay rate to go to the first Sustain level. Release 0…127 Once the note is released, the release phase begins. During this phase, the envelope fades to zero at the rate determined by the Release value. Waldorf Q User’s Manual... -
Page 126: Loop All
The Release phase is used while the note is pressed to form the last stage before the loop restarts with the Attack phase. When the note is released, the loop stops and the Release phase is used to fade the envelope to zero. Waldorf Q User’s Manual... -
Page 127: Low Frequency Oscillators (Lfo)
The Sine shape is best suited for oscillator FM or pan modulations. • The Triangle shape is perfect for smooth pitch, filter or volume modulations. • The Square shape can be interesting for hard pan modulations or special effects. Waldorf Q User’s Manual... -
Page 128: Lfo Edit Menu
LFO slows down when higher notes are played and vice versa. A setting of +100% corresponds to a 1:1 scale, e.g. when an octave up is played on the keyboard the LFO speed is doubled. Waldorf Q User’s Manual... - Page 129 Controls the initial phase of the LFO when a new note is started. Free means that the LFO isn’t restarted on a new note but runs freely while other values set the LFO phase to the respective offset in degrees. Waldorf Q User’s Manual...
-
Page 130: Modulation Matrix
(slots) each with individual settings of source, destination and amount. The Modulation Matrix is the key of the power of each Waldorf synthesizer, so start experimenting with it right now. Basically, the Modulation Matrix is split in two kinds: Fast Modulation Matrix (M1F…M8F) -
Page 131: Modifier Matrix
XOR Returns the binary exclusive-or operation of Source #1 and Source #2. • min Returns the minimum value of either Source #1 or Source #2. If Source #1 is smaller than Source #2, the value of Source #1 is returned and vice versa. Waldorf Q User’s Manual... -
Page 132: Control Delay
Please note that the Control Delay must be set as the Modulation Source in the Modulation Matrix for the Modulation Destination to be affected. see Table “Standard Modulation Sources” on page 60 Source Selects the Modulation Source (and correspondingly its signal) which will be delayed. Waldorf Q User’s Manual... -
Page 133: Drum Map
Output center |Main Out L64…center…R63 Controls the stereo position of the selected Drum Map entry. Output Main Out / Sub Out 1 / Sub Out 2 Sets the audio output of the selected Drum Map entry. Waldorf Q User’s Manual... - Page 134 Sound to not respond to keytrack (O1…O3 Keytrack 0%), this parameter also has no effect on the pitch of the oscillators. 0…127 Volume #01 Volume Sets the maximum output volume of the selected Drum Map entry. Waldorf Q User’s Manual...
-
Page 135: Global Parameters
If you have only one Q, leave Sysex ID on 0. There is no need at all to change this setting to any other value. After you bought your 128th Q please get in contact with Waldorf Electronics. You will receive a personally ID number that authorize you to have a diner with our manager. Waldorf Q User’s Manual... - Page 136 Multis or to Ctl, when your sequencer can’t work with system exclusive data anyway. Off / On Controller Receive (Ctl. Recv) Determines if Real-Time Sound Parameter Changes are received over MIDI by the Q. • If Off is selected, no Sound Parameter Changes are received. Waldorf Q User’s Manual...
- Page 137 Q will recognise A major as the scaled tuning reference. The chord A major then becomes the reference chord upon which the HTM alters that sound’s tuning. If you normally play polyphonic music, this mode will sound pleasing to your ears. This mode works best with lower tuning values. Waldorf Q User’s Manual...
- Page 138 Octave Scale Tuning. Please note that the connected MIDI instrument must be able to correctly interpret the incoming scaled tuning data. Please refer to the owner’s manual of the connected instrument to verify if it can. Waldorf Q User’s Manual...
- Page 139 When set to Num the Q only sends program change messages. Bank change messages won’t be send. • The setting Num+Bank will cause the Q to send program as well as bank change messages when selecting programs. Waldorf Q User’s Manual...
- Page 140 Sets the curve that is used for aftertouch when played on the keyboard. It changes the aftertouch behaviour of the internal tone generation and the outgoing MIDI Aftertouch messages. It doesn’t affect incoming MIDI Aftertouch messages. Waldorf Q User’s Manual...
- Page 141 • Foot Contr. send the Foot controller (Controller #4) to the internal tone generation and over MIDI Out. This controller can be used to change any Sound parameter that is accessible in the Standard Modulation Matrix. Waldorf Q User’s Manual...
-
Page 142: Input Gain
Main Out will route an external signal directly to the Q’s Main Out or the Digital Out. • Sub1 out will route an external signal directly to the Q’s Sub Out 1. • Sub2 out will route an external signal directly to the Q’s Sub Out 2. Waldorf Q User’s Manual... - Page 143 Move the Pedal to its minimum position or make sure that the CV is at its minimum voltage. Adjust Pedal/CV 1 Offset until the pitch is the same no matter if the Amount in the Matrix slot is set to +00 or +63. Waldorf Q User’s Manual...
- Page 144 Table 17: Pedal/CV controller numbers Pedal/CV2 Offset -64…+63 Pedal/CV2 Offset Sets the initial gain for Control Pedal/CV 2 that is used when the pedal is at its minimum position. Please read “Pedal/CV1 Offset” above for further information. Waldorf Q User’s Manual...
- Page 145 Off / Volume / Control W...Z / F1 Cutoff / F2 Cutof Pedal/CV2 Ctrl. Pedal/CV2 Ctrl. Volume. Sets the controller that is used for Control Pedal/CV 2. Please read “Pedal/CV1 Ctrl.” above for further information. Waldorf Q User’s Manual...
-
Page 146: Utility Menu
Press Shift+Utility again to activate the function. The selected Multi program is now initialized. When you initialize a Multi program, all action takes place inside an edit buffer. Therefore no data will be lost until you store the program. Waldorf Q User’s Manual... - Page 147 First select the character to be modified via the first value dial. Then change its setting via the second value dial. The card name can use up to 16 characters. To confirm your changes press Shift+Utility. Waldorf Q User’s Manual...
-
Page 148: Midi Control
MIDI Control – Channel Based MIDI Messages MIDI Control This chapter describes the MIDI functions of the Waldorf Q. Channel Based MIDI Messages In Single Mode, the Q sends and receives channel based MIDI messages like Notes, Aftertouch, Pitchbend and Controllers on the selected Global MIDI Channel. If it is set to omni, the Q sends channel based MIDI messages on channel 1 but receives them on any channel. -
Page 149: Pitchbend Messages
The Footswitches send value 0 (off) and 127 (on) on the controller numbers they are set to in the Global menu. There is no dedicated “MIDI Footswitch Message” so the reception of the MIDI Messages they originally generated depends on the settings of the parameters of the current Sound. Waldorf Q User’s Manual... -
Page 150: Pedals
Changing Sound Parameters with System Exclusive Data All Sound parameters of the Q can be controlled by system exclusive data. Please read the sections “Controller Send” and “Controller Recv” on page 137 for further information. Waldorf Q User’s Manual... -
Page 151: System Exclusive Data Transmission
If *All* is selected, all Sounds, Multis, Drum Maps, Patterns and the Global parameters are sent. Press Shift+Utility again to activate the dump. Depending on the selected type, the dump may take some time. The Q cannot be played during this time. Waldorf Q User’s Manual... -
Page 152: Receiving System Exclusive Data
If you want to keep these edits, you have to store them. Otherwise they are lost when you switch the Q off. Receiving sound dumps from the Waldorf microQ The Q is able to receive a sound dump from the microQ via MIDI. According to that please refer to the chapter „System Exclusive Data Transmission“... -
Page 153: Other Functions
Updating System Do not under any circumstances turn off the Q when this step is in progress. A total loss of data may occur and there is no way to make it work again! Waldorf Q User´s Manual... - Page 154 We recommended to use this function before dumping a complete new sound set into your Q. Attention – By using this function you will lose all your stored programs. Please be sure backup your programs before. Waldorf Q User’s Manual...
-
Page 155: The Hmt Function
The Q offers a global HMT function in its Global Menu (on page 138) The HMT Function can be activated or deactivated for each sound in the corresponding Oscillator Edit menu (on page 78). Waldorf Q User’s Manual... -
Page 156: Tips & Tricks
You can create further movement by applying an LFO to the comb filter cutoff. • The perfect place to read this user manual is your favourite bathroom. We recommend 5 pages per session! Waldorf Q User’s Manual... -
Page 157: Appendix
Dimensions and Weight Q / Q Rack Audio Inputs Width: 987mm / 483mm (1 x stereo) Height (incl. control rotaries): 120mm / 92mm Maximum level: +0dBm Depth: 350mm / 220mm Dynamic range: 86dB Total weight: 8kg / 3,1kg Frequency range: 5Hz-24kHz Waldorf Q User’s Manual... -
Page 158: Index
Diffusion (Reverb FX) OS (Global Menu) Osc 1/2/3 (Mixer) Sustain (Multi) Direction (Arpgeggiator) Output (Multi) Swing Factor (Tap Dly FX) Disp. Time (Global Menu) Overdrive (5FX) Sync (LFO) Drive (Filter) SysEx ID (Global) Drive (Overdrive FX) Waldorf Q User´s Manual... -
Page 159: Midi Signalflow Diagram
Off, Local, Off, Midi, Loc.+Midi Loc.+Midi Rx Status Key/Vel. Filter MIDI Message Filter Direct MIDI Out Tx Status Step Sequencer Seq. Note only Arpeggiator Arp. Note only Local Mute Mute Engine Play, Solo Engine MIDI signalflow diagram Waldorf Q User’s Manual... -
Page 160: Glossary
A low pass filter dampens all frequencies above the cutoff frequency. A high pass filter in turn Waldorf Q User’s Manual... -
Page 161: Low Pass Filter
An envelope generator can use this signal for its trigger purposes, and as a result a VCA unit can be controlled. Waldorf Q User’s Manual... -
Page 162: Midi Channel
A VCA is a component that influences the volume programs. Program numbers 1 through 128 can be level of a sound via a control voltage. This is often changed via program change messages. generated by an envelope or an LFO. Waldorf Q User’s Manual... - Page 163 Appendix – Glossary Volume VCF is the acronym for voltage-controlled filter. It is a The term describes a sound's output level. filter component that allows you to manipulate the filter parameters via control voltages. Waldorf Q User’s Manual...
-
Page 164: Controller Numbers
LFO 3 Delay 0…127 16, 28, 40…112 Osc 1 Octave 128’…1/2’ 52…76 Osc 1 Semitone -12…+12 0…127 Osc 1 Detune -64…+63 0…127 Osc 1 FM 0…127 0…5 Osc 1 Shape pulse, saw, triangle, sine, alt 1, alt 2 Waldorf Q User’s Manual... - Page 165 0…127 0…127 Osc 3 Balance F1 64…mid…F2 63 0…127 N/E Level 0…127 0…127 N/E Balance F1 64…mid…F2 63 - not used - undefined - not used - - not used - undefined - not used - Waldorf Q User’s Manual...
- Page 166 0…127 Filter 2 Pan L64…center…R63 0…127 Filter 2 Panmod -64…+63 0…127 Amp Volume 0…127 0…127 Amp Velocity -64…+63 0…127 Amp Mod -64…+63 0…127 FX 1 Mix 0…127 0…127 FX 2 Mix 0…127 0…127 FE Attack 0…127 Waldorf Q User’s Manual...
- Page 167 - not used - - not used - Omni Mode On - not used - - not used - Poly Mode On/Off - not used - - not used - Poly Mode On - not used - Waldorf Q User’s Manual...
-
Page 168: Midi Implementation Chart
Appendix – MIDI Implementation Chart MIDI Implementation Chart Date: June/02/2001 Model: Waldorf Q Keyboard / Q Rack Version: 3.0 Function Transmitted Recognized Remarks Basic Default Memorized Channel Changed 1 – 16 1 – 16 Default Memorized Mode Messages ✽1 3, 3b... -
Page 169: Ce Declaration
Appendix – Declaration of Conformity Waldorf Q User’s Manual... - Page 170 1. IMPORTANT NOTICE: DO NOT MODIFY THIS UNIT! This product, when installed as indicated in the instructions contained in this Manual, meets FCC requirements. Modifications not expressly approved by Waldorf may void your authority, granted by the FCC, to use this product.
- Page 171 ©Waldorf-Music AG 2003• All rights reserved •Printed in Germany Waldorf-Music AG • Schloß Ahrenthal • D-53489 Sinzig • Germany Phone: +49-(0) 26 42 - 90 20 8-0 • Fax +49-(0) 26 42 - 90 20 8-77 http://www.waldorf-music.com • info@waldorf-music.com...
Need help?
Do you have a question about the Q Synthesizer and is the answer not in the manual?
Questions and answers