
Related Manuals for Concept Pro AHD Series


Summary of Contents for Concept Pro AHD Series
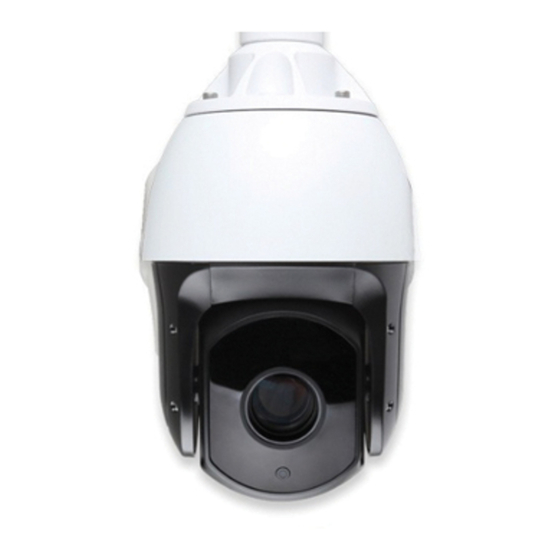
- Page 1 CP-HSD20-AHD CP-HSD30-AHD AHD HIGH SPEED DOME SERIES USER MANUAL AHD HIGH SPEED DOME SERIES USER MANUAL...
-
Page 2: Table Of Contents
Contents SECTION PAGE NO. 1. Precaution 2. Product Features 3. Introduction: Components 3. Introduction: Product Accessories 4. Keyboard Shortcuts of Speed Dome Operation 5. Menu Operation 6. Wiring Schematic 7. Optional Brackets 8. Dimensions 9. Specifications AHD HIGH SPEED DOME SERIES USER MANUAL... -
Page 3: Precaution
1. Precaution This manual is to instruct on the basic operation, installation and use of the CP-HSD20-AHD and CP-HSD30-AHD. It is recommended that even those experienced in analogue camera installation read this document, this will ensure any warnings or precautions relevant to the product are met. This will result in the safe and consistent performance of the camera. These safety and warning instructions contained with this document are intended to promote proper use of the CP-HSD20-AHD and CP-HSD30-AHD to reduce the possibility of accidents and damage, therefore these instructions must be adhered to. - Page 4 1. Precaution SAFETY PRECAUTIONS WARNING RISK OF ELECTRIC SHOCK. DO NOT OPEN. WARNING: TO REDUCE THE RISK OF ELECTRIC SHOCK, DO NOT REMOVE COVER (OR BACK). THERE ARE NO USER SERVICEABLE PARTS WITHIN THIS CAMERA. REFER REPAIRS TO THE SUPPLIER. Important Safeguards Lightning Read Instructions...
- Page 5 1. Precaution FCC COMPLIANCE STATEMENT SAFETY SYMBOLS THIS EQUIPMENT HAS BEEN TESTED AND FOUNDED TO COMPLY WITH THE LIMITS FOR A CLASS OF A DIGITAL DEVICE, PURSUANT TO PART 15 OF THE FCC RULES. THESE LIMITS ARE DESIGNED TO PROVIDE REASONABLE PROTECTION AGAINST HARMFUL INTERFERENCE WHEN THE EQUIPMENT IS OPERATED IN A COMMERCIAL ENVIRONMENT. CAN GENERATE,USE AND RADIATE RADIO FREQUENCY ENERGY AND IF NOT INSTALLED AND USED IN ACCORDANCE WITH THE INSTRUCTION MANUAL, IT MAY CAUSE HARMFUL INTERFERENCE TO RADIO COMMUNICATIONS.
-
Page 6: Product Features
Easily control the speed dome and configure the OSD patterns, and groups. Up to 4 alarm outputs can be chosen menu from a Concept Pro DVR with Up-the-Coax (UTC) for 1 schedule and can be triggered when the schedule is control via the Coaxitron protocol. -
Page 7: Introduction: Components
3. Introduction: Components Wall Bracket Inner Box (PCB) Mounting Plate Camera Head Camera Module Bracket Cover IR LEDs IR Filter AHD HIGH SPEED DOME SERIES USER MANUAL... -
Page 8: Introduction: Product Accessories
3. Introduction: Product Accessories W all Mount Type Hex Key Anchor Bolt (4EA) W all Mount Type W all Mount Type W all Mount Type W all Mount Type W all Mount Type Mount Template Product Files USB Pendant Mount Type W all Mount Type Screwdriver User Manual (On USB) - Page 9 3. Installation: Wall Mount & Pendant Mount Installation Using Wall/Pendant Mount Bracket 1. Using the mount template, mark the holes on the wall/ceiling. 2. After drilling the holes, fix the four anchor bolts into the holes. 3. After locating the wall/ceiling mount bracket on the anchor bolts properly, tighten the nuts on anchor bolts. Wall Mount Bracket Pendant Mount Bracket Installation Installation...
- Page 10 3. Installation: Assemble Camera Inner Box and Wall Mount Bracket Cover Installation 1. Place the Inner Box into the Junction Box; the 1. Connect the securing lanyard onto the dome. positioning columns will automatically lock the 2. Connect the cables between the dome and Inner Box in place.
- Page 11 3. Installation: Product & Accessories Cabling Cabling BNC1 BNC2 Speaker In 1 DC 12V/ AC 24V Power Input In 8 Address ID Set Switch Alarm Input Terminal Block Mic. Camera Setting Set Switch Alarm Output Terminal Block RS-485 Connector DC12V Output AHD HIGH SPEED DOME SERIES USER MANUAL...
- Page 12 3. Installation: Product & Accessories NOTE: VIDEO OUTPUT D I P N O . 3 N O . 4 O u t p u t BNC1: Analogue HD connector, AHD/TVI/CVI/CVBS video output. Switch No. 3 and 4 are configured 1 6 3 2 6 4 1 2 8 Va l OF F OF F CVBS...
-
Page 13: Keyboard Shortcuts Of Speed Dome Operation
4. Keyboard Shortcuts of Speed Dome Operation Once the pattern, scan functions, and groups have been programmed in the speed dome setup menu, they can all be accessed directly from PTZ control equipment by using 07/01/2017 17: 25: 55 CAM 1 07/01/2017 17: 25: 55 CAM 1 the following sequences. -
Page 14: Menu Operation
5. Menu Operation FOCUS MODE (AUTO/MANUAL/SEMIAUTO/ONE PUSH) _IRIS LEVEL (F2x/F28-F1.6) When AUTO is selected, the image will automatically focus. IRIS LEVEL RANGE can be set from (F28-F1.6), F2x Iris level can only be When MANUAL is selected, the image will not focus adjusted when AE MODE is set to IRIS PRIOR. - Page 15 5. Menu Operation _FILTER (LOW/MIDDLE/HIGH) VIDE O SETU P POWER UP ACTIO N LAST ACT Selected patterns: LOW/MIDDLE/HIGH. PT Z SETU P _ACTIO N NO . ACTION SETUP AU TO FLI PO << VIDEO SETUP IMAG E FLIP OF F _AUTO C (HALF/FULL/OFF) 16 0 JO G SPEE D...
- Page 16 5. Menu Operation ZOOM PROPORTION (ON/OFF) VIDE O SETU P PRESE T SETU P >> PRESET SETUP >> ON: Movements are proportional to zoom. PTZ SETU P SCAN SETUP PATTER N SETUP ACTION SETUP >> OFF: Movements are not proportional to zoom. PRESET NO.
- Page 17 5. Menu Operation EDIT SCENE PRESET 1 SCA N SETUP PRESET LABEL EDI T SCAN NO. UNDEFINED ---------- CLEA R SCAN >> EDIT SCA N 1234567890 CLEA R LABE L AB CD EFGH IJ JO G SPEED KLMN OP QR ST JO G DIRECTIO N NORMAL UV WX YZabcd...
- Page 18 5. Menu Operation PATTER N SETU P EDIT SCEN E SCAN 1 SCAN LABEL EDI T PATTERN NO. UNDEFINE D ---------- CLEA R PATTER N EDIT PATTERN >> 123456789 0 CLEA R RU N PATTERN <> AB CD EFGH IJ KLMN OP QR ST UV WX YZabcd BACK...
- Page 19 5. Menu Operation EDIT SCENE PATTER N 1 GROU P SETU P EDI T GROU P GROU P NO. NO . ACTION NO . DWELL OP T UNDEFINED CLEA R GROU P NONE >> EDIT GROUP NONE <> RUN GROUP NONE NONE BACK...
- Page 20 5. Menu Operation IR SETUP SCHEDULE SET ALAR M SETU P IR MOD E AUT O ALARM NO. SCHEDULE NO. INPU T ENABL E OF F SENSITIVITY ENABLE ACTION NONE INPU T TYPE N. O IR NEAR ACTIO N NONE ACTION NO.
- Page 21 5. Menu Operation REBOOT SYSTEM (NO/YES/DAY) YES: Reboot the camera. PASSWORD EDI T ALL/SUN/MON/TUE/WED/THU/FRI/SAT/NO: Schedule time for reboot ---------- _REBOOT TIME 123456789 0 CL AR Set the time of day for the system reboot (00:00~23:59) AB CD EFGH IJ KLMN OP QR ST START TEMP (0-10) UV WX YZabcd Set a start-up temperature for the system.
- Page 22 5. Menu Operation VIDE O SETU P FIRMW AR E VE R STA001TR3 0 COLO R SYSTEM PTZ SETUP ACTION SETUP HDTV OUT HD-SDI AU TO OSD SETU P PROT OCOL BAUD RATE 2400 SYSTEM SETUP ADDRES S INFORMA TION EXIT 2016-09-28 ZOOM FW VER...
-
Page 23: Wiring Schematic
6. Wiring Schematic CVBS HD AHD Out Cable AHD/TVI/CV I DVR Monito r HD SDI Out Cable SDI/EX-SD I DVR Monitor Powe r Cable 12V/ RS - Cable Ke y boar d Alarm Input Cable Alar m Senso r Alarm Output Cable Siren / Ligh t etc . -
Page 24: Optional Brackets
7. Optional Brackets Wall Bracket Pendant Bracket Pole Bracket Corner Bracket AHD HIGH SPEED DOME SERIES USER MANUAL... -
Page 25: Dimensions
8. Dimensions 28 6 Unit: mm AHD HIGH SPEED DOME SERIES USER MANUAL... - Page 26 8. Dimensions of optional brackets φ 12 9 28 6 38 4 33 6 10 2 13 4 Unit: mm AHD HIGH SPEED DOME SERIES USER MANUAL...
Need help?
Do you have a question about the AHD Series and is the answer not in the manual?
Questions and answers