
Related Manuals for Childcare 089420


Summary of Contents for Childcare 089420
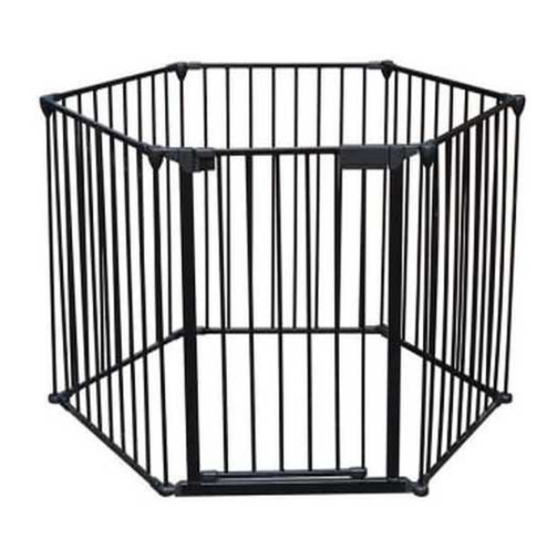
- Page 1 DELUXE UNIVERSAL HEARTH GATE Model # 089420 IMPORTANT: RETAIN FOR FUTURE REFERENCE, READ CAREFULLY...
-
Page 2: Safety Precautions
Safety Precautions Read all instructions before assembly and use of the gate. Keep instructions for future use. WARNING TO PREVENT SERIOUS INJURY OR DEATH, SECURELY INSTALL GATE OR ENCLOSURE AND USE ACCORDING TO MANUFACTURER’S INSTRUCTIONS. NEVER LEAVE CHILD UNATTENDED. NEVER USE WITH A CHILD ABLE TO CLIMB OVER OR DISLODGE/ OPEN THE GATE OR ENCLOSURE. - Page 3 Assembly contents list Assembly / Operating instructions How to care for your Childcare Gate Due to variations in the style and design of our products, the photographs and illustrations shown in this instruction manual are generic, therefore product fabrics, colour and design may vary from images shown.
-
Page 4: Assembly Contents
Assembly Contents Check what you have received... You have received 1 box. Please check the contents of the box against the list below. If anything is missing, please contact Customer Service. In Australia, contact CNP Brands on 1300 667 137, in New Zealand contact Wainhouse Distribution on 0800 567 5000. - Page 5 Assembly / Operating Instructions Setting up as Play Den Unpack the hearth gate on a stable surface making sure the handle is on the top. Unfold the sections by pushing in the button on the join and turning the sections. If required, lift the top section slightly while pushing the button.
- Page 6 Assembly / Operating Instructions Setting up as Play Den (cont) Remove the pre-assembled hinge cone and top and bottom hinge caps from the ends of the den which are to be joined together. Connect the two sections by aligning the ends of the sections and ensuring that the hinges drop together on both the top and the bottom.
- Page 7 Assembly / Operating Instructions Positioning as Hearth Gate around a fireplace When used as a hearth barrier around a fireplace, the distance between the fireplace / hearth and gate sections must be a minimum of 75cm. The gate must never be setup in a straight line.
- Page 8 Assembly / Operating Instructions Positioning the Hearth Gate at the top of stairs If the gate is to be positioned at the top of stairs. please note the following: • The gate must be setup in a curve away from the stairs. •...
- Page 9 Assembly / Operating Instructions Setting up as Hearth Gate and Configure Gate Unpack the hearth gate on a stable surface making sure the handle is on the top. Unfold the sections by pushing in the button on the join and turning the sections.
- Page 10 Assembly / Operating Instructions Setting up as Hearth Gate and Configure Gate Connect the two sections by aligning the ends of the sections and ensuring that the hinges drop together on both the top and the bottom. Push the vertical bar up into the top hinge and then slide into the groove in the bottom hinge.
- Page 11 Assembly / Operating Instructions Installing wall fittings Attach the upper wall bracket to the cone hinge. Push the vertical bar up into the top hinge. Ensure the vertical bar is inserted with the narrow section at the top. Slide the lower bracket onto the removable bar and slide into the lower bracket.
- Page 12 Assembly / Operating Instructions Installing wall fittings (cont.) Remove wall plates from brackets by pressing locking tabs on the wall plates and lifting off. Hold one wall plate inside outline on wall and attach using two wood screws. Repeat for other wall plates. PLEASE NOTE: Screws provided are for mounting directly into wood.
- Page 13 Assembly / Operating Instructions Adding optional sections An extension has a top hinge on one side and a cone hinge on the other side. This makes it possible to fit the extension in a range of configurations. The removable vertical bar has been fitted by the manufacturer. Remove the bar by lifting it up and sliding it out of the lower hinge.
- Page 14 Assembly / Operating Instructions Removing sections To remove a section, always remove the end sections. Remove the removable vertical bar by lifting it up and sliding it out of the lower hinge. Lift the section off the hearth gate. Fitting hinge caps / covers Depending on the number of sections removed or added, you will need to fit the appropriate caps and covers to the...
-
Page 15: Maintenance
How to care for your Hearth Gate Cleaning To ensure the long-lasting use of your gate, wipe down with a damp cloth and use a mild soap solution if necessary. Do not use abrasive cleaners. Always store product in a clean dry place. Maintenance Always check parts regularly for tightness of screws, nuts and other fasteners –... - Page 16 Distributed in Australia by CNP Brands, 20 Calarco Drive, VIC, 3030 Customer Service 1300 667 137 www.cnpbrands.com.au Distributed in New Zealand by Wainhouse Distribution, 2-6 Argyle St, Morningside, PO Box 41-014, St Lukes, Auckland, New Zealand Customer Service: 0800 567 5000 helpline@wainhousedist.co.nz...
Need help?
Do you have a question about the 089420 and is the answer not in the manual?
Questions and answers