Table of Contents
Advertisement
Quick Links
Advertisement
Table of Contents

Subscribe to Our Youtube Channel
Related Manuals for Invacare Cetus


Summary of Contents for Invacare Cetus
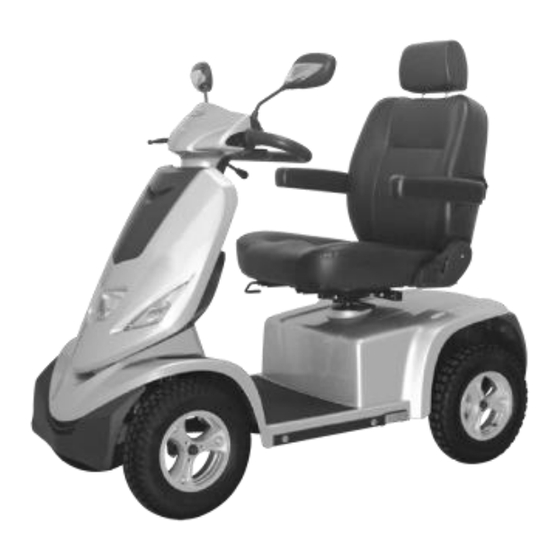
- Page 1 Invacare® Cetus® Scooter Service Manual...
- Page 2 Cetus Service Manual Cetus This product has passed certifications of CE, GMP Taiwan. ISO9001and ISO13485. In case of any discrepancy between the illustrations and accessories in this manual and the actual vehicle, the actual vehicle shall prevail. CTM reserves the right to design and modify this scooter.
-
Page 3: Table Of Contents
Cetus Service Manual Table of Contents General information ............................. 5 Repair instruction ..........................5 Batteries/Charger ............................7 Battery power-off: ..........................7 Battery removal: ........................... 7 Battery connection cable set maintenance: ..................8 Battery connection cable set disassembly: ..................9 Charging operation instruction: ......................9 Control Panel ............................. - Page 4 Cetus Service Manual Seat support maintenance: ........................ 27 Main controller maintenance: ......................27 Wheels and rear section of electronics/Lights ................... 28 Front wheel maintenance: ......................... 28 Speedometer drive maintenance (right front wheel): ................ 28 Rear wheel maintenance: ........................29 Left/right brake adjustment: ....................... 30 Left/right brake plate maintenance: ....................
-
Page 5: General Information
The service manual is the technical data for damage to the scooter. maintenance and inspection of all parts of the Cetus. In case of any discrepancy between the illustration in Its contents are arranged in parallel with pictures and the service manual and the actual vehicle, the actual texts, with the key items of "work order", “work... - Page 6 Cetus Service Manual • It is strictly forbidden to clean with corrosive Personal safety equipment preparation: solvents or detergents to avoid discoloration • Safety goggles and deformation of plastic parts and painted In case of leakage of lead-acid battery fluid surfaces.
-
Page 7: Batteries/Charger
Cetus Service Manual Caution: BATTERIES/CHARGER Before the maintenance of the scooter, please Battery power-off: cut off power first. If the power is not cut off first, it may cause the risk of electric shock. No tools Before the maintenance of the scooter, please The scooter power is off. -
Page 8: Battery Connection Cable Set Maintenance
Cetus Service Manual Battery connection cable set Remove the positive and negative terminals maintenance: on the battery power cable and the battery. Cross screwdriver x 1pcs • Refer to 2-1 Battery power-off: The scooter power–off treatment. • The battery is connected to the cable set and the circuit breaker is pushed up. -
Page 9: Battery Connection Cable Set Disassembly
Cetus Service Manual Caution: Caution: In order to avoid the overvoltage of battery, the During the running of the scooter, in case of battery connection cable set has a high voltage voltage overload, the battery connection cable protection function. If the battery connection... - Page 10 Cetus Service Manual • Charger failure and troubleshooting The display panel automatically switches to the The power charging indicator light (red light) is not SPD speedometer mode while in the charging state. Troubleshooting → Confirm whether the socket has normal voltage. If the socket voltage is normal,...
- Page 11 Cetus Service Manual 70 % 4 cells Loop display 80 % 5 cells Loop Charging display 90 % indication 6 cells Loop display 100 % 6 cells Constantly Incremental 0.5 seconds frequency 1. The state of the cell number only increases upwards and does not decrease.
-
Page 12: Control Panel
Cetus Service Manual F. Headlights: Lighting function during running G. Right direction light: Right direction light CONTROL PANEL reminder H. Acceleration: Press to accelerate for 1 level, Main switch and upper control speed fine adjustment from level 1 to level 5. -
Page 13: Control Panel Maintenance
Cetus Service Manual 5. Trip accumulation mode The digital display range is from 0.0 to 999.9. When the mileage reaches 999.9, it will stop accumulating (no recalculation). Press K for 3 seconds to return to zero. * Setting mode can be closed and the latest setting 1. -
Page 14: Panel Wiring Instruction
Cetus Service Manual Caution: Caution: If there is a problem with the control panel, The shape and color of different panel please reconnect the main cable connector first. connectors are different, which avoids the If there is no effect, please replace with a new wrong connection of the connector, but please one directly. -
Page 15: Steering Lever Shroud Maintenance
Cetus Service Manual Remove the head steering lever back shroud. Please refer backward for reassembly and replacement. Caution: Please refer to the previous page for upper control wiring maintenance, re-connect the connector B of the VR initiator controller. If it is of no effect, please replace with a new controller. -
Page 16: Front Section Of Electronics/Lights
Cetus Service Manual FRONT SECTION OF Caution: ELECTRONICS/LIGHTS The front slanting is combined with the front light and has three connectors. Please refer to the Front slanting maintenance: figure below. Cross screwdriver x 1pcs Refer to 2-1 Battery power-off: The scooter is powered off. -
Page 17: Turning Deceleration Set Maintenance
Cetus Service Manual The rear compartment can be separated. Remove the locking screw (M5 x 13L x 2pcs). The turning deceleration set can be removed. Please refer backward for reassembly and replacement. Please refer backward for reassembly and replacement. Caution:... -
Page 18: Temperature Sensor Maintenance
Cetus Service Manual Temperature sensor 1. Refer to 2-1 Battery power-off: The scooter is maintenance: powered off. 2. Please refer to 4-1 Front slanting maintenance: Cross screwdriver x 1pcs open the front slanting. 3. Remove the gyroscope connector. Refer to 2-1 Battery power-off: The scooter is powered off. -
Page 19: Headlight Maintenance
Cetus Service Manual 6. Remove the locking screw (M3 x 6L x 2pcs) Remove the front slanting screws (M4 x 12L x from the holder. 1pcs). Remove the headlights from the slot. 7. The gyroscope can be removed. Please refer backward for reassembly and Please refer backward for reassembly and replacement. -
Page 20: Main Power Switch Set Maintenance
Cetus Service Manual Remove the main power switch set from the Remove the front (left) turn light screws (M4 slot. x12Lx3pcs). The entire set of main power switches can be pulled out. Please refer back in reverse for reassembly and Take out the front (left) turn light from the slot. - Page 21 Cetus Service Manual The entire set of charging block can be removed. Please refer back in reverse for reassembly and replacement. Caution: If the charging cover is damaged, it is recommended to replace with a new one to avoid the lack of protection of the charging...
-
Page 22: Steering Column
Cetus Service Manual STEERING COLUMN Caution: Steering lever frame Before removing the steering lever, the maintenance: scooter's upper control wiring can be taken out after cutting off of the strap (x 1pcs). Hex wrench 8 x 2pcs Allen wrench 4 x 1pcs... -
Page 23: Front Shroud Upper Cover Maintenance
Cetus Service Manual Remove the above items. Remove the fixing screws of the front shroud Remove the front shroud upper cover screws and the frame (M4 x 12L x 3pcs). (M4 x 12L x 2 pcs). Remove the protective shroud. -
Page 24: Front Fender Maintenance
Cetus Service Manual Center bar maintenance: The entire front shroud upper cover can be removed. Hex wrench 10 x 1pcs Hex wrench 8 x 2pcs Hex wrench 13 x 1pcs Refer to 2-1 Battery power-off: The scooter is powered off. - Page 25 Cetus Service Manual Remove the entire set of bead-bowls. Caution: Step 3. The front wheel connecting lever is connected to the bottom of the center bar, which must be removed. If it is not disassembled, the center bar will not be able to be removed due to the front wheel suspension.
-
Page 26: Seating
Cetus Service Manual Seat rotating disk adjustment: SEATING Hex wrench 17 x 2pcs Seat board maintenance: Refer to 2-1 Battery power-off: The scooter is powered off. Hex wrench 13 x 2pcs Remove the seat and rear shroud lower cover. Refer to 2-1 Battery power-off: The scooter is Remove the fixing screw set of the seat powered off. -
Page 27: Seat Support Maintenance
Cetus Service Manual Seat support maintenance: Remove the main controller fixing screws (ø4 x 25L x 2pcs). Hex wrench 17 x 2pcs The entire set of controllers can be removed. Cross screwdriver x 1pcs Refer to 2-1 Battery power-off: The scooter is powered off. -
Page 28: Wheels And Rear Section Of Electronics/Lights
Cetus Service Manual WHEELS AND REAR Caution: SECTION OF Standard front tire specifications: • Tire pressure: 35-40 psi ELECTRONICS/LIGHTS • Tread pattern standard: more than 0.5 mm Front wheel maintenance: The front wheel left/right disassembly method is the same. Socket wrench 17 x 1pcs... -
Page 29: Rear Wheel Maintenance
Cetus Service Manual By this step the tire can be replaced. Please refer back in reverse for reassembly and replacement. Caution: When reassembling the speedometer drive, please note the direction of the slot before fixing. Loosen the rim lock screws (M10 x 35L x 3pcs). -
Page 30: Left/Right Brake Adjustment
Cetus Service Manual Loosen the right brake plate adjustment The rear wheel left/right disassembly method is screw. the same. If the tire has abnormalities such as yellowing/deformation/damage/air leakage /shallow tread depth, please replace with a new one. Scooter tires are consumables. It is recommended to check daily before running to ensure safety. -
Page 31: Left/Right Brake Plate Maintenance
Cetus Service Manual Pull out the right brake cable and the spring. Caution: Please insert the brake cable through the locking screw of the brake plate and lock the brake cable. If it is not tightly locked, it may cause a brake system failure or the scooter to behave abnormal. -
Page 32: Rear Shrouds Group Maintenance
Cetus Service Manual Rear shrouds group Tail light maintenance: maintenance: Cross screwdriver x 1pcs Cross screwdriver x 1pcs Refer to 2-1 Battery power-off: The scooter is Refer to 2-1 Battery power-off: The scooter is powered off. powered off. Please refer to 7-7 Rear shrouds group Remove the scooter seat and the rear shroud maintenance: remove the rear shrouds group. - Page 33 Cetus Service Manual Please refer back in reverse for reassembly and replacement. Caution: When repairing the rear mudguard of the scooter, it is not necessary to disassemble any parts. It can be removed and replaced directly from the outside. S81201-92800~A...
-
Page 34: Propulsion Unit
Cetus Service Manual PROPULSION UNIT Caution: Motor maintenance: When disassembling the motor, the motor and the differential mechanism can be taken out Allen wrench 5 x 1pcs without removing the rear wheel/rear frame. When disassembling the motor, it is Refer to 2-1 Battery power-off: The scooter is recommended to be handled by two people. -
Page 35: Differential Mechanism Maintenance
Cetus Service Manual Remove the electromagnetic brake protection Differential mechanism shroud. maintenance: Remove the electromagnetic brake screws (ø3 x 15L x 3pcs). Hex wrench 13 x 2pcs Take out the electromagnetic brake. Refer to 2-1 Battery power-off: The scooter is powered off. -
Page 36: Rear Shock Absorber Maintenance
Cetus Service Manual The entire rear shock absorber set can be Caution: taken out. The differential mechanism has a certain weight, so it is recommended to operate it by two or more people during maintenance. The left/right rear shock absorber can be disassembled in the same way. -
Page 37: Front Shock Absorber Maintenance
Cetus Service Manual Front shock absorber maintenance: Caution: The vibration of the vehicle is mainly absorbed Hex wrench 17 x 2pcs by the shock absorber. If the vibration is too Refer to 2-1 Battery power-off: The scooter is large, it may be related to the shock absorber. - Page 38 Cetus Service Manual The main line goes to the front of the steering Cut the main trace strap on the left side of the lever. Cut the upper strap (x 1pcs). front frame (x 2pcs). The main line passes through the groove at The trace extends to the lower center bar the bottom of the frame.
-
Page 39: Brake Cable Maintenance
Cetus Service Manual When the main line is reassembled or replaced, be sure to retie the cut-open fixing straps as Caution: described above. Fix it without tightening too The cable tie must be neither too loose nor too tightly. tight. - Page 40 Cetus Service Manual 4. The trace extends to the right side of the lower 8. Pull out the left/right brake cable and the spring. center bar bead-bowl nut. Cut the upper fixed strap (x 1pcs). The entire brake cable can be taken out.
-
Page 41: Check For Troubleshooting
Cetus Service Manual CHECK FOR TROUBLESHOOTING Checking point Check content Processing method Gear lever Is the gear adjustment abnormal? 8-2 Electromagnetic brake maintenance Does it set off a sound when Buzzer 3-3 Control panel maintenance working? Will the battery indicator light be on? -
Page 42: Indicator Light Troubleshooting
Cetus Service Manual INDICATOR LIGHT TROUBLESHOOTING Number Possible reasons Processing method of flashes The battery needs to be charged Please charge or check the battery as soon as possible. urgently Insufficient battery electric Please charge as soon as possible or check if the battery quantity related wiring is normal. - Page 44 España: France: Ireland: Italia: Invacare SA Invacare Poirier SAS Invacare Ireland Ltd, Invacare Mecc San s.r.l., Avda. Del Oeste n.50, 1 Route de St Roch Unit 5 Seatown Business Via dei Pini 62, Valencia-46001 F-37230 Fondettes Campus I-36016 Thiene (VI)
Need help?
Do you have a question about the Cetus and is the answer not in the manual?
Questions and answers