Invacare Colibri User Manual
Invacare colibri
Hide thumbs
Also See for Colibri:
- Service manual (42 pages) ,
- User manual (56 pages) ,
- Service manual (24 pages)

Related Manuals for Invacare Colibri


Summary of Contents for Invacare Colibri
- Page 1 Invacare® Colibri™ EN Scooter User Manual This manual MUST be given to the user of the product. BEFORE using this product, read this manual and save for future reference.
- Page 2 All rights reserved. Republication, duplication or modification in whole or in part is prohibited without prior written permission from Invacare. Trademarks are identified by ™ and ®. All trademarks are owned by or licensed to Invacare Corporation or its subsidiaries unless otherwise noted.
-
Page 3: Table Of Contents
Usage ........19 Contents Getting in and out . - Page 4 6.3.7 Technical specifications ..... . 29 Transport ........31 Transport - General information .
-
Page 5: General
If you find that the font size in the print version of the user manual Indicates a hazardous situation that could result in is difficult to read, you can download it as a pdf from the Invacare minor or slight injury if it is not avoided. -
Page 6: Type Classification And Intended Use
Invacare® Colibri™ 1.4 Warranty This product complies with Directive 93/42/EEC concerning medical devices. The launch date of this The terms and conditions of the warranty are part of the general product is stated in the CE declaration of conformity. terms and conditions particular to the individual countries in which this product is sold. -
Page 7: Safety
– Do not connect any electric devices to your vehicle vehicle on a gradient with its motors disengaged. that are not expressly certified by Invacare for this Always re-engage the motors immediately after purpose. Have all electrical installations done by your pushing the vehicle. -
Page 8: Safety Information With Regard To Care And Maintenance
Also, – Only use original Invacare spare parts, which have the electronics used in our vehicles can generate a low level of been approved for use with this vehicle. -
Page 9: Safety Information On Driving And Freewheel
Safety 2.4 Safety information on driving and freewheel WARNING! mode Risk of malfunction due to electromagnetic interference WARNING! – Do not switch on or operate portable transceivers or Risk of injury if the vehicle tips over communication devices (such as radio transceivers or –... -
Page 10: Labels On The Product
Invacare® Colibri™ WARNING! WARNING! Risk of injury if the vehicle tips over (continued) Risk of tipping – Never use the vehicle to transport more than one Antitippers (stabilizers) are only effective on firm ground. person. They sink in on soft ground such as grass, snow or mud if –... - Page 11 Safety Pull the battery box latch to the front to release the battery box for removing European representative label on the seat post This product has been supplied from an environmentally Quick info how to disassemble the scooter. Read the user aware manufacturer.
- Page 12 Invacare® Colibri™ The product needs to be tied down at indicated anchor points with a lashing system during transport. This product may not be used as a vehicle seat. Disengaging lever label indicating the “Push” and “Drive” position of the lever...
-
Page 13: Components
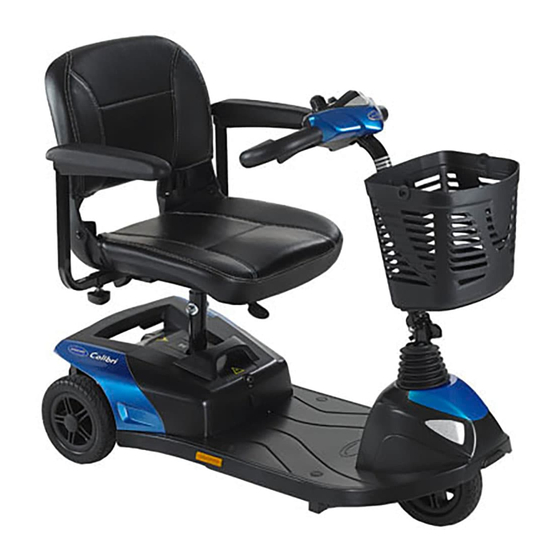
Components 3.2 Operating console arrangement 3 Components 3.1 Key features Battery charge display (1) Speed controller (5) Drive lever (6) Operating console (3) Keyswitch (ON/OFF) (4) Lever for adjusting tiller inclination (4) Horn (2) Unlocking lever for swivelling and removing seat (front Status display / ON/OFF diode(3) below seat) (2) Disengaging lever (1) -
Page 14: Battery Charge Display
Invacare® Colibri™ 3.2.2 Battery charge display • All diodes illuminate: maximum driving range • Only red and yellow diodes illuminate: reduced driving range. Recharge the batteries at the end of your journey. • Only red LEDs illuminate/blink, electronic beeps 3x: battery reserve = severely restricted driving range. -
Page 15: Setup
Setup Turn the knobs to loosen the fixing for the armrest. 4 Setup Adjust the armrests to the required width. Retighten the knobs. 4.1 Adjusting the armrest width 4.2 Adjusting the armrest angle WARNING! Serious injury hazard if one of the armrests CAUTION! falls out of its bracket because they have been Pinch point may occur when adjusting the arm... -
Page 16: Replacing Armrest Pads
Invacare® Colibri™ 4.3 Replacing armrest pads Remove the two mounting screws A that secure the armrest pad B to the arm C. Remove the old armrest pad. Install the new armrest pad and securely tighten with the existing mounting screws. -
Page 17: Adjusting The Tiller Angle
Setup 4.6 Adjusting the tiller angle Requirements: • 2 x open-ended spanners 17 mm WARNING! Risk of injury if tiller is not locked into position Remove the seat. – Ensure that the tiller is properly adjusted before driving the scooter. –... - Page 18 Invacare® Colibri™ Rotate or pull out the tiller adjustment lever A until the pin disengages from the mounting hole. Fold down the tiller. Release or rotate the tiller adjustment lever to lock the pin above the tiller base B. Gently push/pull against tiller to ensure that the tiller is securely locked.
-
Page 19: Usage
Usage 5 Usage 5.1 Getting in and out Lift the detent lever A up. The armrests can be swivelled upwards to assist getting in and out. The seat can also be rotated to assist getting in and out. Turn the seat to the side. Information on turning the seat –... -
Page 20: Taking Obstacles
Invacare® Colibri™ 5.3.3 The correct way to overcome obstacles NOTE – If installed, make sure to properly adjust and use the postural belt each time you use the wheelchair. Sitting comfortably = Driving safely Before each trip, make sure that: Right •... -
Page 21: Parking And Stationary
Usage 5.6.1 Disengaging Motors WARNING! Risk of tipping over CAUTION! – Only ever drive downhill at a maximum of 2/3 of the Risk of the vehicle running away top speed. – When the motors are disengaged (for push operation – If your scooter is fitted with an adjustable backrest, whilst freewheeling), the electromagnetic motor always return the backrest of your seat to an upright brakes are deactivated. -
Page 22: Driving The Scooter
When stopping the vehicle, the drive lever needs to by trained Invacare specialist dealers. return entirely to the middle position to activate the – Invacare supplies all mobility products with a standard electromagnetic brakes. If there is any obstruction drive program ex-works. Invacare can only give a... -
Page 23: Electrical System
6 Electrical system NOTE – A defective main fuse may be replaced only after checking the entire electric system. An Invacare 6.1 Electronics protection system specialised dealer must perform the replacement. You The vehicle's electronics are fitted with an overload-protection can find information on the fuse type in chapter 11 system. -
Page 24: How To Charge The Batteries
• Use only charging devices in Class 2. This class of chargers may be left unattended during charging. All charging devices which are supplied by Invacare comply with these requirements. • You cannot overcharge the batteries when using the charger supplied with your vehicle, or a charger that has been approved by Invacare. -
Page 25: Charging
– Only ever use the battery charger supplied with your vehicle, or a charger that has been approved by Invacare. – Never charge 12 Ah batteries with a 5 A battery charger. Always use a 2 Ah battery charger. -
Page 26: Storage And Maintenance
Invacare® Colibri™ 6.2.6 Instructions on using the batteries The charging socket is located under the seat Switch off the scooter. CAUTION! Fold up the charging socket protective cap. Risk of damaging the batteries. Connect the battery charger to the scooter. -
Page 27: Transporting Batteries
Disposing of dead or damaged batteries correctly technologies, or use batteries that do not have similar date Dead or damaged batteries can be given back to your dealer or codes. directly to Invacare. • Never mix gel with AGM batteries. •... -
Page 28: Battery Charger
Invacare® Colibri™ 6.3 5 A battery charger 6.3.3 LED display 6.3.1 Symbols found on the product Green flashes Waiting for connection to battery Orange flashes Pre-charge This product complies with Directive 93/42/EEC concerning medical devices. The Orange Charging launch date of this product is stated in the CE... -
Page 29: Operating Instructions
Electrical system • • Power Supply Cord: Use UL Listed detachable power supply If the green CHARGING LED keeps flashing, it cannot turn to cord-No. 18 AWG, 2 conductors, flexible cord, rated 10 A, indicate charging: VW - 1, 105 C, minimum 1.8 m , maximum 3 m long. Provided –... - Page 30 Invacare® Colibri™ Input current 2.5 A max. (AC) Input voltage 100 - 240 V, 50/60 Hz (AC) Degree of AC-DC 80% efficiency Operating 0 °C – 40 °C temperature Switching Switch mode method Charging Constant current, two levels of constant voltage...
-
Page 31: Transport
Transport 7 Transport CAUTION! Risk of injury from unsecured scooter parts Removing the battery box will release the LITE-LOCK™ 7.1 Transport - General information mechanism allowing the front frame assembly to separate from the rear frame assembly. WARNING! – Do not lift or move the scooter without the battery Risk of severe or fatal injuries in the event of a box unless you want to disassemble it. -
Page 32: Removing The Drive Unit
Invacare® Colibri™ Ensure the battery box latch A engages the mounting hole in the seat post. Reinstall the seat. Refer to 4.4 Disengaging the seat to rotate it or remove it, page 16. The drive unit separates from the chassis. - Page 33 Transport Make sure the latch A of the battery box is locked. Refit the seat. Refer to 4.4 Disengaging the seat to rotate it or remove it, page 16. 1576371-B...
-
Page 34: Maintenance
Invacare dealer. A more comprehensive list of inspection checks and instructions for maintenance work can be found in the service manual for this device, which can be obtained from Invacare. That manual, however, is intended to be used by trained and authorised service technicians, and describes tasks which are not intended to be performed by the user. - Page 35 Maintenance Weekly Monthly Inspection work (to be carried out by user) Before each journey Check battery charging status. Charge batteries if necessary (refer to6.2.3 How to charge the batteries, page 24). Checked all connecting plugs for condition and stable connections. Press connecting plugs firmly together if necessary.
-
Page 36: After Use
Electric components and printed circuit boards are disposed of as electronic scrap. • Exhausted or damaged batteries can be returned to your medical equipment supplier or Invacare. • Disposal must be carried out in accordance with the respective national legal provisions. -
Page 37: Troubleshooting
Troubleshooting You can find detailed descriptions of individual flash codes, including 10 Troubleshooting possible causes and fault repair, in the section entitled 10.1.2 Error codes and diagnostic codes, page 37. 10.1 Diagnosis and fault repair 10.1.1 Error diagnosis The electronic system offers diagnostic information to support the If the scooter shows a failure, please use the following guide to locate technician during the recognition and rectification of faults on the the fault. - Page 38 Stops driving • There is a defect in the braking coil or in the cabling. Check the magnetic brake and cabling for open or short-circuited circuitry. Contact your Invacare dealer. • No neutral position when Stops driving Drive lever is not in neutral when the keyswitch was turned.
-
Page 39: Resetting The Circuit Breaker
The motor or its cabling is defective Check the cabling for open or short-circuited circuitry. • Miscellaneous internal fault Stops driving Contact your Invacare dealer. • Push/freewheel mode error Stops moving The scooter has exceeded the permissible maximum speed during pushing or freewheeling. Switch the electronics system off and on again. -
Page 40: Technical Data
Invacare® Colibri™ 11 Technical data 11.1 Technical specifications The technical information provided hereafter applies to a standard configuration or represents maximum achievable values. These can change if accessories are added. The precise changes to these values are detailed in the sections for the respective accessories. - Page 41 Technical data Driving characteristics • Speed (dependent on country - please ask your 6 km/h • dealer which speed is available in your country.) 8 km/h • Min. braking distance 1000 mm (6 km/h) • 1500 mm (8 km/h) • Max.
- Page 42 Invacare® Colibri™ Components weight • Front section 13.1 kg (3–wheel) • 15.6 kg (4–wheel) • Drive unit 9.6 kg • Seat 9.6 kg • Battery box 12 Ah 9.4 kg • Battery box 18 Ah 14.1 kg Loading • Max. load...
- Page 43 Notes...
- Page 44 Australia: Canada: Ireland: New Zealand: Invacare Australia PTY. Ltd. Invacare Corporation Invacare Ireland Ltd, Invacare New Zealand Ltd 1 Lenton Place, North Rocks N.S.W. 570 Matheson Blvd E Unit 8 Unit 5 Seatown Business Campus 4 Westfield Place, Mt Wellington,...
Need help?
Do you have a question about the Colibri and is the answer not in the manual?
Questions and answers
where is the serial number on my scooter
what size are the batteries