Dometic Saneo B Installation Instructions Manual
Cassette toilet for recreational vehicles
Hide thumbs
Also See for Saneo B:
- Operating manual (348 pages) ,
- Installation manual (248 pages) ,
- Operating instructions manual (22 pages)
Table of Contents
Advertisement
Quick Links
Installation Instructions
Cassette toilet for recreational vehicles
Saneo B
Dometic
Saneo C
Dometic
Saneo BLP
Dometic
Saneo CLP
Dometic
10 R - 047317
N 1
MBA 03/2015
Dometic
®
Dometic
®
Dometic
®
Dometic
®
More information https://www.caravansplus.com.au
Saneo BS
®
Saneo CS
®
Saneo BW
®
Saneo CW
®
EN
English
Advertisement
Table of Contents

Subscribe to Our Youtube Channel
Related Manuals for Dometic Saneo B


Summary of Contents for Dometic Saneo B
- Page 1 Installation Instructions Cassette toilet for recreational vehicles Saneo B Saneo BS Dometic Dometic ® ® Saneo C Saneo CS Dometic Dometic ® ® Saneo BLP Saneo BW Dometic Dometic ® ® Saneo CLP Saneo CW Dometic Dometic ® ® 10 R - 047317...
- Page 2 6 bar. The magnet valve will be damaged by excessive pressure. Saneo BW Saneo CW Dometic GmbH In der Steinwiese 16 D-57074 Siegen www.dometic.com © Dometic GmbH - 2015 - Subject to change without prior notice More information https://www.caravansplus.com.au...
-
Page 3: Table Of Contents
4.3.1.2 Installing the control and operator panel of the Saneo B, Saneo C toilet ......4.3.2 Placing the Saneo BW, Saneo CW, Saneo BS, Saneo CS, Saneo BLP, Saneo CLP toilet models . -
Page 4: General
No part of useful guidance. these instructions may be reproduced, copied or utilised in any other way without written aut- horisation by Dometic GmbH, Siegen. Environmental tip Explanation of symbols used in this manual Environmental tip gives you useful guidance for saving energy and disposal of the appliance. -
Page 5: Limitation Of Liability
In order to ensure that the recyclable packa- the art. Dometic reserves the right to make ging materials are re-used, they should be changes at any time which are deemed to be... -
Page 6: Safety Instructions
The following models are available: European standards EN 1645-1, EN 1646-1,EN 1648-1 , Saneo B, Saneo C : free-standing, without EN 1648-2 water tank, without console Saneo BS, Saneo CS : free-standing, without water tank, with console... -
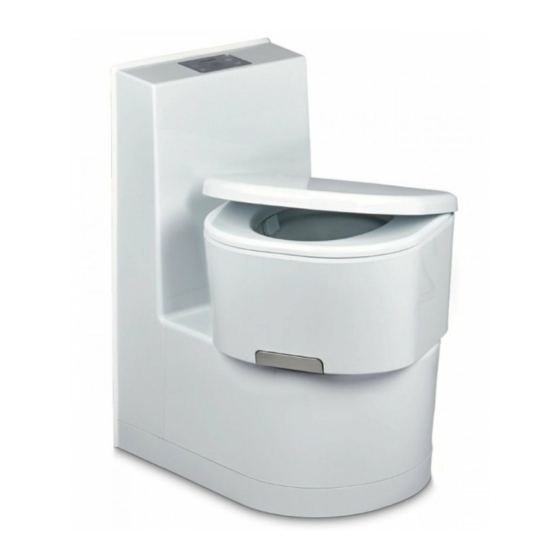
Page 7: Toilet Identification Label
Description of model Explanation of components Toilet identification label The identification label contains all important details. You can read off from this the model identification, the product number and the serial number. You will need these details whe- never you contact the customer services cen- tre or when ordering spare parts. -
Page 8: Installation Of Toilet
Saneo CW models with an integrated water vice door can be found in the document sup- tank. Use the template (1) , Item 5.3.1., to plied Dometic Seitz SK 5 ) (optional/depen- make the aperture for the flap. You can find the ding on model). -
Page 9: Placing The Saneo B, Saneo C Toilet Models
Fig.9 the toilet (see Section 4.3.1.2). 4.3.1.1 Fitting the Saneo B, Saneo C toilet Once the toilet is installed in the desired posi- tion, bolt down the floor plate with the four screws (enclosed) (Fig. 10) . -
Page 10: Installing The Control And Operator Panel Of The Saneo B, Saneo C Toilet
Saneo B, Saneo C toilet Saneo BLP , Saneo CLP toilets Install the control and operator panel for the Saneo B, Saneo C toilet in an easily accessi- These models have a wall connection bracket. ble position on the wall. First cut the aperture The control and operating panel is integrated in the wall (Fig.12). -
Page 11: Fitting The Saneo Bw, Saneo Cw, Saneo Bs, Saneo Cs, Saneo Blp, Saneo Clp Toilet
Installation of toilet Fitting height of the wall holder : Detail wall holder Fig. 18 1 = Wall holder 2 = Wall connection console If the toilet is installed in the desired position, bolt down the floor plate with the four screws enclosed and insert the mobile tank cassette. -
Page 12: Water Connection
Installation of toilet Water connection Flap installation The water supply is connected using a smooth Apply the flap when using Saneo BW and tube connection (1). Saneo CW models with an integrated water tank. To install the flap, use the template (1) , The connection sleeve is not included in the Item 5.3.1, in order to make the aperture in the scope of delivery. -
Page 13: Electric Connection
Installation of toilet Electric connection Note the following instructions before installa- tion of the cassette toilet: 4.6.1 System diagrams Connect the toilet to a suitable power supply via the main connection block of 4.6.1.1 General system diagram the vehicle (Fig. 23). The toilet must not be directly connected in parallel to other consumers, otherwise CAUTION! -
Page 14: System Diagram (Saneo Xw Model With Integrated Water Pump)
Control and operator panel Connection 12V- supply Connection magnetic valve Fig. 25 4.6.1.3 System diagram (Saneo B, C/ Saneo xS/ Saneo xLP models with external water pump) Supply voltage : 12 V DC 12V connection cable profile : min. 1.5 mm²...
Need help?
Do you have a question about the Saneo B and is the answer not in the manual?
Questions and answers