
Related Manuals for Mimosa CAIRO


Summary of Contents for Mimosa CAIRO
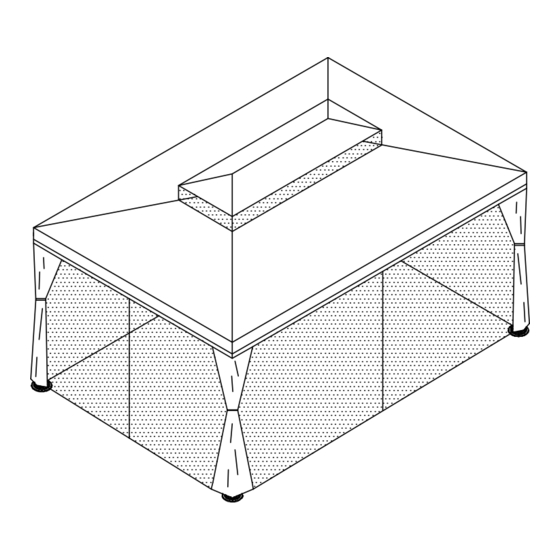
- Page 1 CAIRO ALUMINIUM & STEEL FRAME GAZEBO 3 X 4M Product Assembly Caution: this gazebo is a non-permanent structure and it is recommended the canopy be removed under extreme wind conditions to prevent damage.
- Page 2 short, left short, right Upright pole Side pole Side pole 4 PCS 2 PCS 2 PCS STEP 8: long, left long, right Side pole Side pole Central rib Upper top rib 2 PCS 2 PCS 6 PCS 4 PCS Corner rib Horizontal rib M6x12 bolt 4 PCS...
- Page 3 STEP 6: Note: The canopy is not waterproof and it is recommended to remove the canopy under extreme wind conditions. BBQ use is not recommended under the Gazebo. Follow each step of the line drawings and parts list to assemble your Gazebo. STEP 7:...
- Page 4 STEP 5: 1:Reinforce ANGLE E with A, then insert the Corner rib 8 into it. 2:Fix the Central rib 6 with A.
- Page 5 STEP 4: STEP 1: Put the Upright poles 1 on the Pole feet D, then use screw A to fix it. 1, Insert the Corner rib 8/ Central Rib 6/ Horizontal into the Top joint plate F in sequence. 2, Put the Cover M onto the frame top.
- Page 6 STEP 3: STEP 2: 1: Connect the Upright pole 1 and the Side pole 2/3/4/5 by using B. Connect the long Side poles 2&3 and short Side poles 4&5 with Linked parts H ,then fix with A. 2: Joint the Side poles 2&3, 4&5 by using A. 3: Fix the Crossing rib K on the Upright pole 1 with screw A.
Need help?
Do you have a question about the CAIRO and is the answer not in the manual?
Questions and answers