Table of Contents
Advertisement
Quick Links
Advertisement
Table of Contents

Related Manuals for Datavideo DVK-400


Summary of Contents for Datavideo DVK-400
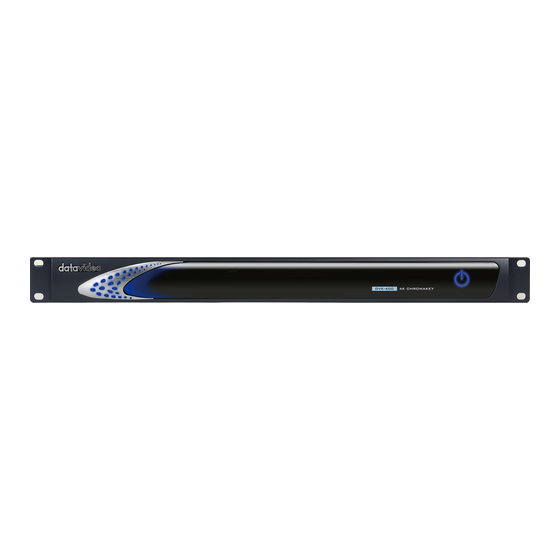
- Page 1 4K CHROMAKEY DVK-400 Instruction Manual...
-
Page 2: Table Of Contents
Datavideo Technologies will try to give correct, complete and suitable information. However, Datavideo Technologies cannot exclude that some information in this manual, from time to time, may not be correct or may be incomplete. This manual may contain typing errors, omissions or incorrect information. -
Page 3: Fcc Compliance Statement
AC adapter. If you are not sure of the type of power available, consult your Datavideo dealer or your local power company. 8. Do not allow anything to rest on the power cord. Do not locate this unit where the power cord will be walked on, rolled over, or otherwise stressed. -
Page 4: Warranty
The product warranty period beings on the purchase date. If the purchase date is unknown, the product warranty period begins on the thirtieth day after shipment from a Datavideo office. All non-Datavideo manufactured products (product without Datavideo logo) have only one year warranty from the date of purchase. -
Page 5: Disposal
Disposal For EU Customers only - WEEE Marking This symbol on the product or on its packaging indicates that this product must not be disposed of with your other household waste. Instead, it is your responsibility to dispose of your waste equipment by handing it over to a designated collection point for the recycling of waste electrical and electronic equipment. -
Page 6: Chapter 1 Product Overview
IP network remotely. The Datavideo DVK-400 can be used in the live events applications which are based on HDMI and SDI videos. Moreover, the DVK-400 supports the video chromakey for up to 4K resolution and it also provides easy-to-use Spill Suppression and Color Enhancement features for users. - Page 7 Chapter 2 System Diagram...
-
Page 8: Chapter 3 Connection
This is the power button which is located at the front panel. Please turn on the power switch which is located at the rear panel of the DVK-400 and then please press this button to turn on the power of the DVK-400. -
Page 9: Rear View
PC for the Logo icon input. B.B EXT. SYNC When there is a B.B or a tri-level sync signal which is connected to be the input signal for the DVK-400 4K Chromakey, it can be a reference source of the video output synchronization. SDI IN/OUT... - Page 10 DVIP Please connect an RJ-45 Ethernet cable from this interface to the RJ- 45 interface of your laptop for controlling the DVK-400 4K Chromakey by the DVIP protocol. F/W UPGRADE This interface is used for updating the firmware by connecting a USB thumb drive only.
- Page 11 1.0mm IP Address Reset Hole When the DVK-400 is connected to a PC by the static IP address, if the IP address of the DVK-400 can not be scanned by users, it is possible that this DVK-400 was set in DHCP mode.
-
Page 12: Chapter 4 Basic Setup
45 Ethernet interface on the rear panel of the DVK-400. If it is needed to use the RS-232 interface to control the DVK-400, please use a D-sub 9 pin to USB adapter cable to connect from the RS-232 REMOTE CONTROL interface on the rear panel of the DVK-400 to the USB interface of your laptop. -
Page 13: Chapter 5 Dvk-400 4K Chromakey Control Software
5.1 How to Launch the DVK-400 4K Chromakey Control Software Please follow following steps for launching the DVK-400 4K Chromakey control software. 1. Please download the DVK-400 4K Chromakey control software from Datavideo official website www.datavideo.com 2. Please unzip the DVK-400 4K Chromakey control software. -
Page 14: Hromakey
Before the operation of the DVK-400 4K Chromakey control software, it is necessary for users to set the way for controlling the DVK-400 and to connect the DVK-400 to the notebook for operating the DVK-400 4K Chromakey control software. Please follow following steps for setting the network related settings of the DVK-400. - Page 15 3. Please click the “Globe” icon which is located on the top-right side of the interface. 4. The CONNECT control interface will be shown.
- Page 16 “Scanning” will be shown on the bottom-left side of the CONNECT dialogue box. 8. Please select the IP address of the DVK-400 that you want to connect from the IP Select option. After that, the messages including the Host Name=DVK-400, Mac Address, Address Mode, IP...
- Page 17 “DVK-400 is configured. Please scan to refresh” will be shown. Users need to turn off and then turn on the power of the DVK-400. After the DVK-400 control software interface is shown, please press the Scan button again to select the right IP address from...
- Page 18 Please follow following steps for connecting the DVK-400 to the notebook PC by the RS-232 interface. 1. Please connect the RS-232 cable between the PC and the DVK-400. After that, please launch the latest version of the DVK-400 control App.
- Page 19 1. If the RS-232 to USB adapter cable is used by users, please make sure that this cable is connected properly before opening the DVK-400 control App for seeing the COM port in the Comport list. Please select the right COM port and then press the “Connect” button. If the connection is failed, the CONNECT dialogue box will not be closed and there is an error message that will be shown on the bottom-right corner of the App.
-
Page 20: Introduction Of The Dvk-400 4K Chromakey Control Software Interface
5.3 Introduction of the DVK-400 4K Chromakey Control Software Interface Please see following paragraphs for the introduction of the DVK-400 4K Chromakey Control Software interface. Output Source: The main interface of the Output Source option is shown as following diagram. - Page 21 PGM(HDMI) The PGM(HDMI) drop-down menu allows users to select what kind of output source must be used for the PGM HDMI interface if the PGM HDMI interface is connected. Those output sources can be divided into following categories. FG:This option allows users to output the FOREGROUND CAMERA video source.
- Page 22 PVW(SDI/HDMI) The PVW(SDI/HDMI) drop-down menu allows users to select what kind of output source must be used for the PVW SDI or PVW HDMI interface. Those output sources can be divided into following categories. FG:This option allows users to output the FOREGROUND CAMERA video source.
- Page 23 User Memory This User Memory function allows users to store current settings and then users can recall those settings in the future. There are 8 settings including User 1 to User 8 for users to store their desired settings. If users want to store current settings ...
- Page 24 1. Type: This option lists DVK-400’s input interfaces including FG/BG/AUX interface and EXT.SYNC interface. 2. Source: After the DVK-400 is connected successfully by the DVIP or RS-232 protocol, this option will show the type of the connected Foreground interface such as SDI or HDMI.
- Page 25 Chromakey Option: The main interface of Chromakey is shown as following diagram.
- Page 26 1. Backing Color: This option provides Auto color sampling (dropper) and manual color sampling for users. Generally speaking, the Auto color sampling is sufficient for users. Auto: Please press the “Auto” button and then users will see that the FG is shown on the PVW OUT for about 2 seconds.
- Page 27 3. Black Level: Please slide the Black Level slider to the right side or press the right-arrow button to increase the black level for eliminating the uneven situation in the composite screen. If the PVW OUT is switched to Matte output, users can see that there are more areas which are eliminated and become black.
- Page 28 Shadow Level. 11. Spill Suppression: Default: The Spill Suppression option of the DVK-400 provides users three default Spill Suppression level including “Spill Low”, “Spill Mid” and “Spill High”. Users can push one button for applying their desired Spill Suppression setting.
- Page 29 12. Spill Suppression: The Spill Suppression option is used to restore the reflective green or blue. If the Spill Suppression is increased, it can restore the reflective green or blue for the subject. Generally speaking, the suitable Spill Suppression range is from 400 to 700. (The default value is 500). Users can use the slider, the left-arrow or the right arrow button to adjust the value of the Spill Suppression option.
- Page 30 Post Processor:The main interface of the Post Processor is shown as following diagram. 1. FG PostAmp: FG PostAmp: Please press the to launch the FG PostAmp function. 2. Hue: This option is used for the adjustment of the Hue for the foreground screen. Users can use the slider, the left-arrow button or the right-arrow button to adjust the value of the Hue option.
- Page 31 6. FG Corrector: This option is used for RGB color calibration. Please click the to launch the FG Corrector function. 7. R White Level: This option is used for Red White Level calibration. Users can use the slider, the left-arrow button and the right-arrow button to adjust the value of the R White Level option.
- Page 32 Garbage Mask Option: The main interface of the Garbage Mask is shown as following diagram. 1. Windows:Please press the button to turn on/turn off the foreground matte display range. 2. Left: This option allows users to adjust the left-side matte, the higher the value is, the more the left-side edge of the foreground screen will be cropped.
- Page 33 7. Invert: Please press the button to turn on/turn off the invert function. If the Invert button is set to open and then the related cropping of the Garbage Mask will be done in reversal direction. Setup: The main interface of the Setup option is shown as following diagram. Please open the main interface of the Setup option from following diagram.
- Page 34 1. Output Resolution: After the DVK-400 is connected, please set the output resolution to be as the same as the resolution of the foreground camera from this Output Resolution drop-down menu. Note:After the “Output Resolution” in the SETUP option is set, please press the “Save” button for SETUP option and then those formats will become effective.
-
Page 35: How To Reset The Dvk-400 To Factory Default Settings
Please follow following steps for reset the DVK-400 to Factory Default Settings. 1. Please press the “Setting” icon after the DVK-400 software is launched. 2. Please press the “Factory Default” button. 3. Please press the “Reset” button and then the DVK-400 will be reset to Factory Default Settings. -
Page 36: Chapter 6 How To Use The Chromakey Function For Video Chromakeying
Please follow following steps for Video Chromakeying by using the DVK-400 4K Chromakey. 1. Please make sure that the DVK-400 is connected successfully according to instructions in previous chapter. Moreover, please make sure that all network related settings are set successfully. - Page 37 4. Please press the “Auto” icon in the “Backing Color” option for Auto Chromakeying. The PWM OUT screen will be switched to the Foreground screen temporarily and there is a “+” icon that will be shown and moved for 2 seconds for auto color sampling. After the screen color is calculated automatically, all parameters in the Chromakey page will be reset to factory default values and the video chromakeying will be done automatically.
-
Page 38: Example For Video Chromakeying By The Dvk-400
6.1 Example for Video Chromakeying by the DVK-400 At first, when the video is not chromakeyed, the background green mat is shown in green which is shown as following diagram. After the Auto Chromakey is done according to previous procedures, the screen will be shown as following diagram. - Page 39 After that, please set your Monitor 1 as “Extend these displays” Please press the button within the DVK-400 software to set the resolution of your monitor 2 to be the same as the resolution of the foreground camera. After that, please press the “Save” button.
- Page 40 Please prepare the background video material in advance. Please play the prepared background video and then please drag this video to the external connected extended monitor. After that, the final chromakey outcome will be shown as following diagram.
-
Page 41: Chapter 7. Firmware Update
5. Please connect any SDI OUT or HDMI OUT to an external connected monitor and then please turn on the power of the DVK-400. After that, the firmware upgrading of the DVK-400 will be started automatically. It will cost for about 1 minutes and there is no picture that will be shown on the screen. -
Page 42: Chapter 8. Dimensions
Chapter 8. Dimensions Unit:mm... -
Page 43: Chapter 9 Frequently-Asked Questions
RESET hole which is located on the rear panel of the DVK-400 and then please turn off and turn on the power of the DVK-400. After the IP RESET hole is pressed for about 5 seconds, please release it. And then the... -
Page 44: Chapter 10. Specifications
Chapter 10. Specifications Model Name DVK-400 Product Name 4K Chromakey Interface 1 x 12G/3G-SDI Foreground Camera 1 x HDMI 2.0 Background Inputs 1 x HDMI 2.0 Camera 1 x HDMI 1.4 AUX Input (Used to input the Lumakey overlay or the external matte) - Page 45 Note...
- Page 46 Note...
- Page 47 Note...
-
Page 48: Service And Support
Mar.-31.2020 Version E1 Datavideo Technologies Co., Ltd. All rights reserved 2020...
Need help?
Do you have a question about the DVK-400 and is the answer not in the manual?
Questions and answers