Table of Contents
Advertisement
Quick Links
CALIBRATION PROCEDURE
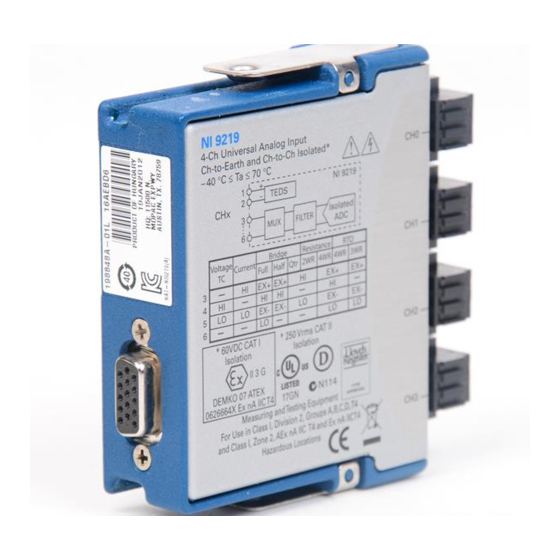
NI 9219
This document contains information for calibrating the National Instruments 9219. For more
information on calibration, visit
Contents
Software Requirements........................................................................................................................ 1
Documentation Requirements.............................................................................................................. 2
Calibration Interval .............................................................................................................................. 2
Test Equipment .................................................................................................................................... 2
Test Conditions .................................................................................................................................... 4
Calibration Procedures......................................................................................................................... 4
Initial Setup.................................................................................................................................. 4
Verification .................................................................................................................................. 5
Voltage Accuracy Verification ............................................................................................ 6
Thermocouple Accuracy Verification ................................................................................. 8
Current Accuracy Verification............................................................................................. 10
2-Wire Resistance Accuracy Verification ........................................................................... 11
Quarter-Bridge Accuracy Verification ................................................................................ 12
4-Wire Resistance Accuracy Verification ........................................................................... 14
4-Wire RTD Accuracy Verification .................................................................................... 15
3-Wire RTD Accuracy Verification .................................................................................... 17
Half-Bridge Accuracy Verification ..................................................................................... 19
Full-Bridge Accuracy Verification ...................................................................................... 23
Adjustment................................................................................................................................... 25
Voltage and Thermocouple Accuracy Adjustment.............................................................. 26
Current Accuracy Adjustment ............................................................................................. 29
4-Wire and 2-Wire Resistance Accuracy Adjustment......................................................... 32
4-Wire RTD, 3-Wire RTD, and Quarter-Bridge Accuracy Adjustment.............................. 37
Half-Bridge Accuracy Adjustment ...................................................................................... 42
Full-Bridge Accuracy Adjustment....................................................................................... 45
Accuracy Under Calibration Conditions.............................................................................................. 48
Where to Go for Support ..................................................................................................................... 49
Software Requirements
Calibrating the NI 9219 requires installing NI-DAQmx 9.3 or later on the calibration system. You can
download NI-DAQmx from
languages, including LabVIEW, LabWindows/CVI, C/C++, C#, and Visual Basic .NET. When you
install NI-DAQmx you only need to install support for the ADE that you intend to use.
Français
Deutsch
ni.com/manuals
ni.com/calibration
ni.com/downloads
.
. NI-DAQmx supports a number of programming
Advertisement
Table of Contents

Related Manuals for National Instruments 9219


Summary of Contents for National Instruments 9219
-
Page 1: Table Of Contents
Accuracy Under Calibration Conditions....................48 Where to Go for Support ........................49 Software Requirements Calibrating the NI 9219 requires installing NI-DAQmx 9.3 or later on the calibration system. You can download NI-DAQmx from . NI-DAQmx supports a number of programming ni.com/downloads... -
Page 2: Documentation Requirements
NI-DAQmx C Reference Help—This help file contains C reference and general information about measurement concepts. Calibration Interval National Instruments recommends a calibration interval of one year for the NI 9219. You should adjust the recommended calibration interval based on the measurement accuracy demands of your application. Test Equipment National Instruments recommends that you use the equipment in Table 1 for calibrating the NI 9219. - Page 3 TCR: 10 ppm/°C Half-Bridge Accuracy Resistor values: 1 k ± 1% (x2) TCR: 10 ppm/°C Full-Bridge Accuracy Resistor values: 10 k ± 1% (x2) cDAQ NI cDAQ-9178 — Chassis Connection NI 9972 — Accessory © National Instruments Corporation NI 9219 Calibration Procedure...
-
Page 4: Test Conditions
Complete the following steps to set up the NI 9219. Install the NI-DAQmx driver software. Install the NI 9219 in slot 8 of the NI cDAQ-9178 chassis. Leave slots 1 through 7 of the NI cDAQ-9178 chassis empty. Launch Measurement & Automation Explorer (MAX). -
Page 5: Verification
Table 3 for the channel assignments, signal names, and terminal assignments of the NI 9219. Caution The analog inputs on the NI 9219 are not grounded (floating). Ensure that a single point in the test system is connected to ground to prevent the entire system from floating. -
Page 6: Voltage Accuracy Verification
T– — — Voltage Accuracy Verification Complete the following steps to verify the voltage accuracy of an NI 9219. Connect the NI 9219 to the DMM and source as shown in Figure 2. V– Source HI (4) Ch 0 LO (5) - Page 7 Enable Auto Zero on the DMM. Acquire a voltage reading with the DMM. Record this measurement as V Create an AI voltage channel on the NI 9219. Configure the channel according to Table 4. Table 4. NI 9219 Configuration for Voltage Accuracy Verification...
-
Page 8: Thermocouple Accuracy Verification
10. Set the source output to zero and clear the acquisition. 11. Repeat steps 2 through 10 for all test points and all channels on the NI 9219. NI recommends that you verify the values for all the iterations listed in Table 5 for each channel, but you can save time by verifying only the ranges, values, and channels used in your application. - Page 9 11. Set the source output to zero and clear the acquisition. 12. Repeat steps 2 through 11 for all test points and all channels on the NI 9219. NI recommends that you verify the values for all the iterations listed in Table 7 for each channel, but you can save time by verifying only the values and channels used in your application.
-
Page 10: Current Accuracy Verification
Configure the DMM for a current measurement in the lowest appropriate range according to the test point from Table 9. Enable Auto Zero on the DMM. Create an AI current channel on the NI 9219. Configure the channel according to Table 8. Table 8. NI 9219 Configuration for Current Accuracy Verification Measurement... -
Page 11: 2-Wire Resistance Accuracy Verification
Complete the following steps to verify the 2-wire resistance accuracy of an NI 9219. Connect the NI 9219 to the resistor and the DMM as shown in Figure 5. Connect the leads of the DMM as close as possible to the terminals on the NI 9219 to ensure that the DMM reference measurements include the same lead wire resistance as the NI 9219 2-wire measurement. -
Page 12: Quarter-Bridge Accuracy Verification
14. Disconnect the resistor from the device. 15. Repeat steps 1 through 14 for all test points and channels on the NI 9219. NI recommends that you verify the values for all the iterations listed in Table 11 for each channel, but you can save time by verifying only the values and channels used in your application. - Page 13 Figure 6. Quarter-Bridge Accuracy Verification Connections to the NI 9219 Create an AI voltage channel in the 1 V range on the NI 9219. Commit the task to place the NI 9219 in voltage mode. This prevents the module from interfering with the resistance measurements of the DMM.
-
Page 14: 4-Wire Resistance Accuracy Verification
Connect the NI 9219 to the resistor and the DMM as shown in Figure 7. Connect the sense leads of the DMM as close as possible to the same point that the sense leads of the NI 9219 (HI and LO) connect to the resistor to ensure that the DMM reference measurements include the same lead wire resistance as the NI 9219 4-wire measurements. -
Page 15: 4-Wire Rtd Accuracy Verification
Connect the NI 9219 to the resistor and the DMM as shown in Figure 8. Connect the sense leads of the DMM as close as possible to the same point that the sense leads of the NI 9219 (HI and LO) connect to the resistor to ensure that the DMM reference measurements include the same lead wire resistance as the NI 9219 4-wire measurements. - Page 16 4-Wire RTD Pt100 RTD nominal resistance at 0 °C. 10. Acquire 20 unscaled I32 4-wire readings with the NI 9219. Record the average of the readings as data unscaled 11. Scale the data by using the formula below to change the unscaled data into .
-
Page 17: 3-Wire Rtd Accuracy Verification
15. Disconnect the resistor from the device. 16. Repeat steps 1 through 15 for all test points and channels on the NI 9219. NI recommends that you verify the values for all the iterations listed in Table 17 for each channel, but you can save time by verifying only the values and channels used in your application. - Page 18 3-Wire 1000 High Pt1000 Resolution Demand 3-Wire RTD Pt100 RTD nominal resistance at 0 °C. 15. Acquire 20 unscaled I32 3-wire readings with the NI 9219. Record the average of the readings as data unscaled NI 9219 Calibration Procedure ni.com...
-
Page 19: Half-Bridge Accuracy Verification
20. Disconnect the resistor from the device. 21. Repeat steps 1 through 20 for all test points and channels on the NI 9219. NI recommends that you verify the values for all the iterations listed in Table 19 for each channel, but you can save time by verifying only the values and channels used in your application. - Page 20 . Using a range larger than necessary creates unwanted additional noise. ExcitationModule Connect the NI 9219 to DMM1, DMM2, and the voltage source as shown in Figures 12, 13, or 14 for the appropriate test point value indicated in Table 21. Observe the following conditions when connecting the equipment to the NI 9219.
- Page 21 EX+ (3) 1 kΩ ± 1% HI (4) Ch x EX– (5) NI 9219 Figure 13. Half-Bridge Accuracy Verification Connections to the NI 9219 (Configuration 3) V– Source 1 kΩ ± 1% 5 kΩ ± 1% DMM1 5 kΩ ± 1%...
- Page 22 18. Repeat steps 8 through 17 for all test points. 19. Repeat steps 1 through 18 for all channels on the NI 9219. NI recommends that you verify each channel, but you can save time by verifying only the channels used in your application.
-
Page 23: Full-Bridge Accuracy Verification
. Using a range larger than necessary creates unwanted additional noise. ExcitationModule Connect the NI 9219 to DMM1, DMM2, and the source as shown in Figures 16 or 17 for the appropriate test point value indicated in Table . Observe the following conditions when connecting the equipment to the NI 9219. - Page 24 10 kΩ ± 1% EX+ (3) HI (4) Ch x EX– (5) LO (6) NI 9219 Figure 16. Full-Bridge Accuracy Verification Connections to the NI 9219 (Configuration 2) V– Source 10 kΩ ± 1% DMM1 TestPoint DMM2 10 kΩ ± 1%...
-
Page 25: Adjustment
18. Repeat steps 8 through 17 for all test points. 19. Repeat steps 1 through 18 for all channels on the NI 9219. NI recommends that you verify each channel, but you can save time by verifying only the channels used in your application. -
Page 26: Voltage And Thermocouple Accuracy Adjustment
Voltage and Thermocouple Accuracy Adjustment Complete the following steps to adjust the voltage accuracy and thermocouple accuracy of the NI 9219. Connect the NI 9219 to the DMM and source as shown in Figure 2. Open a calibration session to your device using the DAQmx Initialize External Calibration VI. The... - Page 27 The external temperature value in degrees Celsius. Obtain an array of the recommended calibration voltages for your device using the NI 9219 instance of the DAQmx Get C Series Calibration Adjustment Points VI. LabVIEW Block Diagram NI-DAQmx Function Call...
- Page 28 10. Acquire a voltage reading with the NI 9219 using the NI 9219 instance of the DAQmx Adjust C Series Calibration VI. LabVIEW Block Diagram NI-DAQmx Function Call Call with the following DAQmxAdjust9219Cal parameters: calHandle: calHandle channelName: cDAQ1Mod8/aix value: The DMM reading.
-
Page 29: Current Accuracy Adjustment
Interfaces in Measurements & Automation Explorer. password: calHandle: &calHandle Place all channels on the NI 9219 in current mode using the NI 9219 instance of the DAQmx Setup C Series Calibration VI. LabVIEW Block Diagram NI-DAQmx Function Call Call... - Page 30 Set up the signal acquisition using the NI 9219 instance of the DAQmx Setup C Series Calibration VI. LabVIEW Block Diagram NI-DAQmx Function Call Call with the following DAQmxSetup9219Cal parameters: rangeMin: –0.025 rangeMax: 0.025 calHandle: calHandle channelName: cDAQ1Mod8/a measType: DAQmx_Val_Current...
- Page 31 Configure the DMM for a current measurement. Enable Auto Zero on the DMM. 10. Acquire a current reading with the DMM. 11. Acquire a current reading with the NI 9219 using the NI 9219 instance of the DAQmx Adjust C Series Calibration VI. LabVIEW Block Diagram...
-
Page 32: 4-Wire And 2-Wire Resistance Accuracy Adjustment
Connect the NI 9219 to the resistor and the DMM as shown in Figure 7. Connect the sense leads of the DMM as close as possible to the same point that the sense leads of the NI 9219 (HI and LO) connect to the resistor to ensure that the DMM reference measurements include the same lead wire resistance as the NI 9219 4-wire measurements. - Page 33 Place the NI 9219 channel in resistance mode using the NI 9219 instance of the DAQmx Setup C Series Calibration VI. LabVIEW Block Diagram NI-DAQmx Function Call Call with the following DAQmxSetup9219Cal parameters: rangeMin: rangeMax: 1050, 10500 calHandle: calHandle channelName:...
- Page 34 DAQmx Adjust Calibration VI. bufferSize: The size of the adjustmentPoints array in elements. Place the NI 9219 channel in voltage mode using the NI 9219 instance of the DAQmx Setup C Series Calibration VI. LabVIEW Block Diagram NI-DAQmx Function Call...
- Page 35 Acquire a resistance reading with the DMM. 10. Disconnect the DMM from the resistors and NI 9219. 11. Set up the signal acquisition using the NI 9219 instance of the DAQmx Setup C Series Calibration VI. LabVIEW Block Diagram NI-DAQmx Function Call...
- Page 36 12. Acquire a 4-wire resistance reading with the NI 9219 using the NI 9219 instance of the DAQmx Adjust C Series Calibration VI. LabVIEW Block Diagram NI-DAQmx Function Call Call with the following DAQmxAdjust9219Cal parameters: calHandle: calHandle channelName: cDAQ1Mod8/a value: The DMM reading.
-
Page 37: 4-Wire Rtd, 3-Wire Rtd, And Quarter-Bridge Accuracy Adjustment
Connect the NI 9219 to the resistor and the DMM as shown in Figure 8. Connect the sense leads of the DMM as close as possible to the same point that the sense leads of the NI 9219 (HI and LO) connect to the resistor to ensure that the DMM reference measurements include the same lead wire resistance as the NI 9219 4-wire measurements. - Page 38 Place the NI 9219 channel in RTD mode using the NI 9219 instance of the DAQmx Setup C Series Calibration VI. LabVIEW Block Diagram NI-DAQmx Function Call Call with the following DAQmxSetup9219Cal parameters: rangeMin: rangeMax: 505, 5050 calHandle: calHandle channelName:...
- Page 39 DAQmx Adjust Calibration VI. bufferSize: The size of the adjustmentPoints array in elements. Place the NI 9219 channel in voltage mode using the NI 9219 instance of the DAQmx Setup C Series Calibration VI. LabVIEW Block Diagram NI-DAQmx Function Call...
- Page 40 Enable Auto Zero on the DMM. Acquire a resistance reading with the DMM. 10. Disconnect the DMM from the resistors and NI 9219. 11. Set up the signal acquisition using the NI 9219 instance of the DAQmx Setup C Series Calibration VI. LabVIEW Block Diagram...
- Page 41 12. Acquire a 4-wire reading with the NI 9219 using the NI 9219 instance of the DAQmx Adjust C Series Calibration VI. LabVIEW Block Diagram NI-DAQmx Function Call Call with the following DAQmxAdjust9219Cal parameters: calHandle: calHandle channelName: cDAQ1Mod8/a value: The DMM reading.
-
Page 42: Half-Bridge Accuracy Adjustment
This name can be found under Devices and Interfaces in Measurements & Automation Explorer. password: calHandle: &calHandle Set up the signal acquisition using the NI 9219 instance of the DAQmx Setup C Series Calibration VI. LabVIEW Block Diagram NI-DAQmx Function Call Call with the following... - Page 43 Set the voltage source to V ExcitationModule 10. Connect the NI 9219 to DMM1, DMM2, and the voltage source as shown in Figures 12, 13, or 14 for the appropriate test point value indicated in Table 21. Observe the following conditions when connecting the equipment to the NI 9219.
- Page 44 15. Acquire voltage measurements with both DMMs. Perform the following calculation using the two DMM measurements. DMM2 Ratio ---------------- DMM1 16. Acquire a bridge reading with the NI 9219 using the NI 9219 instance of the DAQmx Adjust C Series Calibration VI. LabVIEW Block Diagram NI-DAQmx Function Call Call with the following...
-
Page 45: Full-Bridge Accuracy Adjustment
This name can be found under Devices and Interfaces in Measurements & Automation Explorer. password: calHandle: &calHandle Set up the signal acquisition using the NI 9219 instance of the DAQmx Setup C Series Calibration VI. LabVIEW Block Diagram NI-DAQmx Function Call Call with the following... - Page 46 Set the voltage source to V ExcitationModule 10. Connect the NI 9219 to DMM1, DMM2, and the voltage source as shown in Figures 16 or 17 for the appropriate test point value indicated in Table . Observe the following conditions when connecting the equipment to the NI 9219.
- Page 47 15. Acquire voltage measurements with both DMMs. Perform the following calculation using the two DMM measurements. DMM2 Ratio ---------------- DMM1 16. Acquire a bridge reading with the NI 9219 using the NI 9219 instance of the DAQmx Adjust C Series Calibration VI. LabVIEW Block Diagram NI-DAQmx Function Call Call with the following...
-
Page 48: Accuracy Under Calibration Conditions
The NI 9219 is now calibrated with respect to your external source. After performing the Adjustment Procedure, repeat the Verification Procedure to re-verify the accuracy of the module. Accuracy Under Calibration Conditions The following accuracy table is valid for calibration under the following conditions: •... -
Page 49: Where To Go For Support
National Instruments corporate headquarters is located at 11500 North Mopac Expressway, Austin, Texas, 78759-3504. National Instruments also has offices located around the world to help address your support needs. For telephone support in the United States, create your service request at ni.com/...
Need help?
Do you have a question about the 9219 and is the answer not in the manual?
Questions and answers