Table of Contents
Advertisement
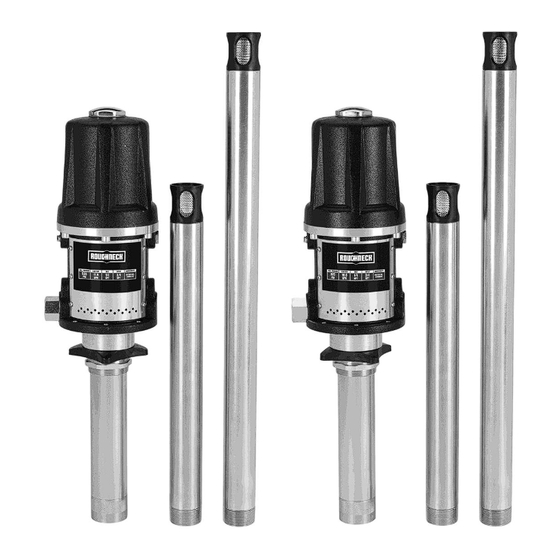
Heavy-Duty Air-Operated Oil Pump
With Extension Kit – 3:1 or 5:1
Owner's Manual
WARNING:
Read carefully and understand all ASSEMBLY AND OPERATION
INSTRUCTIONS before operating. Failure to follow the safety rules and other basic safety
precautions may result in serious personal injury.
Items #58267 & #58268
READ & SAVE THESE INSTRUCTIONS
Advertisement
Table of Contents

Related Manuals for Roughneck 58267


Summary of Contents for Roughneck 58267
- Page 1 Owner’s Manual WARNING: Read carefully and understand all ASSEMBLY AND OPERATION INSTRUCTIONS before operating. Failure to follow the safety rules and other basic safety precautions may result in serious personal injury. Items #58267 & #58268 READ & SAVE THESE INSTRUCTIONS...
- Page 2 Thank you very much for choosing a Roughneck™ product! For future reference, please complete the owner’s record below: Serial Number/Lot Date Code: ________________________________ Purchase Date: ____________________________________________ Save the receipt, warranty, and this manual. It is important that you read the entire manual to become familiar with this product before you begin using it.
-
Page 3: Table Of Contents
Table of Contents Intended Use ............................4 Packaging Contents ..........................4 Technical Specifications ........................4 Important Safety Information ....................... 4 Specific Operation Warnings ....................... 6 Main Parts of Product ........................... 7 Assembly Instructions .......................... 8 Before Each Use ............................ 9 Operating Instructions ........................ -
Page 4: Intended Use
The Roughneck Heavy-Duty Air-Operated Oil Pump with Extension Kit is perfect for fluid oil transfer in high volumes and longer distance applications such as truck shop service fleet facilities and in-plant applications. #58267 is suitable for use with SAE130 oil and #58268 is suitable for use with SAE240 oil. Both pumps have extension tubes. - Page 5 product will be safer and do a better job at the capacity for which it was intended. DO NOT use this equipment for a purpose for which it was not intended. Industrial or commercial applications must follow OSHA requirements. ⚠WARNING WORK AREA SAFETY ...
-
Page 6: Specific Operation Warnings
⚠CAUTION PUMP USE AND CARE Do not force the pump. Products are safer and do a better job when used in the manner for which they are designed. Plan your work, and use the correct product for the job. ... -
Page 7: Main Parts Of Product
Do not use with any liquid besides the intended oil, lubricants, or antifreeze liquids. See owner's manual for intended oil. Disconnect air hose and relieve air pressure before servicing. Always dispose of oil and other liquids according to local waste authority guidelines. ... -
Page 8: Assembly Instructions
Assembly Instructions Grounding Before using the pump, check the grounding of the entire system to prevent fire and explosion. To reduce the risk of static sparking, each device should ground effectively. Pump: Use a ground wire and clamp as Fig.2 shows. Remove the grounding screw, place the end of the grounding wire into the grounding hole. -
Page 9: Before Each Use
FIG.2: Grounding guide Installation Standard installation 1: Cut-off valve 2: Filter 3: Regulator 4: Lubricator 5: Control valve 6: Locking adapter 7: Hose reel Fig.3: Oil supply system installation The above installation is part of the oil supply system. If you need installation for the whole air circle transfer, contact the manufacturer or distributor. -
Page 10: Operating Instructions
Pump cannot operate with an empty load or the speed will be too fast causing damage. If acceleration is too fast or running very slow, stop operation and check to be sure there is enough oil in the barrel. If there is insufficient oil, change the trolley and initialize the entire system. -
Page 11: After Each Use
Process • Put the pump into lock adapter (Fig .3, Part 6). • Install to the trolley. • Install cut-off valve (Fig 3, Part 1). • Install filter (Fig 3, Part 2). • Install regulator, which controls the speed, and adjust the air pressure (Fig 3, Part 3). •... -
Page 12: Troubleshooting
Open the master air valve from the compressor. Open the dispensing valve into a grounded metal waste container, making firm metal-to-metal contact between the container and valve. Open the bleed-type master air valve and open the pump air regulator slowly, just until the pump is running. When the pump is primed and all air has been pushed out of the lines, close the dispense valve. -
Page 13: Parts Diagram
Parts Diagram Page 13 of 17... -
Page 14: Parts List
Parts List Part No. Description Quantity Part No. Description Quantity Air motor cover O-ring Spring piece Piston Bracket Rope rocker O-ring Shaft Rope shaft O-ring Spring Base O-ring O-ring Jar body Right silencer Washer U-seal Steel wire Sponge O-ring Cushion Steel ball O-ring Seal... -
Page 15: Replacement Parts
Replacement Parts For replacement parts and technical questions, please call Customer Service at 1-800-222-5381. Not all product components are available for replacement. The illustrations provided are a convenient reference to the location and position of parts in the assembly sequence. ... -
Page 16: Limited Warranty
Northern Tool and Equipment Company, Inc. ("We'' or "Us'') warrants to the original purchaser only ("You'' or "Your") that the Roughneck product purchased will be free from material defects in both materials and workmanship, normal wear and tear excepted, for a period of one year from date of purchase. - Page 17 Distributed by: Northern Tool & Equipment Company, Inc. Burnsville, Minnesota 55306 www.northerntool.com Made in China Page 17 of 17...
Need help?
Do you have a question about the 58267 and is the answer not in the manual?
Questions and answers