Table of Contents
Advertisement
Quick Links
INSTRUCTION GUIDE
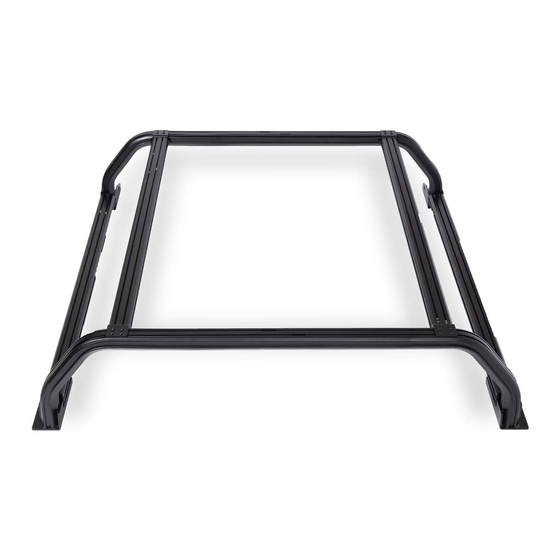
Front Hoop
Rear Hoop
Side Mounting Bracket
Congratulations on your purchase of a high quality PUTCO
you need any application or technical assistance, feel free to call us at:
Monday-Friday 8:00am - 5:00pm (Central Standard Time)
Contact your PUTCO
PLEASE READ ALL INSTRUCTIONS BEFORE INSTALLATION
AND CHECK TO SEE THAT ALL PARTS ARE INCLUDED
REQUIRED TOOLS
HEX KEYS OR SOCKETS
(sizes: 7/32", 3/16", 5/32")
OR
WRENCH OR SOCKET
(sizes: 9/16", 7/16")
OR
1-800-247-3974
dealer for other quality accessories.
®
PERMANENT MARKER
OR PUNCH
(to mark drill hole locations)
DRILL & BITS
(1/8" and 25/64" drill bits)
Upper Mounting Bracket
CoreTEC Block Insert
CONTENT LIST
Rear Hoop (etched hoop)
Front Hoop
CoreTEC Block Inserts
Support Tubes
Vehicle Specific Hardware Mounting Kit
Upper Mounting Brackets
Side Mounting Brackets
Rack Hardware Kit
Accessory Mounting Kit
Universal Tent Bracket Kit
Blue Loc Tite
Support Tubes
product. Should
®
QTY
1
1
8
4
1
4
4
1
(Bag #185601)
1
(Bag #185602)
1
(Bag #185603)
1
184800I
Advertisement
Table of Contents

Related Manuals for PUTCO Venture Tec Rack


Summary of Contents for PUTCO Venture Tec Rack
- Page 1 Front Hoop Support Tubes Rear Hoop CoreTEC Block Insert Side Mounting Bracket Congratulations on your purchase of a high quality PUTCO product. Should ® you need any application or technical assistance, feel free to call us at: 1-800-247-3974 Monday-Friday 8:00am - 5:00pm (Central Standard Time) Contact your PUTCO dealer for other quality accessories.
- Page 2 Carefully follow the instructions and measure twice before drilling holes. Place the front hoop (NOTE: the rear hoop has “Putco” etched on it) on the bed caps as shown in Figure 1. Ensure that the gaps are consistent on both sides of the vehicle.
- Page 3 Venture TEC Rack Instruction Guide Insert 8 square nuts into each channel of both racks. Slide square nuts down to the mounting plate, so that both sides of the hoop look like Figure 4. Position remaining square nuts in top channel near bend, as shown in Figure 5.
- Page 4 Figure 11b: Diagram showing the correct side Figure 11a: Diagram showing the alignment tool tube mounting Your new Venture TEC Rack is now successfully installed on your vehicle! Let the adventures begin! WARNING: • Make sure to periodically check that bolts are tight.
Need help?
Do you have a question about the Venture Tec Rack and is the answer not in the manual?
Questions and answers