Middle Atlantic Products Credenza Rack C5 Series Instruction Sheet
Hide thumbs
Also See for Credenza Rack C5 Series:
- Assembly instructions manual (10 pages) ,
- Instruction sheet (6 pages) ,
- Installation instructions (4 pages)
Table of Contents
Advertisement
Quick Links
THANK YOU
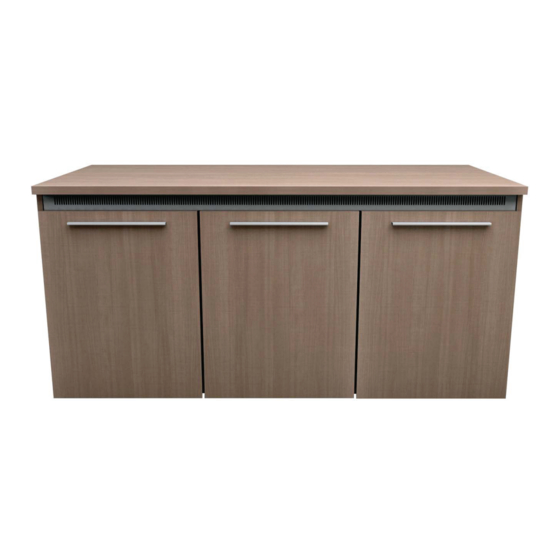
Thank you for purchasing the C5 Series credenza rack. Please read these instructions thoroughly
before installing or assembling this product.
PRODUCT FEATURES
• Built-in thermostatically controlled cooling.
• Heavy duty frame ships separate to allow for equipment integration before finished surfaces are
attached.
• 14 rackspaces per bay.
• Factory installed casters.
Instruction Sheet
C5 Series
Credenza Rack
I-00661
Rev H
Advertisement
Table of Contents

Subscribe to Our Youtube Channel
Related Manuals for Middle Atlantic Products Credenza Rack C5 Series


Summary of Contents for Middle Atlantic Products Credenza Rack C5 Series
- Page 1 Instruction Sheet C5 Series Credenza Rack THANK YOU Thank you for purchasing the C5 Series credenza rack. Please read these instructions thoroughly before installing or assembling this product. PRODUCT FEATURES • Built-in thermostatically controlled cooling. • Heavy duty frame ships separate to allow for equipment integration before finished surfaces are attached.
-
Page 2: Important Safety Instructions
IMPORTANT SAFETY INSTRUCTIONS • Read these instructions. • Heed all warnings. • Clean only with dry cloth. • Keep these instructions. • Follow all instructions. • Only use attachments/accessories specified by the manufacturer. DANGER HAZARDOUS VOLTAGE: The lightning flash with the arrowhead symbol, within an equilateral triangle is intended to alert the user to the presence of uninsulated dangerous voltage within the product’s enclosure that may be of sufficient magnitude to constitute a risk of electric shock to persons. -
Page 3: Instructions Importantes Sur La Sécurité
IMPORTANT SAFETY INSTRUCTIONS (CONTINUED) When using an electrical furnishing, basic precautions should always be followed, including the following: • For institutional use. • Read and follow all instructions before using. • Refer all servicing to qualified service personnel. Servicing is required when the apparatus has been damaged in any way, such as power-supply cord or plug is damaged, liquid has been spilled or objects have fallen into the apparatus, the apparatus has been exposed to rain or moisture, does not operate normally, or has been dropped. -
Page 4: Weight Rating
INSTRUCTIONS IMPORTANTES SUR LA SÉCURITÉ (A CONTINUÉ) Pour éviter une condition instable, placer des composants plus lourds dans le bas de l'armoire. Lorsque plus d'un ATTENTION composant sera placé dans l'armoire, commencez en bas de l'armoire, placent l'équipement sur le point le plus bas disponible, distribuant uniformément le poids (verticalement) dans l l'armoire. - Page 5 HARDWARE KIT QUANTITIES Configuration Hardware Kit 1-Bay 91-00514 91-00508/91-00518 91-00517 91-00517 2-Bay 91-00515 (2x) 91-00508, (2x) 91-00518 3-Bay 91-00516 (3x) 91-00508, (3x) 91-00518 91-00517 2- AND 3-BAY C5-FF22-X MODELS ONLY (8x) #10-32 x 3/8” Thread Forming Screws (2x) Rear Anti-Tip Feet INTRODUCTION NOTE: •...
-
Page 6: Vent Installation
FAN NOTES (CONTINUED) Use obrounds for cable tie points. VENT INSTALLATION 1. Place vent underneath the flange. (FIGURE A) 2. Use a #2 Phillips driver, and 10-32 screws (use hardware kit #91-00507) to attach the vent into the top of the frame. FIGURE A Page 6... -
Page 7: Side Panel Installation
SIDE PANEL INSTALLATION NOTE: • C5-FF27-X and C5-FF31-X MODELS ONLY: If installing a C5MM monitor mount kit, install stabilizing feet and monitor mount support brackets per instruction I-00749 prior to attaching wood side panels and doors to frame. • For accessories related to the side panels, please read those instructions thoroughly before proceeding with the following installation. - Page 8 TOP SURFACE INSTALLATION NOTE: • C5-FF27-X and C5-FF31-X MODELS ONLY: For accessories related to the top surface, please read those instructions thoroughly before proceeding with the following installation. • To help protect the wood finish from scratching, do not place any components or tools on unprotected wood surface during assembly.
- Page 9 INSTALLING DOORS Installing Doors Into Wood Side Panels NOTE: If using a power driver, verify the torque is on the lightest setting and only increase as necessary. • Install doors using provided #6 wood screws (2x places per door) as shown (HW Kit #91-00518). Pre-Installed Bumpers (3x Replacement Bumpers Provided) FIGURE D...
- Page 10 INSTALLING DOORS (CONTINUED) Installing Doors Into Metal Credenza Frame (Where Applicable) NOTE: If using a power driver, verify the torque is on the lightest setting and only increase as necessary. • Install door to be attached to credenza frame using provided 10-32 screws (2x places per door) as shown (HW Kit #91-00518).
- Page 11 LOCK/KNOB INSTALLATION • Install lock/knob into pre-drilled pilot holes. (FIGURE F) FIGURE F HINGE ADJUSTMENTS Door in open position. FIGURE G Directional adjustments apply to the door in the closed position. Hinge adjustment is done with door in open position. See (FIGURE G) for appropriate adjustments. Side Adjustment: Adjusts horizontal placement of door.
- Page 12 SPRING LATCH INSTALLATION • Install latch using provided screws (2x places per latch) as shown (HW Kit #91-00508). (FIGURE H) NOTE: When installing a latch into the credenza frame, use the provided machine screws. If installing into wood, use provided wood screws. FIGURE H Page 12...
- Page 13 REAR ANTI-TIP FEET INSTALLATION (C5-FF22-X MODELS ONLY) NOTE: • Rear anti-tip feet are pre-installed on 1-bay models. • Install before wood trim assembly on 2- and 3-bay models. • Use a 5/16” deep socket and (8x) 10-32 x 3/8” thread forming screws to install both rear anti-tip feet to the outside locations of your credenza as shown.
-
Page 14: Warranty
Voice: 613-836-2501 - Fax: 613-836-2690 / ca.middleatlantic.com - customerservicecanada@middleatlantic.ca Factory Distribution USA: NJ - CA - IL Canada: ON At Middle Atlantic Products we are always listening. Your comments are welcome. Middle Atlantic Products is an ISO 9001 and ISO 14001 Registered Company. Page 14...
Need help?
Do you have a question about the Credenza Rack C5 Series and is the answer not in the manual?
Questions and answers