Advertisement
Quick Links
Applied Machines: C652/C552/C452
COLOR MFP: 65 ppm/55 ppm/45 ppm
Product Code: A0P0/A0P1/A0P2
Note:
Lifting the machine in an awkward position or
transporting it in a poorly balanced position could
result in personal injury. When transporting the
machine, assign an adequate number of persons
to the job and ensure that each person can take a
good position of not being excessively loaded.
(mass: approx. 25 kg (55 lb))
I. Accessory parts
No.
Name
1. Rail
2. Mounting
bracket A
3. Mounting
bracket B
4. Mounting
bracket C
5. Screw
(4 x 8 mm)
6. Label
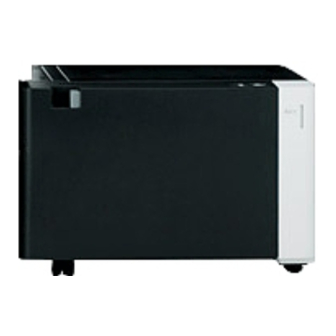
LU-204
INSTALLATION MANUAL
Shape
Q'ty
1
A0TJIXC027DA
1
A03NIXC002DA
1
A03NIXC003DA
2
A03NIXC004DA
11
4038IXC033DA
1 set
Large Capacity Unit
No.
Name
7. Installation
manual
After unpacking, be sure to get rid of the
packaging materials and keep them out of
the reach of children.
Putting the head in the plastic bag
involves danger of suffocation.
E-1
Shape
Q'ty
1 set
4980IXC019DA
A0TJ-9550-00
Advertisement

Related Manuals for Konica Minolta LU-204


Summary of Contents for Konica Minolta LU-204
- Page 1 LU-204 Large Capacity Unit INSTALLATION MANUAL Applied Machines: C652/C552/C452 COLOR MFP: 65 ppm/55 ppm/45 ppm Product Code: A0P0/A0P1/A0P2 Note: Name Shape Q’ty Lifting the machine in an awkward position or 7. Installation transporting it in a poorly balanced position could manual result in personal injury.
-
Page 2: Installation Procedures
II. Installation procedures 4. Install the mounting bracket C furnished with the unit onto the two places (two screws for each 1. Turn off the machine and unplug the power cord bracket). from the power outlet. 2. Remove the protective tape and shipping preser- vatives and remove the protective vinyl bag of the hookup cord. - Page 3 7. Insert the mounting bracket B into the round hole 9. Slide the large capacity unit towards the main unit at the rail. and lock it. A03NIXC009DC A0TJIXC006DA 8. Hold up the mounting bracket B and insert the 10. Open the manual feed tray section in order to rail.
- Page 4 12. Remove the right cover of the large capacity unit 14. Loosen the screws on the right side (three (four screws). screws each for front and rear) and the left side (two screws each for front and rear) of the large capacity unit.
- Page 5 17. Remove the left and the right adjustment roller 19. By turning the right side adjustment roller screws lock nuts (two lock nuts each for front and rear). (front and rear) counterclockwise, the overall length of the right adjustment roller legs is short- ened and therefore the right side of the unit is lowered.
- Page 6 21. Reinstall the left and the right adjustment rollers 23. Reinstall the front and the rear covers that have lock nuts (two lock nuts each for front and rear) been removed in step 14 and 15. Tighten screws that have been removed in step 17. on the right side (three screws each for front and rear) and the left side (two screws each for front and rear) of the large capacity unit.
- Page 7 27. Slide the large capacity unit and remove it from 31. Reinstall the lower rear right cover of the main the main unit. unit that has been removed in step 28 and put 28. Remove the lower rear right cover of the main the cable into the groove (two screws).
-
Page 8: Loading Paper
III. Loading paper 5. Load a stack of paper and align it to the left side of the large capacity unit. 1. Open the upper door of the large capacity unit. Note: 2. Remove the paper guide side plates (six screws). Ensure that a stack of paper does not go past the upper limit indicated on the label. -
Page 9: Affixing The Label
IV. Affixing the label VI. Checking the paper reference position Affix a label of either tray number or paper size that <Centering> are furnished with the large capacity unit, to the 1. Touch “Machine.” positions shown in the illustration. 2. Touch “Printer Area.” 3. - Page 10 • When width A is greater than the specified range <Centering (Duplex 2nd side)> Loosen the eight screws and move both paper 1. Touch “Centering (Duplex 2nd side)” guide side plates to the left then retighten the 2. Touch “LCT” and then press the Start key. eight screws that have been loosened.
Need help?
Do you have a question about the LU-204 and is the answer not in the manual?
Questions and answers