Table of Contents
Advertisement
Quick Links
Advertisement
Table of Contents

Related Manuals for Konica Minolta Precision Label Series


Summary of Contents for Konica Minolta Precision Label Series
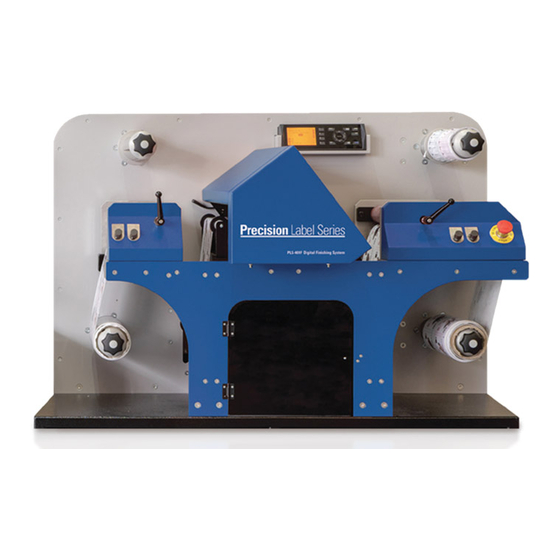
- Page 1 TECHNICAL MANUAL DOCUMENT I 18.41V00...
-
Page 2: Table Of Contents
TECHNICAL MANUAL TABLE OF CONTENTS Technical procedures 1.1. Machine Covers 1.2. Frontal Frame 1.3. Take-up Motor and Coupling 1.4. Take-up Roll Bearing 1.5. Lamination Expandable Shaft Bearing 1.6. Feeder Pinch Roll/Lamination 1.7. Traction Pinch Roll 1.8. Transport Roll 1.9. Brake Roller 1.10. - Page 3 TECHNICAL MANUAL TECHNICAL MANUAL DOCUMENT I 18.41V00 - Page 3 Update: 13.02.2019...
-
Page 4: Technical Procedures
TECHNICAL MANUAL 1. TECHNICAL PROCEDURES 1.1. Machine Covers TURN OFF THE MACHINE/SWITCH OF THE MAIN POWER 1. Unplug the main power cable and unscrew the four bolts (M3x10 DIN 7380) to loosen the plate. 2. Disconnect the doors safety sensor and remove the zip ties. DOCUMENT I 18.41V00 - Page 4... - Page 5 TECHNICAL MANUAL 3. Disconnect the USB inlets. DOCUMENT I 18.41V00 - Page 5 Update: 13.02.2019...
- Page 6 TECHNICAL MANUAL 4. Unscrew the 13 screws (M4x20) that attach the back cover to the main structure. DOCUMENT I 18.41V00 - Page 6 Update: 13.02.2019...
- Page 7 TECHNICAL MANUAL 5. Unscrew the last 7 bolts (M4x16) that attach the back cover to the main structure. 6. Is now possible to safely remove the machine back cover. The last procedure should be done by two persons. DOCUMENT I 18.41V00 - Page 7 Update: 13.02.2019...
- Page 8 TECHNICAL MANUAL 7. To remove the digital cutter cover, unscrew the 3 bolts (M4x25) located inside of the electrical cabinet, on the back of the main frame. 8. Unscrew the 2 bolts (M4x25) in the back of the frontal frame. 9.
-
Page 9: Frontal Frame
TECHNICAL MANUAL 1.2. Frontal Frame Before following the next steps repeat procedures: TURN OFF THE MACHINE/SWITCH OF THE MAIN POWER MACHINE COVERS (STEPS 7- 9); DIGITAL CUTTER (STEPS 1 - 3). 1. With extra carefull remove the 2 springs from the pinch roll unit. DOCUMENT I 18.41V00 - Page 9... - Page 10 TECHNICAL MANUAL 2. Unbolt the 13 screws (M8x20 and M6x20) and gently pull the frontal frame. All components will be hanging from the back frame. | TO RE-ASSEMBLE PLEASE REVERSE THE PROCESS | DOCUMENT I 18.41V00 - Page 10 Update: 13.02.2019...
-
Page 11: Take-Up Motor And Coupling
TECHNICAL MANUAL 1.3. Take-up Motor and Coupling Before following the next steps repeat procedures: TURN OFF THE MACHINE/SWITCH OF THE MAIN POWER 1. Disconnect the Take-up motor plugs. DOCUMENT I 18.41V00 - Page 11 Update: 13.02.2019... - Page 12 TECHNICAL MANUAL 2. Loose the coupling by unscrewing both coupling bolts. DOCUMENT I 18.41V00 - Page 12 Update: 13.02.2019...
- Page 13 TECHNICAL MANUAL 3. Unscrew 4 bolts (M8 x 25) from the Take-up motor support. 4. Gently remove the Take-up motor. The coupling will be free. | TO RE-ASSEMBLE PLEASE REVERSE THE PROCESS | DOCUMENT I 18.41V00 - Page 13 Update: 13.02.2019...
-
Page 14: Take-Up Roll Bearing
TECHNICAL MANUAL 1.4. Take-up Roll Bearing Before following the next steps repeat procedures: TURN OFF THE MACHINE/SWITCH OF THE MAIN POWER TAKE-UP MOTOR AND COUPLING (ALL STEPS). 1. Remove the 2 retaining rings on the electrical cabinet side. 2. Gently pull the expandable shaft. DOCUMENT I 18.41V00 - Page 14... - Page 15 TECHNICAL MANUAL 3. Remove the frontal retaining ring and take the bearings out. | TO RE-ASSEMBLE PLEASE REVERSE THE PROCESS | DOCUMENT I 18.41V00 - Page 15 Update: 13.02.2019...
-
Page 16: Lamination Expandable Shaft Bearing
TECHNICAL MANUAL 1.5. Lamination Expandable Shaft Bearing Before following the next steps repeat procedures: TURN OFF THE MACHINE/SWITCH OF THE MAIN POWER 1. Unscrew the 3 bolts (M5x35) on the magnetic breaker. 2. Gently pull the magnetic breaker. DOCUMENT I 18.41V00 - Page 16 Update: 13.02.2019... - Page 17 TECHNICAL MANUAL 3. Remove the 2 retaining rings. 4. Gently pull the expandable shaft and remove it. DOCUMENT I 18.41V00 - Page 17 Update: 13.02.2019...
- Page 18 TECHNICAL MANUAL 5. Remove the frontal retaining ring and take the bearing out. DOCUMENT I 18.41V00 - Page 18 Update: 13.02.2019...
- Page 19 TECHNICAL MANUAL | TO RE-ASSEMBLE PLEASE REVERSE THE PROCESS | DOCUMENT I 18.41V00 - Page 19 Update: 13.02.2019...
-
Page 20: Feeder Pinch Roll/Lamination
TECHNICAL MANUAL 1.6. Feeder Pinch Roll/Lamination Before following the next steps repeat procedures: TURN OFF THE MACHINE/SWITCH OF THE MAIN POWER 1. Using extra carefull remove the pinch roll springs. DOCUMENT I 18.41V00 - Page 20 Update: 13.02.2019... - Page 21 TECHNICAL MANUAL 2. Unscrew 2 bolts (M6x16) that attach the pinch roll set to the machine frame (one on the frontal frame, one inside of the electrical cabinet). 3. Remove the Pinch Roll set. DOCUMENT I 18.41V00 - Page 21 Update: 13.02.2019...
- Page 22 TECHNICAL MANUAL Bearing (4) Unscrew both fixation bolts and remove pinch roll shaft (1); Loose the collar shaft pin and remove it (3). With the collar shaft out it´s possible to replace the components, namely, bearing (4), pinch roll shaft (6) and pinch roll inner shaft (5). Buching (2) To remove the buching unscrew the collar shaft.
-
Page 23: Traction Pinch Roll
TECHNICAL MANUAL 1.7. Traction Pinch Roll Before following the next steps repeat procedures: TURN OFF THE MACHINE/SWITCH OF THE MAIN POWER MACHINE COVERS (STEPS 7 - 9); DIGITAL CUTTER; FRONTAL FRAME. DOCUMENT I 18.41V00 - Page 23 Update: 13.02.2019... - Page 24 TECHNICAL MANUAL 1. Unscrew inner bolt from coupler (the closest to the machine wall). DOCUMENT I 18.41V00 - Page 24 Update: 13.02.2019...
- Page 25 TECHNICAL MANUAL 2. Unscrew 3 bolts inside of the electrical cabinet. The shaft will come loose and may fall. DOCUMENT I 18.41V00 - Page 25 Update: 13.02.2019...
- Page 26 TECHNICAL MANUAL With traction pinch roll bearing out it’s possible to replace the bearing. To do so remove the retaining ring (2) and the bearing (3) will slide out. | TO RE-ASSEMBLE PLEASE REVERSE THE PROCESS | DOCUMENT I 18.41V00 - Page 26 Update: 13.02.2019...
-
Page 27: Transport Roll
TECHNICAL MANUAL 1.8. Transport Roll Before following the next steps repeat procedures: TURN OFF THE MACHINE/SWITCH OF THE MAIN POWER MACHINE COVERS (STEPS 7 – 8); FRONTAL FRAME. 1. Unscrew 1 bolts (M8x20) that attach the transport roll to the machine main frame. Unscrew the bolt with one hand and hold the transport roll with the other to keep it from falling. - Page 28 TECHNICAL MANUAL With the transport roll outside, replace the needed part, namely, collar shaft (1), transport roll (2) or shaft (3). | TO RE-ASSEMBLE PLEASE REVERSE THE PROCESS | DOCUMENT I 18.41V00 - Page 28 Update: 13.02.2019...
-
Page 29: Brake Roller
TECHNICAL MANUAL 1.9. Brake Roller Before following the next steps repeat procedures: TURN OFF THE MACHINE/SWITCH OF THE MAIN POWER MACHINE COVERS (STEP 7 – 9); FRONTAL FRAME; MECHANICAL BRAKE. 1. Unscrew 3 screws (M8x20) on the inside of the electrical cabinet. 2. -
Page 30: Magnetic Breaker
TECHNICAL MANUAL 1.10. Magnetic Breaker Before following the next steps repeat procedures: TURN OFF THE MACHINE/SWITCH OF THE MAIN POWER 1. Unscrew the 3 bolts (M5x35) on the magnetic breaker. 2. Gently pull the magnetic breaker. DOCUMENT I 18.41V00 - Page 30 Update: 13.02.2019... -
Page 31: Mechanical Brake
TECHNICAL MANUAL 1.11. Mechanical Brake Before following the next steps repeat procedures: TURN OFF THE MACHINE/SWITCH OF THE MAIN POWER 1. Inside of the electrical cabinet, unscrew the two horizontal screws (M6x140) on the side of the breaker and exit the right half of the breaker. 2. - Page 32 TECHNICAL MANUAL 3. Relieve the bolt on the rear of the brake. 4. Gently pull the mecanic breaker. | TO RE-ASSEMBLE PLEASE REVERSE THE PROCESS | DOCUMENT I 18.41V00 - Page 32 Update: 13.02.2019...
-
Page 33: Web Guides
TECHNICAL MANUAL 1.12. Web Guides Before following the next steps repeat procedures: TURN OFF THE MACHINE/SWITCH OF THE MAIN POWER MACHINE COVERS (STEPS 7 - 9); DIGITAL CUTTER; FRONTAL FRAME. 1. Unscrew the 3 bolts (M8x20) inside of the electrical cabinet. DOCUMENT I 18.41V00 - Page 33... - Page 34 TECHNICAL MANUAL 2. Gently remove the Web Guide set. DOCUMENT I 18.41V00 - Page 34 Update: 13.02.2019...
- Page 35 TECHNICAL MANUAL With the web guide outside, unscrew de collar shaft (2) pin and replace the transport roll. | TO RE-ASSEMBLE PLEASE REVERSE THE PROCESS | DOCUMENT I 18.41V00 - Page 35 Update: 13.02.2019...
-
Page 36: Digital Cutter
TECHNICAL MANUAL 1.13. Digital Cutter Before following the next steps repeat procedures: TURN OFF THE MACHINE/SWITCH OF THE MAIN POWER MACHINE COVERS (STEPS 7 - 9). 1. Disconnect the digital cutter USB cable 2. Disconnect the digital cutter control unit flat table. DOCUMENT I 18.41V00 - Page 36... - Page 37 TECHNICAL MANUAL 3. Disconnect the power supply cable under the digital cutter unit. DOCUMENT I 18.41V00 - Page 37 Update: 13.02.2019...
- Page 38 TECHNICAL MANUAL 4. Unscrew 4 nuts (M6) from the bottom side of the metalic support part. DOCUMENT I 18.41V00 - Page 38 Update: 13.02.2019...
- Page 39 TECHNICAL MANUAL 5. Gently remove the digital cutter with the support. DOCUMENT I 18.41V00 - Page 39 Update: 13.02.2019...
- Page 40 TECHNICAL MANUAL 6. Unscrew 4 lock nuts (M8) to release the digital cutter support from the machine and gently remove it. | TO RE-ASSEMBLE PLEASE REVERSE THE PROCESS | DOCUMENT I 18.41V00 - Page 40 Update: 13.02.2019...
-
Page 41: Digital Cutter Control Unit
TECHNICAL MANUAL 1.14. Digital Cutter Control Unit Before following the next steps repeat procedures: TURN OFF THE MACHINE/SWITCH OF THE MAIN POWER 1. On the electrical cabinet pull the flat cable from the digital cutter control unit. DOCUMENT I 18.41V00 - Page 41 Update: 13.02.2019... - Page 42 TECHNICAL MANUAL 2. Unscrew 2 screws (M4x20) on the back of the main frame. 3. In the front of the machine, gently pull the digital cutter control unit. DOCUMENT I 18.41V00 - Page 42 Update: 13.02.2019...
- Page 43 TECHNICAL MANUAL 4. Unscrew 3 screws. 5. Gently pull the digital cutter control unit with the support part. | TO RE-ASSEMBLE PLEASE REVERSE THE PROCESS | DOCUMENT I 18.41V00 - Page 43 Update: 13.02.2019...
-
Page 44: Dancing Bar Transport Roll
TECHNICAL MANUAL 1.15. Dancing Bar Transport Roll Before following the next steps repeat procedures: TURN OFF THE MACHINE/SWITCH OF THE MAIN POWER 1. On the electrical cabinet unscrew the 2 electrical board bolts (M4x12) and gently pull it. 2. Now it’s possible to access to the inner dancing bar colar shafts. Unscrew the collar shaft pin and remove it. - Page 45 TECHNICAL MANUAL 3. The dancing bar shaft will be free. Gently slide it towards the machine main frame and slide foward to remove it. DOCUMENT I 18.41V00 - Page 45 Update: 13.02.2019...
-
Page 46: Dancing Bar Guides
TECHNICAL MANUAL 1.16. Dancing Bar Guides Before following the next steps repeat procedures: TURN OFF THE MACHINE/SWITCH OF THE MAIN POWER DANCING BAR TRANSPORT ROLL (STEPS 1 – 4). 1. Unscrew 4 bolts (M6 x 16) that hold the dancing bar to the machine main frame and gently remove it. - Page 47 TECHNICAL MANUAL With the dancing bar guide outside, replace the needed part, namely screw (1), spring (2), washer (3), linear bearing with flange (4) or shaft (5). | TO RE-ASSEMBLE PLEASE REVERSE THE PROCESS | DOCUMENT I 18.41V00 - Page 47 Update: 13.02.2019...
-
Page 48: Dancing Bar Sensor
TECHNICAL MANUAL 1.17. Dancing Bar Sensor Before following the next steps repeat procedures: TURN OFF THE MACHINE/SWITCH OF THE MAIN POWER 1. On the electrical cabinet unscrew the 2 electrical board bolts and gently pull it. Now its possible to freely access to the dancing bar sensors. 2. - Page 49 TECHNICAL MANUAL 3. Unscrew the bolt (M4x16) and gently remove the sensor. | TO RE-ASSEMBLE PLEASE REVERSE THE PROCESS | DOCUMENT I 18.41V00 - Page 49 Update: 13.02.2019...
-
Page 50: Pinch Roll Security Sensor
TECHNICAL MANUAL 1.18. Pinch Roll Security Sensor Before following the next steps repeat procedures: TURN OFF THE MACHINE/SWITCH OF THE MAIN POWER 1. Disconnect the sensor cable. DOCUMENT I 18.41V00 - Page 50 Update: 13.02.2019... - Page 51 TECHNICAL MANUAL 2. Inside the electrical cabinet unscrew the safety sensor. 3. Is now safe to remove the sensor. DOCUMENT I 18.41V00 - Page 51 Update: 13.02.2019...
- Page 52 TECHNICAL MANUAL 4. To replace the cover side safety sensor unscrew it. | TO RE-ASSEMBLE PLEASE REVERSE THE PROCESS | DOCUMENT I 18.41V00 - Page 52 Update: 13.02.2019...
-
Page 53: Electronic Board Nsant
TECHNICAL MANUAL 1.19. Electronic Board NSANT Before following the next steps repeat procedures: TURN OFF THE MACHINE/SWITCH OF THE MAIN POWER Using anti-static gloves. 1. Disconnect all NSANT connections and gently pull the NSANT from the plastic holders. | TO RE-ASSEMBLE PLEASE REVERSE THE PROCESS | DOCUMENT I 18.41V00 - Page 53... - Page 54 TECHNICAL MANUAL Electric layout showing, the plate responsible for controlling the servo motor (part I). DOCUMENT I 18.41V00 - Page 54 Update: 13.02.2019...
- Page 55 TECHNICAL MANUAL Electric layout showing, the plate responsible for controlling the servo motor (part II). DOCUMENT I 18.41V00 - Page 55 Update: 13.02.2019...
-
Page 56: Electronic Board Nspb
TECHNICAL MANUAL 1.20. Electronic Board NSPB Before following the next steps repeat procedures: TURN OFF THE MACHINE/SWITCH OF THE MAIN POWER Using anti-static gloves. 1. Disconnect all NSPB connections and gently pull the NSPB from the plastic holders. | TO RE-ASSEMBLE PLEASE REVERSE THE PROCESS | DOCUMENT I 18.41V00 - Page 56... - Page 57 TECHNICAL MANUAL Electric layout showing, the plate responsible for controlling the machine's electromagnetic brakes. DOCUMENT I 18.41V00 - Page 57 Update: 13.02.2019...
-
Page 58: Blm 1 Electronic Board
TECHNICAL MANUAL 1.21. BLM 1 Electronic Board Before following the next steps repeat procedures: TURN OFF THE MACHINE/SWITCH OF THE MAIN POWER Using anti-static gloves. 1. Disconnect all 3 cable connections. DOCUMENT I 18.41V00 - Page 58 Update: 13.02.2019... - Page 59 TECHNICAL MANUAL 2. Unscrew 2 bolts (M3 x 10) and gently pull the BLM 1 electronic board. | TO RE-ASSEMBLE PLEASE REVERSE THE PROCESS | DOCUMENT I 18.41V00 - Page 59 Update: 13.02.2019...
-
Page 60: Blm 2 Electronic Board
TECHNICAL MANUAL 1.22. BLM 2 Electronic Board Before following the next steps repeat procedures: TURN OFF THE MACHINE/SWITCH OF THE MAIN POWER USING ANTI-STATIC GLOVES. 1. Disconnect all 3 cable connections. DOCUMENT I 18.41V00 - Page 60 Update: 13.02.2019... - Page 61 TECHNICAL MANUAL 2. Unscrew 2 bolts (M3 x 10) and gently pull the BLM 1 electronic board. | TO RE-ASSEMBLE PLEASE REVERSE THE PROCESS | DOCUMENT I 18.41V00 - Page 61 Update: 13.02.2019...
- Page 62 TECHNICAL MANUAL TECHNICAL MANUAL DOCUMENT I 18.41V00 - Page 62 Update: 13.02.2019...
Need help?
Do you have a question about the Precision Label Series and is the answer not in the manual?
Questions and answers