Table of Contents
Advertisement
Advertisement
Table of Contents

Subscribe to Our Youtube Channel
Related Manuals for DT SWISS D 232


Summary of Contents for DT SWISS D 232
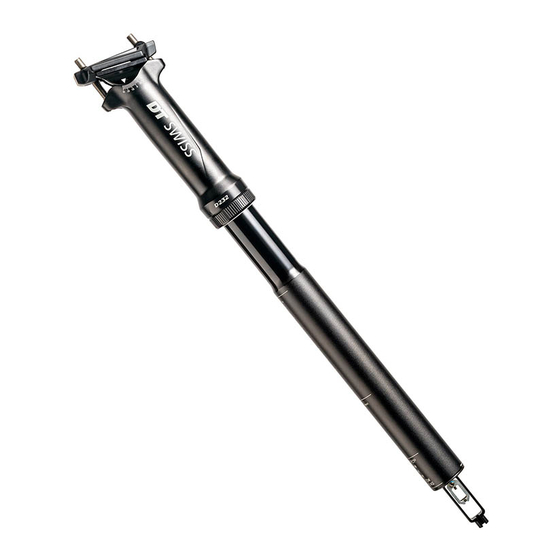
- Page 1 D 232 / D 232 ONE TECHNICAL MANUAL V2020.05...
- Page 2 1. GENERAL ..........3 2. OVERVIEW ........... 6 3. SERVICE KITS ........7 4. SERVICE AND CARE ......13 5. TROUBLE SHOOTING ......14 6. SMALL SERVICE ......... 17 7. FULL SERVICE ........24...
- Page 3 The cover page and the footing provide information about the type of product and manual as well as the version of the manual. The DT Swiss contact details can be found on the back. A list of all DT Swiss service centers can be found at www.dtswiss.com.
- Page 4 The use of different tools is at the discretion of the user. If components are damaged by the usage of differing tools, the user is liable. DT Swiss special tools are precision tools. Damage-free mounting and dismounting of the components can only be ensured if the tools are working properly and if the condition of the tools are perfect.
- Page 5 The activities listed in this manual may only be carried out by persons with sufficient specialist knowledge. The user is liable for any damage or consequential damage caused by wrongly maintained or installed components. If you have doubts, please contact your region‘s DT Swiss pro level service center.
- Page 6 D232 QUICK CONNECTOR KIT lower seat tube cover D232 / D232 ONE QUICK CONNECTOR CAP KIT quickrelease slider D232 QUICK CONNECTOR KIT quickrelease housing D232 QUICK CONNECTOR KIT O-ring D232 QUICK CONNECTOR KIT *only available for DT Swiss Service Center...
- Page 7 1x coil spring release piston 1x guide for release piston 1x raster ring 5x latch D232 QUICK CONNECTOR CAP KIT Ø27.2 Item No: DWKD232X30511S 1x lower seat tube cover Ø27.2 mm 1x O-ring Ø18 x 2.5 mm D 232 - Technical Manual V2020.05...
- Page 8 D232 QUICK CONNECTOR CAP KIT Ø30.9 Item No: DWKD232X30512S 1x lower seat tube cover Ø30.9 mm 1x O-ring Ø22 x 2.5 mm D232 ONE QUICK CONNECTOR CAP KIT Ø27.2 Item No: DWKD232X30514S 1x lower seat tube cover Ø27.2 mm 1x O-ring Ø18 x 2.5 mm D232 ONE QUICK CONNECTOR CAP KIT Ø30.9 Item No: DWKD232X30513S...
- Page 9 Item No: DWKD232S30519S 1x upper seat clamp aluminium 1x lower seat clamp aluminium 2x barrel nut 1x seat clamp screw M6 / Ø10 x 36 mm 1x seat clamp screw M6 / Ø10 x 46 mm D 232 - Technical Manual V2020.05...
- Page 10 D232 ONE TITAN SEAT CLAMP SCREW KIT Item No: DWKD232S30520S 2x barrel nut 1x seat clamp screw Ti M6 / Ø10 x 36 mm 1x seat clamp screw Ti M6 / Ø10 x 46 mm D232 STEEL SEAT CLAMP SCREW KIT Item No: DWKD232N30521S 2x barrel nut 1x seat clamp screw M6 / Ø10 x 36 mm...
- Page 11 D232 SEAT TUBE REPLACEMENT Ø27.2 Item No: DWKD232S30523S Only available for DT Swiss Service Center. D232 SEAT TUBE REPLACEMENT Ø30.9 Item No: DWKD232S30524S Only available for DT Swiss Service Center. D232 ONE SEAT TUBE REPLACEMENT Ø27.2 Item No: DWKD232C30525S Only available for DT Swiss Service Center.
- Page 12 D232 BALL REPLACEMENT KIT Item No: DWKD232N30527S 10 x latch Only available for DT Swiss Service Center. L1 REMOTE LEVER Art.Nr: LL1XX4LXXXSA29724S 1x remote lever 1x shifting cable Ø1,1 mm, length 2100 mm 2x cable end crimp...
- Page 13 Incorrect maintenance or assembly of the seat post can lead to incorrect function! • Maintenance and assembly may only be done by a skilled professional. • In case of any doubt, contact a DT Swiss service center. • Only use original spare parts.
- Page 14 5. TROUBLE SHOOTING Issue Reason Solution seat post does not compress dirty / too little grease small service or extend properly details, see 6 on page 17 O-ring (“2. Overview” on disassemble the seat post page 6 / No. 13) crushed / completely, clean all parts.
- Page 15 7 on page 24. D 232 - Technical Manual V2020.05...
- Page 16 In case of further issues or questions, please contact your dealer or a DT Swiss service center. only available for DT Swiss Service Center...
- Page 17 Motorex Rex, Motorex Swissclean, Motorex OPAL 2400, as required OPAL 3000, OPAL 5000 or similar 6.1 REMOVING THE SEAT POST 1. Press the saddle down slightly and unscrew the lock nut from the slider tube by hand. D 232 - Technical Manual V2020.05...
- Page 18 2. Pull the slider tube off the seat tube. 3. Pull the coil spring out of the seat tube. 4. Remove the guide ring from the upper end of the seat tube.
- Page 19 6. Take the five latches out of the recesses in the seat tube. TIP: A magnet makes it easier to remove the latches. 7. Pull the spring guide out of the seat tube. D 232 - Technical Manual V2020.05...
- Page 20 6.2 CLEANING THE PARTS 1. Clean all parts with an appropriate cleaner. We recommend one of the following cleaners: • Motorex Rex • Motorex Swissclean • Motorex OPAL 2400, 3000 OPAL, OPAL 5000 2. Check all parts for excessive wear and replace worn parts if necessary.
- Page 21 5. Grease the entire area around the latches. GREASE 6. Press the remote lever and simultaneously slide the raster ring over the latches. 7. Grease the entire area around the raster ring. GREASE D 232 - Technical Manual V2020.05...
- Page 22 8. Grease the guide ring and the groove for the guide ring in the seat tube. 9. Slide the guide ring on the seat tube. 10. Grease the entire area around the guide ring. GREASE 11. Make sure that the entire sliding area of the seat post is greased.
- Page 23 4. Check that the seat post clamp is clamping correctly: Stand behind your bicycle, grasp the saddle with one hand and attempt to twist the seat post. → It must be impossible to twist the seat post. D 232 - Technical Manual V2020.05...
- Page 24 7. FULL SERVICE A full service should be carried out in the following cases: • Interval for a full service has elapsed (annually or after 200 operating hours) • Replacement of a component due to a malfunction that requires complete disassembly of the seat post.
- Page 25 4. Pull the cable housing on the quickconnector downwards and detach the cable housing. 5. Detach the cable from the quickconnector. D 232 - Technical Manual V2020.05...
- Page 26 7.2 DISASSEMBLING THE SEAT POST 1. Unscrew the lock nut from the slider tube by hand. 2. Pull the slider tube off the seat tube. 3. Pull the coil spring from the seat tube. 4. Remove the guide ring.
- Page 27 6. Slide a 6 mm Allen key from above into the stop of the release piston and press the release piston slightly downwards. 7. Push the raster ring upwards with the release piston pressed down and remove the raster ring from the seat tube. D 232 - Technical Manual V2020.05...
- Page 28 8. Take the five latches out of the recesses in the seat tube. TIP: A magnet makes it easier to remove the latches. 9. Slide the lock nut and O-ring off the seat tube. 10. Pull the spring guide out of the seat tube.
- Page 29 2. Pull the quickconnector with the slider down. 3. Remove the seat tube cover. 4. Push the actuating spoke upwards and pull the actuating spoke out of the seat tube from the top. D 232 - Technical Manual V2020.05...
- Page 30 REMOVING THE RELEASE PISTON FROM THE SEAT TUBE 1. Screw the stop of the release piston out of the seat tube using an 8 mm Allen key. 2. Take the release piston, the spring and the guide of the release piston out of the seat tube.
- Page 31 14). In case of malfunction, all parts of the required service kit should be replaced. 1. Grease the inner surface of the lock nut, the sliding surface of the seat tube and the O-ring. 2. Slide the lock nut and O-ring onto the seat tube. D 232 - Technical Manual V2020.05...
- Page 32 MOUNTING THE RELEASE MECHANISM Required Material Specification Quantity D232 LATCH SYSTEM KIT Art. No.: DWKD232X30510S Details, see “Service and care” on page 13 universal grease Slick Honey as required *The service kit only needs to be replaced if there is a seat post malfunction (see “Trouble Shooting” on page 14).
- Page 33 6. Slide a 6 mm hex key from the top into the stop of the release piston and press the release piston slightly downwards. 7. Slide the raster ring upwards over the latches with the release piston pressed down. D 232 - Technical Manual V2020.05...
- Page 34 QUICK CONNECTOR D 232 Ø27.2 Art. No.: DWKD232X30511S CAP KIT D 232 Ø30.9 Art. No.: DWKD232X30512S D 232 ONE Ø27.2 Art. No.: DWKD232X30514S D 232 ONE Ø30.9 Art. No.: DWKD232X30513S Details, see “Service Kits” on page 7 QUICK CONNECTOR KIT Art.
- Page 35 → The slider must not have axial play. → The raster ring must have no play on the latches. → If there is play, loosen the clamping screw and clamp the actuating spoke with correct tension. D 232 - Technical Manual V2020.05...
- Page 36 MOUNTING THE GUIDING PARTS Required Material Specification Quantity GUIDING KIT Art. No.: DWKD232X30517S Details, see “Service Kits” on page 7 universal grease Slick Honey as required *The guiding kit should be replaced at every full service (annually or after 200 operating hours). 1.
- Page 37 Required Material Specification Quantity SLIDER TUBE KIT D 232 Art. No.: DWKD232S30508S D 232 ONE Art. No.: DWKD232S30507S Details, see “Service Kits” on page 7 universal grease Slick Honey as required *The service kit only needs to be replaced if there is a seat post malfunction (see “Trouble Shooting”...
- Page 38 REPLACEMENT SPRING Art. No.: DWKD232N30522S Details, see “Service Kits” on page 7 SEAT TUBE REPLACEMENT D 232 Ø27.2 Art. No.: DWKD232S30523S D232 Ø30.9 Art. No.: DWKD232S30524S D232 ONE Ø27.2 Art. No.: DWKD232C30525S D232 ONE Ø30.9 Art. No.: DWKD232C30526S Details, see “Service Kits” on page 7...
- Page 39 2. Tighten the fixing screw with a max. tightening of 5 Nm. 5 Nm an. → If the remote lever is fitted on carbon handlebars, the maximum torque may be lower. Observe the handlebar manufacturer’s user manual! D 232 - Technical Manual V2020.05...
- Page 40 FITTING THE SADDLE AND SEAT CLAMP 1. Using a 5 mm hex key, unscrew the two seat clamp screws leaving a few screw turns still engaged in the barrel nuts. 2. Lift the upper seat clamp and pull out the lower saddle clamp to the side. 3.
- Page 41 USA - Grand Junction, CO 81505 D-33378 Rheda–Wiedenbrück info.us@dtswiss.com Germany info.de@dtswiss.com DT SWISS (FRANCE) S.A.S. DT SWISS POLSKA Sp. z o.o. Parc d‘Activites de la Sarrée ul. Towarowa 36 Route de Gourdon PL-64-600 Oborniki F - 06620 Le Bar sur Loup Poland info.fr@dtswiss.com...
Need help?
Do you have a question about the D 232 and is the answer not in the manual?
Questions and answers