Table of Contents
Advertisement
Public Address System
Network Public Address Host
MAG6182II
NETWORK PUBLIC ADDRESS CENTRE
MAG 6182II
COMPACT DISC DRIVER
OFF
ON
USB
FULL ALARMING
EMC MIC
POWER
User Manual
Thank you for using our DSPPA public address system. Please read this User Manual carefully to make better use
of this equipment.
G u a n g z h o u D S P PA A u d i o C o . , L t d .
http://www.dsppatech.com
Advertisement
Table of Contents

Related Manuals for DSPPA MAG6182II


Summary of Contents for DSPPA MAG6182II
- Page 1 POWER User Manual Thank you for using our DSPPA public address system. Please read this User Manual carefully to make better use of this equipment. G u a n g z h o u D S P PA A u d i o C o . , L t d .
- Page 2 This page is left blank for notes of user...
- Page 3 Manual. This symbol on the rear panel indicates matters needing attentions, please use or operate the product in accordance with corresponding instructions. Please keep this User Manual in good custody for future use. MAG6182II—V2.6 Facture 2019-6-15...
- Page 4 Matters need attention Please read the following before operating the product. Warning The following basic requirements must be strictly observed, to avoid potential personal injury and equipment or property damages to you or any person nearby. The basic requirements include without limitation to the following: Power source/power cable When abnormal conditions are realized...
-
Page 5: Table Of Contents
Network Address System Contents System Overview.................................1 1. About Network PA System..........................1 2. Features................................1 Introduction to Network PA Host........................3 1.1 Features..............................3 1.2 Front Panel..............................4 1.3 Rear panel............................... 5 Functional Modules Description........................7 2.1 Phone paging module..........................7 2.2 Four-channel audio input module......................9 2.3 Monitor Module............................11 2.4 Hard disk module.......................... -
Page 6: System Overview
Network Address System System Overview 1. About Network PA System Network public address is a computer network technology based modular structured and highly integrated and intelligent public address system. The system realizes digital transmission and takes LAN as its transmission medium, and the transmission distance may be over a dozen kilometers. - Page 7 Network Address System The system provides a fire control interface and alarm signals can override automatically. At the same time, it supports short-circuit alarm (alarm card) and network signal alarm. A fire icon will show on the main interface of corresponding zone in case of fire alarms. The alarm status is clear and informative. The addressing can be automatically resumed after the interrupted terminal re-establishes connection to the ...
-
Page 8: Introduction To Network Pa Host
Network Address System 1. Introduction to Network PA Host 1.1 Features 17.3" large color LCD display, with touch screen Key switch to ensure better security and stability of system; Powerful addressing matrix, built-in mass space for audio source, program customizable on basis of ... -
Page 9: Front Panel
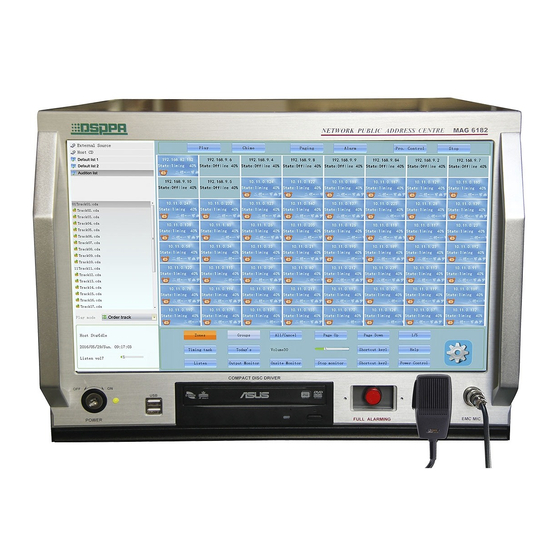
Network Address System 1.2 Front Panel NETWORK PUBLIC ADDRESS CENTRE MAG 6182II COMPACT DISC DRIVER FULL ALARMING EMC MIC POWER 1.Key switch (POWER) The key switch is the power switch of the machine. Use the professional key of the network PA system center to turn on the power clockwise and turn off the power counterclockwise. -
Page 10: Rear Panel
RISK OF ELECTRIC SHOCK DO NOT OPEN SER. 警告 请勿打开,以免触电 网络广播系统-网络广播中心 MAINS 广州市迪士普音响科技有限公司 Guangzhou DSPPA Audio Co.,Ltd. ~220V/50Hz SELF200W 1.Data exchange interface (DATA) It is used to connect the device to functional module extension box. 2.Speaker 3.Ventilation Window Please do NOT place this device against walls and do NOT block the ventilation port. - Page 11 Network Address System in the device. Please eliminate the fault before replacing the fuse. 5.Power input plug of the local device The power source for this device is AC220V (±10%), please make sure the voltage of power source to the device conforms to required voltage.
-
Page 12: Functional Modules Description
Network Address System 2. Functional Modules Description 2.1 Phone paging module Phone paging module is a TCP/IP based digital PSNT analog switch from analog phone input to digital transmission. An analog phone cam be transferred to the PA system via a local phone port, to realize seamless combination with traditional internal communication systems. - Page 13 Network Address System Customize IP interface. 2.1.1 Installation of phone paging module The phone paging module can be installed on the extension card slot of the network PA Host with 2 screws. 2.1.2 Settings of phone paging module on the host To set the phone paging module in network PA host, first install and connect the module, and then modify the IP address of the module to be in the same network segment as the host (see 5.8.2 Equipment Maintenance).
-
Page 14: Four-Channel Audio Input Module
Network Address System 2.2 Four-channel audio input module Four-channel audio input module is a TCP/IP based full-digital analog-to-digital signal processor. Local programs, background music and internal voice signals can be transferred to this PA system via the local audio input port, realizing seamless combination with traditional internal communication systems and intelligent control, without needs for local operations. - Page 15 Network Address System There are 4 audio channels from right to left, for connection to other audio source devices (such as DVD player) 5. DIP switch When the parameters of this module cannot be found, such as IP is not clear, pull down one of the four dial keys, the indicator will be on, and the local parameters will recover the following specific parameters: IP:192.168.18.2 GATE:192.168.18.1...
-
Page 16: Monitor Module
Network Address System 2.3 Monitor Module Amplifier Monitor Device OUT+ OUT- Setup AMP VOL Net Setup Phone utput LINE OUT LINE IN MIC IN 1. Network indicating LED When this system is offline, the LED is in green color, and it turns red when network connection to the controller is re-established. - Page 17 Network Address System The indicator is on when the user uses DIP switch to modify IP address. Features: Network monitoring function Monitor terminal output sound Monitor the terminal environmental sound 1 line input and output, 1 line MIC input ...
-
Page 18: Hard Disk Module
Network Address System 2.4 Hard disk module H a rd D is k R e c o rd in g M a n g e m e n t D e v ic e U S B D is k P o w e r L E D 1. - Page 19 Network Address System 4. DIP indicator The indicator is on when the user uses DIP switch to modify IP address. Features: Smart power management function Host switch and power management function Indicating function of alarming, fault and the other emergencies output ...
-
Page 20: Stand-By Module For Power Extension
Network Address System 2.6 Stand-by module for power extension CH4 (2A) CH3(2A) CH2(2A) CH1(2A) Power OUTLET -220V /50Hz/8A Power Slave -220V/50Hz/10A INPUT Setup Setup 1. Setup indicator When the parameters of this module cannot be found, such as IP is not clear, pull down the Mode key and this indicator will be on. - Page 21 Network Address System DIP switch, the indicator will stop flashing and the modified IP parameters will be effective. 5. Network indicator When this system is offline, the LED is in green color, and it turns red when network connection to the controller is re-established.
-
Page 22: Ethernet Switches Module
Network Address System 2.7 Ethernet switches module Power indicator When the power is connected, the indicator is always on. PC Network indicator When the internal main board of host connect the switch data exchange card normally, the indicator light is always on or flashing. -
Page 23: 32-Channel Fire Linkage Network Module
Once receiving fire alarm signal form fire center, it will automatically activate the corresponding working area of DSPPA networked PA system to force the insertion of emergency broadcast status There are 32 fire trigger channels for each machine, setting through the host, the alarm zone of each channel can be combined randomly ... - Page 24 Network Address System conflicts will occur. Check: Line detection switch. This machine has line fault detection function of 32 channel. Pull the switch down to start the line detection. (Set the independent channel by referring to “Configuration of fire detection function” on item 2.8.4).
- Page 25 Network Address System 2.8.3. Operation of this module on the host: When the 32 channel fire linkage network module is added to the network public address system, first install and connect the module well, and then modify the IP address of the module to be in the same network segment as the host (refer to 5.8.2 equipment maintenance below);...
- Page 26 Network Address System 4. Click to “confirm the modification” to open the function of line fault detection in the corresponding channel 5. To extend 32 channel fire linkage module, set the corresponding IP address on the host for the module after finishing the installment and connection of the module.
-
Page 27: System Connection Description
Network Address System 3. System connection description 3.1 Basic system Connection Diagram TUNER Recorder MODEL: CM10 MIC ON DOWN CHIME MIC Other resources NETWORK PUBLIC ADDRESS CENTRE Remote PC Monitoring Paging station COMPACT DISC DRIVER FULL ALARMING EMC MIC POWER Remote Paging Selector PA Host ∞... - Page 28 Refer to the following picture for common network cables and ports used in Ethernet: (taking 100Mb Ethernet as an example. The picture is only for reference and DSPPA will not provide any network equipment. If required, please consult your network equipment supplier.)
-
Page 29: Main Functions Of Basic System
"Full Zone Alarm" or "Selected Zone Alarm" button, to deliver preset alarm and to manually deliver disaster warnings; c. Inner CD (INNER CD) and inner DSPPA special audio source (DSPPA SOURCE): They are for use as background music. -
Page 30: Typical System Connection Diagram
Network Address System 3.3. Typical System Connection Diagram TUNER Remote paging mobile phone Recorder MODEL: CM10 MIC ON DOWN CHIME MIC Other resources NETWORK PUBLIC ADDRESS CENTRE Monitoring Remote control PC COMPACT DISC DRIVER POWER FULL ALARMING EMC MIC Paging station PA Host Remote Paging Selector ∞... -
Page 31: Main Functions Of Typical Systems
Network Address System In order to improve the system reliability, a backup device is configured in the PA controller, which may be automatically switched between the master and backup devices. During system operation, if any failure occurs to the PA system, it will automatically switch to the backup device without interrupting system operation. All peripheral devices of the PA controller are connected to the master/backup switcher. -
Page 32: Operations And Settings
Network Address System 4. Operations and Settings 4.1. System start-up procedures As described in introduction to front panel of the network public address Host, a user should power on the system by using a special key and by turning clockwise. The Power LED is yellow and flickers in a while after it is powered on. -
Page 33: View System Operating Status
Network Address System 4.2 View System Operating Status 4.2.1 View Zone Status As shown in Fig. (2), the title of each zone is shown on topside of each zone (users can edit the titles), in terms of zone status, blue color indicates that the terminal is currently online while gray color indicates that such terminal is currently offline. -
Page 34: Designate Program For A Zone
Network Address System 4.3. Designate program for a zone When a program is played on a zone, the programs should be copied to the system and grouped. The operation is described in details in the section of "Source Set" of "System Setting Interface". Programs designated for a zone include background music, alarm, emergency broadcasting, chime inserted and paging, etc. - Page 35 Network Address System Major operating items on main interface Edit program groups: In Source Selection column, select “USB songs” Program, insert the “USB”, it shows “USB ready”, and copy the songs to the host, as shown in figure (5): Step 1: Select the songs you want to copy, select host music catalog type; Step2: Click button, and copy successfully.
- Page 36 Network Address System 4.3.2 Chime Select the terminal zone to play the chime, click “Chime” to play it, click “Stop” to stop the playing of the chime. As shown in figure (6) figure(6) 4.3.3 Paging from host to zones When the host pages a zone, the user should firstly insert a microphone into "EMC MIC" jack and turn on the microphone, and then touch the zone to be paged.
- Page 37 Network Address System 4.3.4 Alarm Before manual alarm operation, the user should touch the "Set" button on the right corner of the main interface to enter system settings interface. In the "source management" set the alarm sound. If don't set, the alarm will set with the default settings.
- Page 38 Network Address System figure (9) figure (10) 4.3.6 Play the built-in CD Before playing a CD in a specific zone, the user needs to insert the CD into a CD drive. To play the CD, the user should firstly select "Internal Source" from the audio source list and then touch a Network Public Address System Network Public Address System...
- Page 39 Network Address System program in the list.Then the user should touch a zone where the CD is to be played, to designate the CD to such selected zone. And then touch "Play" button to start playing. as shown in figure (11): figure (11) 4.3.7 Adjust the zone volume To adjust the volume, select the zone firstly or select "all zone"...
- Page 40 Network Address System slide pusher to adjust the zone volume figure (12) 4.3.8 Timing Program Setup Set timing point: Time point programming is the key to unattended operation of the system. The user can touch "Timing task" on main interface to enter the "Time Program Setup" interface as shown in fig (13) Edit timing point: The steps to edit the timing point are as follows:...
- Page 41 Network Address System Fig. (13) Fig. (14) Set to “By time”: 1.Name the timing point; Network Public Address System Network Public Address System...
- Page 42 Network Address System 2.Select the timing point mode with “By time”; 3.Set the start time and duration; 4.Click the “Next step” to enter the Edit audio interface 5. Select timing type, “common type” or “Insert-cut type”; Note: “Insert-cut type” can interrupt the “common type”...
- Page 43 Network Address System Fig. (15) Special timing point: As shown in figure (16) Set to “special timing point”: 1. Name the timing point; 2. Select the timing point mode with “ special timing point” 3. Set start date and end date for the task 4....
- Page 44 Network Address System Fig (16) Timing point operation column Add function: Add a new timing point; Modify function: Select the timing point to be modified, click “Modify” Delete function: Select the timing point to delete, click “delete”, delete the undesired timing point Copy function: Select the timing point to copy, click “copy”, copy the timing point Search function: Click “search”, it will appear a column of timing point search, input the name of timing point can search the one of the timing point quickly.
- Page 45 Network Address System Fig (17) 4.3.9 Save or call a timing plan "Project Setup" is to save a programmed timetable in the system as a plan for future use. There may be more than one time plans in the system. In schools, if the timetable of an odd number week is different from that in an even number week, then two plans may be made, which can be used in turn.
- Page 46 Network Address System Fig (19) 4.3.10 View timing information Touch the "Today" button in the column of timing, to enter timing points viewing interface, as shown in Fig. (20). On this interface, the user can view all timing points and information of each timing point, including the execution of each timing point.
- Page 47 Network Address System Fig (21) 4.3.11 Preview of programs To preview programs from a certain source, the user should select a program from the list of audio sources, and then touch "Listen" button in "Vol for Zone and listening" column to preview such selected program. The user can touch "Stop"...
- Page 48 Network Address System Fig (22) Output monitor: Through the output monitor, the users know the working status of the terminal clearly The monitoring should be idle condition, the monitored devices should be working status and then select the terminal device to monitor. Tips: Only one zone can be monitored at a time as shown in Fig.
- Page 49 Network Address System Current broadcast status, select the zone to be monitored, and then click “Live monitor” to monitor the playing status of corresponding zone. Tips: Only one zone can be monitored at a time. as shown in Fig. (24). Fig (24) 4.3.13 Shortcut key 1, Shortcut key 2 Click “Shortcut key settings”...
- Page 50 Network Address System Fig. (26) 4.3.15 Broadcast priority When background music is played in a zone, sometimes paging, alarm and phone call signals may break in. On basis of actual needs, the signal priority is set as follows by default: Local device paging →...
-
Page 51: System Settings
Network Address System 5. System settings The user should touch the "Set" button on the right corner of the main interface to enter system settings interface. The interface is as shown in Fig (28). In a network public address system, all settings should be made via this window. Some of the functions on this interface requiring entering a sub-menu, including timing programming, audio source management, zone setting, extension module and phone settings;... - Page 52 Network Address System Fig (29) Device timekeeping, Host timekeeping, Language setting and Transfer server setting Device timekeeping: Click the gray inverted triangle icon, select the checking time of device, and range from 1h-24h Language setting: Select the language type in the language settings column Host timekeeping:...
- Page 53 Network Address System Other settings Shortcut key settings: Find the “Shortcut key settings” on “ Other settings” column of “general settings” interface, lick “Shortcut key settings” to enter the operation interface, as shown in Fig (30) 1. Select “Shortcut key 1”or “Shortcut key 2”, click modify function, it will appear “Shortcut key editor” interface, as shown in Fig (31) 2.
- Page 54 Network Address System Monitor Setting: Select a device number as a monitor device, as shown in Fig (32) Fig (32) Help: Click “Help” to scan the help documents, users can click the help document to guide the operation when do not know how to operate.
- Page 55 Network Address System Register: Click “register”; input the registration code, as shown in the Fig (33): Fig (33) Exit: Click “Exit”, click “ok “to close the server, as shown in the Fig (34) Fig (34) Network Public Address System Network Public Address System...
-
Page 56: Device Management
Network Address System 5.2. Device management 5.2.1 Device information “Delete” function: Select the device to delete, click “delete”, as shown in the Fig (35): Fig (35) “Classification display” function: Click “Classification display” to enter the device searching interface, and classify the type of device through this function. - Page 57 Network Address System Device positioning function: Input the device number can position the sorting position of the device directly, and view the device status as shown in the Fig (36) Fig (37) “Edit” function: Modify the name of terminal through this function, data transmission mode can be selected for unicast or multicast, select the transfer server is closed or open, it also can adjust the play volume, paging volume, alarm volume, as shown in the Fig (38) Fig (38)
- Page 58 Network Address System Set the “Batch device selection” first, select the batch device number, click “ Custom device number area” and select the type of device on drop-down menu, or input the initial device number and end device number; Then set “Data transmission mode”, “Transfer server”, “Volume control”...
- Page 59 Network Address System 5.2.3 Display Device “Device displayed” including these device as follows Fig (41), device information can be seen at the host interface, as shown in the Fig. (42) Fig (41) Fig (42) “Device not displayed” including those devices in the following Fig (43), device information can not be seen at the host interface as shown in the Fig (44) Network Public Address System Network Public Address System...
-
Page 60: Audio Sources Management
Network Address System Fig (43) Fig (44) 5.2.4 Device parameters On Terminal forced insertion output(DC-24V)/(SC-short circuit), tick the corresponding function, the output terminal is play the program, “ Terminal forced insertion output(DC-24V)/(SC-short circuit)”output terminal trigger is open, set delay time, such as, set it as “20 second”. When the terminal stop playing the corresponding program, it will close the terminal forced insertion output (DC-24V)/(SC-short circuit) in 20 second delay as shown in the Fig (45). - Page 61 Network Address System sound setting, chime setting, sound card configuration and so on. 5.3.1 Play list Create a new list: Click “create”, input the list name, click “ok” to create the new list as shown in the Fig. (46) Fig. (46) Add songs: Select a list, click “add songs”...
- Page 62 Network Address System in the Fig. (48) Delete catalog: Choose a catalog list, click “delete” Modify name: Click “modify name” to modify the catalog name Delete songs: “Included music” column on the right side, select the songs need to delete, and click “delete songs” to delete.
- Page 63 Network Address System 5.3.3 USB songs Download the songs to USB, and then inert the USB, when the device shows “USB ready”, select the host music catalog, click to copy the songs to host as shown in the Fig.50 Fig. (50) 5.3.4 Program recording Click “...
- Page 64 Network Address System Fig. (51) 5.3.5 Alarm sound settings Click “audio sources management” will appear “audio source” dialog column, select “alarm sound setting”, and choose “alarm sound” on songs catalog. Then choose the song for alarming, if the users do not set it, the sound will be default alarm sound as shown in the Fig.52 Fig.
- Page 65 Network Address System 5.3.6 Chime Settings Operation refers to “Chime settings”, as shown in the Fig.53 Fig. (53) 5.3.7 Sound card settings Fig.(54) Network Public Address System Network Public Address System...
-
Page 66: User Management
Network Address System 5.4. User management 5.4.1 Create a new user Click “Create a new user”, it will appear “Create a new user” dialog column, input the user name and password, click “save” to create a new user account, as shown in the Fig.55 Fig. -
Page 67: Priority Settings
Network Address System 5.4.3 Delete a user Select an unnecessary account, click “delete a user” and then click “ok” to delete as shown in the Fig.57 Fig. (57) 5.5 Priority settings The default priority setting as shown in the Fig.58 Notes: The priority is reduced from 1-7 level. -
Page 68: Network Settings
Network Address System 5.6 Network settings 5.6.1 IP management “Add IP”: Click “Add IP”, it will appear “Add IP” dialog column, input the IP segment of terminal. For example, input 192.168.20.250, click “ok” to add the terminal segment of the IP 192.168.20.250 as shown in the fig.59 Fig. -
Page 69: Log Management
Network Address System 5.7 Log management 5.7.1 Server log Select “The type of log” and “Sub-type”, choose searching the time range:” start time” and “end time”, click “search” and click “Drive”, as shown in the fig.61 Fig. (61) 5.7.2 Paging station log Save the paging station log to server: When the user tick “Save the paging station log to server”, “Log saving catalog”... - Page 70 Network Address System Log saving catalog: If the user do not tick “Save the paging station log to server”, they can choose log saving catalog. Click , and select the saving routine catalog as shown in the fig.63 Fig. (63) 5.7.3 Device log: Choose the type of log, select the start time and end time, and click “Search”...
-
Page 71: System Maintenance
Network Address System 5.8 System maintenance 5.8.1 Intelligent paging station Click “paging station” and tick “upgrade or not?”, and then select “Choose” to upgrade the program, and then input the terminal IP number need to upgrade, click “upgrade” as shown in the fig.65 Fig. - Page 72 Network Address System Upgrade: Select the “ Automatic search” or “ Specify IP”,click “search”, it will show the IP terminal, and select one of it, Click “Open” on the back of “ File routine”, select upgrade program file and click “Upgrade” as shown in the fig.67;...
- Page 73 Network Address System Safety Precautions 1. Safety Precautions Please do NOT connect this device to the power source, before the system is correctly wired. It is important to ensure that input voltage to the device is the same as required voltage of the device, ...
-
Page 74: Packing List
Network Address System Packing List Item General purpose infrared remote controller MAG6182II User Manual Warranty card Quality Certificate White gasket Audio cable with RCA plug 3m network cable 5×19 semi-sunk cross head wire Audio adapter International standard MP-P power cable 10P Green Plug 2.5MM... -
Page 75: Specifications
Network Address System Specifications The performance specifications are subject to changes without further notification. Model MAG6182II Operational system Above WIN7 Intel(R) Core(TM)i5-5200U Memory Hard disk capacity 120G solid state drives+500G mechanical hard disk Audio source format Play stream 120k-320K Operational system... - Page 76 Guangzhou DSPPA Audio Co., Ltd Network Public Address System Network Public Address System...
Need help?
Do you have a question about the MAG6182II and is the answer not in the manual?
Questions and answers