
Related Manuals for Teknim PARS Series


Summary of Contents for Teknim PARS Series
- Page 1 TSP-5314 / TSP-5324 / TSP-5208 INSTALLATION AND PROGRAMMING MANUAL PARS SERIES Intruder Alarm System V1.2 Revision Date: 26.12.2019...
-
Page 2: Table Of Contents
Extra Settings ............................37 7.5.5 Response Time ............................38 7.5.6 Zone Names ............................... 39 KEYPAD SETTINGS ............................39 7.6.1 Keypad Option ............................39 7.6.2 Keypad Partitions ............................ 40 TEKNİM PARS SERIES INTRUDER ALARM SYSTEM INSTALLATION AND PROGRAMMING MANUAL 1 / 81... - Page 3 13.3 PARTITIONS AND ARROW KEYS........................72 13.4 KEYPAD ................................73 13.5 KEYPAD NOTIFICATIONS ..........................73 13.5.1 KEYPAD SOUND NOTIFICATIONS ......................73 13.5.2 KEYPAD LED NOTIFICATIONS ........................ 73 FAQs ................................74 TEKNİM PARS SERIES INTRUDER ALARM SYSTEM INSTALLATION AND PROGRAMMING MANUAL 2 / 81...
-
Page 4: List Of Figures
Figure 22: PGM Connection for Smoke Detector ....................64 Figure 23: PGM Connection for Fire Siren ......................... 65 Figure 24: TSK-5718 LED Keypad ..........................71 Figure 25: TSK-5710 LCD Keypad ..........................71 TEKNİM PARS SERIES INTRUDER ALARM SYSTEM INSTALLATION AND PROGRAMMING MANUAL 3 / 81... -
Page 5: Important Warnings
FAULT CONDITIONS REQUIRING SERVICE: In the event of any malfunction or in the following cases, contact your authorized service or dealer. TEKNİM PARS SERIES INTRUDER ALARM SYSTEM INSTALLATION AND PROGRAMMING MANUAL 4 / 81... -
Page 6: Introduction
Do not use any chemicals. 4. INTRODUCTION Teknim Pars series alarm panels are user-friendly and capable of responding to many requests with 4+4 / 8+8 zone options and built-in PSTN / GSM-GPRS options. It’s offers easy of use for end users and allows the installer to make easily commission the required features according to the user's demand. - Page 7 ✓ PGM outputs can be controlled by mobile application (TSP-5324 or With TXM-5272 Module) Easy Management; ✓ Users codes canbe limit by date or entery-exit time. ✓ Users authorized partitions can be restricted. ✓ Keypads can be restricted for users. TEKNİM PARS SERIES INTRUDER ALARM SYSTEM INSTALLATION AND PROGRAMMING MANUAL 6 / 81...
-
Page 8: System Features
Special Keys Panic, Fire, Medical Panic, Fire, Medical Keypad Backlit LED Indicator Event Memory Chime Dimensions W: 171,5mm H: 120mm D: 20/36mm W: 171,5mm H: 120mm D: 20/36mm TEKNİM PARS SERIES INTRUDER ALARM SYSTEM INSTALLATION AND PROGRAMMING MANUAL 7 / 81... - Page 9 ✓ Arm – Disarm by Keyfob ✓ Arm – Disarm by Phone ✓ Arm – Disarm by Mobile Application (TSP-5324 or with TXM-5272 Module) ✓ Panic, Fire and Medical Alarm by Keypad TEKNİM PARS SERIES INTRUDER ALARM SYSTEM INSTALLATION AND PROGRAMMING MANUAL 8 / 81...
-
Page 10: Installation
Important: This device must be installed in a place free from dust and moisture. Suitable for indoor installation. WARNING: Do not energize the panel until the installation is completed and all connections are correct. TEKNİM PARS SERIES INTRUDER ALARM SYSTEM INSTALLATION AND PROGRAMMING MANUAL 9 / 81... -
Page 11: Panel Connection Diagram
Unconscious interventions result electrical current exposure and malfunctions of the panel board. Figure 2: TSP-5314 Alarm Control Panel Connections TEKNİM PARS SERIES INTRUDER ALARM SYSTEM INSTALLATION AND PROGRAMMING MANUAL 10 / 81... - Page 12 Unconscious interventions result electrical current exposure and malfunctions of the panel board. Figure 3: TSP-5324 Alarm Control Panel Connections TEKNİM PARS SERIES INTRUDER ALARM SYSTEM INSTALLATION AND PROGRAMMING MANUAL 11 / 81...
- Page 13 Unconscious interventions result electrical current exposure and malfunctions of the panel board. Figure 4: TSP-5208 Alarm Control Panel Connections TEKNİM PARS SERIES INTRUDER ALARM SYSTEM INSTALLATION AND PROGRAMMING MANUAL 12 / 81...
- Page 14 Figure 5: TSP-5208 Alarm Control Panel Connections TEKNİM PARS SERIES INTRUDER ALARM SYSTEM INSTALLATION AND PROGRAMMING MANUAL 13 / 81...
-
Page 15: Outdoor Siren Connection
Figure 7: Detector Connections Figure 7 shows an example of connection of PIR detector, Smoke Detector, Gas Detector and magnetic contact to the panel without end-of-line resistor connection type. TEKNİM PARS SERIES INTRUDER ALARM SYSTEM INSTALLATION AND PROGRAMMING MANUAL 14 / 81... -
Page 16: End Of Line Resistant Connection
Important: In order for the resistor connections to work properly, the resistors must be installed on the detector side. Otherwise, the specified features will not work properly. TEKNİM PARS SERIES INTRUDER ALARM SYSTEM INSTALLATION AND PROGRAMMING MANUAL 15 / 81... -
Page 17: Zone Doubling
!!! WARNING: When connecting the keypad or replacing the keypad, make sure that the panel is de-energized and terminals A, B do not come in contact with 12V. Otherwise, the panel may malfunction. TEKNİM PARS SERIES INTRUDER ALARM SYSTEM INSTALLATION AND PROGRAMMING MANUAL 16 / 81... -
Page 18: Communication Module Connections
PS: If the ADSL line is used, the telephone line connection of the panel must be made through the phone line output of the SPLITTER device. Otherwise, the phone call feature of the panel may be adversely affected. TEKNİM PARS SERIES INTRUDER ALARM SYSTEM INSTALLATION AND PROGRAMMING MANUAL 17 / 81... -
Page 19: Txm-5270 Pstn Module Connection
Ps: GSM / GPRS Module is fixed on TSP-5324 Alarm panel. Only TXM-5270 PSTN Module can be added to this panel. Antenna Antenna Figure 16: TSP-5314 and TSP-5208 Control Panel TXM-5272 Connection TEKNİM PARS SERIES INTRUDER ALARM SYSTEM INSTALLATION AND PROGRAMMING MANUAL 18 / 81... -
Page 20: Pgm Connection
PGM CONNECTION Teknim PARS series panels have 1 PGM output. This output can be used and programmed for a variety of purposes, such as operating any device in the form of On - Off or resetting via the keypad in case of smoke detectors connected to the system. -
Page 21: Power Connection
APPLIANCES grounding of the devices will increase EMC immunity and ensure better health in the long run. !!! Electrical accidents and problems with the general operation of the control panel may occur after starting the device without connecting the ground. !!! TEKNİM PARS SERIES INTRUDER ALARM SYSTEM INSTALLATION AND PROGRAMMING MANUAL 20 / 81... -
Page 22: Programramming
“Master Program” <MaP> It provides access to the main user settings menus such as date, time, phone numbers and user codes. Login with master code. Program addresses of Teknim PARS series panels are grouped according to their subjects. Addresses are a four-digit number and the first two digits indicate this topic. The last two digits include zone no, user no, keypad no. -
Page 23: Entering-Exiting Installer Program And Master Program
• LCD Keypad; [Basic Settings √ OK] → [Time/Date Settings √ OK] → [DD:MM:YY] → [√ OK] eg. To set date 10.11.2019 with LED Keypad; [01] [02] [10] [11] [19] [√ OK] TEKNİM PARS SERIES INTRUDER ALARM SYSTEM INSTALLATION AND PROGRAMMING MANUAL 22 / 81... -
Page 24: Entrance Delays
• LCD Keypad; [Basic Settings √ OK]→[4- Part Exit Delay √ OK]→[SS]→[√ OK] Ör: To set Exit Delay for Partition A as 15sec. ; [03] [01] [15] [√ OK] TEKNİM PARS SERIES INTRUDER ALARM SYSTEM INSTALLATION AND PROGRAMMING MANUAL 23 / 81... -
Page 25: Cms Account No
[05] [01] [X] [0 Long] [02161234567] [√ OK] PS2: To erase any CMS phone number, get to related address and press-hold [B] Key. eg. [05] [01] [B Long] [√ OK] TEKNİM PARS SERIES INTRUDER ALARM SYSTEM INSTALLATION AND PROGRAMMING MANUAL 24 / 81... -
Page 26: User Phone Numbers
9. User Code: [07] [09] → [XXXX] → [√ OK] 10. User Code: [07] [10] → [XXXX] → [√ OK] 11. Threat (Duress) Code: [07] [11] → [XXXX] → [√ OK] TEKNİM PARS SERIES INTRUDER ALARM SYSTEM INSTALLATION AND PROGRAMMING MANUAL 25 / 81... -
Page 27: Panel Settings
Arm – Disarm From Different Keypad: When this option is active, users can use the keypads that are authorized in other partition. When it is off, the keypad cannot process any partition which is not belong to. TEKNİM PARS SERIES INTRUDER ALARM SYSTEM INSTALLATION AND PROGRAMMING MANUAL 26 / 81... - Page 28 • LED Keypad; [10] [04] → [1-2] → [√ OK] • LCD Keypad; [Panel Settings √ OK] → [General Settings √ OK] → [Reset Permission 1-2] → [√ OK] TEKNİM PARS SERIES INTRUDER ALARM SYSTEM INSTALLATION AND PROGRAMMING MANUAL 27 / 81...
-
Page 29: Siren Settings
You can set which partitions will be Arm automatically. • LED Keypad; [12] [01] → [1-2-3-4] → [√ OK] • LCD Keypad; [Panel Settings √ OK]→[Auto Arm/Disarm √ OK]→[Auto Arm Partitions A-B-C-D]→[√ OK] TEKNİM PARS SERIES INTRUDER ALARM SYSTEM INSTALLATION AND PROGRAMMING MANUAL 28 / 81... - Page 30 You can set which partitions will be arm when there is no movement in it. • LED Keypad; [12] [07] → [1-2-3-4] → [√ OK] • LCD Keypad; [Panel Settings √ OK]→[ Auto Arm/Disarm √ OK]→[Inactivity Arm Partitions A-B-C-D]→[√ OK] TEKNİM PARS SERIES INTRUDER ALARM SYSTEM INSTALLATION AND PROGRAMMING MANUAL 29 / 81...
-
Page 31: Pgm Settings
Value partition(s). To select the relevant partition(s), the values in the table are added together and Siren entered. eg. A ve C bölümleri için 1+4=5 değeri girilir. TEKNİM PARS SERIES INTRUDER ALARM SYSTEM INSTALLATION AND PROGRAMMING MANUAL 30 / 81... - Page 32 The value specified for the fire alarm (4) and the value specified for the medical alarm (32) are added and the value found (36) is entered. [13] [02] → [36] → [√ OK] TEKNİM PARS SERIES INTRUDER ALARM SYSTEM INSTALLATION AND PROGRAMMING MANUAL 31 / 81...
-
Page 33: Timer Settings
• LED Keypad; [14] [05] → [1234567] → [√ OK] • LCD Keypad; [Panel Settings √ OK]→[Timer Settings √ OK] → [Timer 2 Days 1234567] → [√ OK] TEKNİM PARS SERIES INTRUDER ALARM SYSTEM INSTALLATION AND PROGRAMMING MANUAL 32 / 81... -
Page 34: Remote Access
[Panel Settings √ OK] → [Panel Info √ Ok] → [SW Version] → [√ OK] [Panel Settings √ OK] → [Panel Info √ Ok] → [HW Version] → [√ OK] TEKNİM PARS SERIES INTRUDER ALARM SYSTEM INSTALLATION AND PROGRAMMING MANUAL 33 / 81... -
Page 35: Zone Settings
PS 3: Zone doubling is not available on systems with additional zone cards. Keypad Zone Keypad zone connection is normally closed. If Keypad zone is to be used, this zone must be opened in Connection Type settings. TEKNİM PARS SERIES INTRUDER ALARM SYSTEM INSTALLATION AND PROGRAMMING MANUAL 34 / 81... -
Page 36: Partition
[Zone Settings √ OK] → [Partition √ OK] → [7- Zone Partition A-B-C-D] → [√ OK] [Zone Settings √ OK] → [Partition √ OK] → [8- Zone Partition A-B-C-D] → [√ OK] TEKNİM PARS SERIES INTRUDER ALARM SYSTEM INSTALLATION AND PROGRAMMING MANUAL 35 / 81... -
Page 37: Zon Type
Custom armed or not. Sends any information to CMS which user selected. Keyswitch System will be Armed if this zone goes NC and Disarmed if goes NO. TEKNİM PARS SERIES INTRUDER ALARM SYSTEM INSTALLATION AND PROGRAMMING MANUAL 36 / 81... -
Page 38: Extra Settings
If there will be no second trigger in the time period of cross zone, panel gives Cross Zone Fault. TEKNİM PARS SERIES INTRUDER ALARM SYSTEM INSTALLATION AND PROGRAMMING MANUAL 37 / 81... -
Page 39: Response Time
[Zone Settings √ OK]→[Response Time √ OK]→[6- Zone Delay XX]→[√ OK] [Zone Settings √ OK]→[Response Time √ OK]→[7- Zone Delay XX]→[√ OK] [Zone Settings √ OK]→[Response Time √ OK]→[8- Zone Delay XX]→[√ OK] TEKNİM PARS SERIES INTRUDER ALARM SYSTEM INSTALLATION AND PROGRAMMING MANUAL 38 / 81... -
Page 40: Zone Names
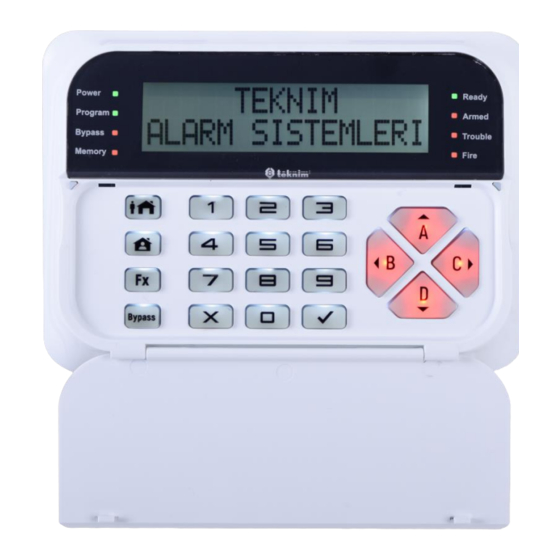
Figure 20: Numeric Keypad KEYPAD SETTINGS This is the section where all the Keypad settings are made. Pars series Alarm control panels suppors 4 keypad connection at the same time. All settings should be made for all 4 keypads separately. All keypads should be giving addressed first. -
Page 41: Keypad Partitions
[Keypad Settings √ OK]→[Keypad Customize √ OK]→[2- Chime ON 9-16 Zones 1-2-3-4-5-6-7-8]→[√ OK] [Keypad Settings √ OK]→[Keypad Customize √ OK]→[3- Chime ON 17-24 Zones 1-2-3-4-5-6-7-8]→[√ OK] [Keypad Settings √ OK]→[Keypad Customize √ OK]→[4- Chime ON 25-32 Zones 1-2-3-4-5-6-7-8]→[√ OK] TEKNİM PARS SERIES INTRUDER ALARM SYSTEM INSTALLATION AND PROGRAMMING MANUAL 40 / 81... - Page 42 LED ON LED OFF LED Keypad; [32] [012] → [1-2-3-4-5-6] → [√ OK] • LCD Keypad; [Keypad Settings √ OK]→[ Keypad Customize √ OK]→[12- Sound Option 1-2-3-4-5-6]→[√ OK] TEKNİM PARS SERIES INTRUDER ALARM SYSTEM INSTALLATION AND PROGRAMMING MANUAL 41 / 81...
-
Page 43: User Settings
[User Settings √ OK]→[Start Time √ OK]→[8- Start Time HH:MM]→[√ OK] [User Settings √ OK]→[Start Time √ OK]→[9- Start Time HH:MM]→[√ OK] [User Settings √ OK]→[Start Time √ OK]→[10- Start Time HH:MM]→[√ OK] TEKNİM PARS SERIES INTRUDER ALARM SYSTEM INSTALLATION AND PROGRAMMING MANUAL 42 / 81... -
Page 44: Finish Time
8. User - [42] [08] → [1-2-3-4-5-6-7] → [√ OK] 9. User - [42] [09] → [1-2-3-4-5-6-7] → [√ OK] 10. User - [42] [10] → [1-2-3-4-5-6-7] → [√ OK] TEKNİM PARS SERIES INTRUDER ALARM SYSTEM INSTALLATION AND PROGRAMMING MANUAL 43 / 81... -
Page 45: User Partitions
You can set which user codes will be authorized in which Keypads. 1. Option: 1. Keypad, 2. Option: 2. Keypad, 3. Option: 3. Keypad, 4. Option: 4. Keypad TEKNİM PARS SERIES INTRUDER ALARM SYSTEM INSTALLATION AND PROGRAMMING MANUAL 44 / 81... -
Page 46: User Limitations
8. User - [45] [08] → [1-2-3-4-5] → [√ OK] 9. User - [45] [09] → [1-2-3-4-5] → [√ OK] 10. User - [45] [10] → [1-2-3-4-5] → [√ OK] TEKNİM PARS SERIES INTRUDER ALARM SYSTEM INSTALLATION AND PROGRAMMING MANUAL 45 / 81... -
Page 47: Communicator Settings
This is where you set how often the test signal is sent to the CMS. Important: It is recommended to set this time to 24 Hours to avoid high invoice amounts when using a PSTN telephone line. TEKNİM PARS SERIES INTRUDER ALARM SYSTEM INSTALLATION AND PROGRAMMING MANUAL 46 / 81... - Page 48 1: CMS 1 – 2: CMS 2 • LED Keypad; [50] [09] → [1-2] → [√ OK] • LCD Keypad; [Communicator √ OK]→[General Settings √ OK]→[Partition A CMS 1-2]→[√ OK] TEKNİM PARS SERIES INTRUDER ALARM SYSTEM INSTALLATION AND PROGRAMMING MANUAL 47 / 81...
- Page 49 6 user numbers. • LED Keypad; [50] [14] → [1-2-3-4-5-6] → [√ OK] • LCD Keypad; [Communicator √ OK]→[General Settings √ OK]→[Part. B Phones 1-2-3-4-5-6]→[√ OK] TEKNİM PARS SERIES INTRUDER ALARM SYSTEM INSTALLATION AND PROGRAMMING MANUAL 48 / 81...
- Page 50 SMS total of 6 user numbers. • LED Keypad; [50] [19] → [1-2-3-4-5-6] → [√ OK] • LCD Keypad; [Communicator √ OK]→[General Settings √ OK]→[Part. C SMS 1-2-3-4-5-6]→[√ OK] TEKNİM PARS SERIES INTRUDER ALARM SYSTEM INSTALLATION AND PROGRAMMING MANUAL 49 / 81...
-
Page 51: Raport Masks
“Event Types and Addresses” table below. • LED Keypad; [51] [01] → [1-2-3-4-5-6] → [√ OK] • LCD Keypad; [Communicator √ OK]→[Report Masks √ Tamam]→[01- Intruder Alarm 1-2-3-4-5-6]→[√ OK] TEKNİM PARS SERIES INTRUDER ALARM SYSTEM INSTALLATION AND PROGRAMMING MANUAL 50 / 81... - Page 52 1-3-5-6 Line Intervention [51] [28] 1-3-5-6 PGM Opened [51] [29] 1-3-5-6 Custom Event [51] [30] 1-3-5-6 24 Hour Alarm [51] [31] 1-2-3-5-6 Factory Default [51] [32] 1-3-5-6 TEKNİM PARS SERIES INTRUDER ALARM SYSTEM INSTALLATION AND PROGRAMMING MANUAL 51 / 81...
-
Page 53: Modules
[61] [01] → [Chose] → [√ OK] • LCD Keypad; [Modules √ OK]→[Remote Module √ OK]→[Erase Remote]→[Select Unavailable]→[√ OK] PS: Selection is may done with right and left arrow keys (B-C). TEKNİM PARS SERIES INTRUDER ALARM SYSTEM INSTALLATION AND PROGRAMMING MANUAL 52 / 81... -
Page 54: Learn And Change The Keypad Address
[Press and Hold 6] → [Master Code XXXX] → [4- Keypad Address] → [√ OK] LED Keypad; Shown Keypad Address. [Press and Hold 6] → [Master Code XXXX] → [Press 4] TEKNİM PARS SERIES INTRUDER ALARM SYSTEM INSTALLATION AND PROGRAMMING MANUAL 53 / 81... -
Page 55: Programming Table
5. Option: Exit Delay Extension On/Off 6. Option: Double Hit On/Off 1. Option: PGM- NC/NO 1. NO 10 02 Output Polarization 4. Option: SRN- NC/NO (+/- Trigger) 2. NO TEKNİM PARS SERIES INTRUDER ALARM SYSTEM INSTALLATION AND PROGRAMMING MANUAL 54 / 81... - Page 56 8: Access Control 9: Timer Output 10: Random 11: ARM Indicator 12: Disarm Indicator 13: Toggle RC Button 14: Alarm Type 13 02 PGM Settings 0~255 Minute TEKNİM PARS SERIES INTRUDER ALARM SYSTEM INSTALLATION AND PROGRAMMING MANUAL 55 / 81...
- Page 57 2. Option: Partition B 21 07 3. Option: Partition C 21 08 4. Option: Partition D 01-Keypad Zone 29 02-Keypad Zone 30 03-Keypad Zone 31 04-Keypad Zone 32 TEKNİM PARS SERIES INTRUDER ALARM SYSTEM INSTALLATION AND PROGRAMMING MANUAL 56 / 81...
- Page 58 4. Option: Disarm Permission Enable/Disable 30 03 3. Keypad 5. Option: Programming Enable/Disable Others 30 04 4. Keypad 6. Option: Access Control Enable/Disable 2-3-4 7. Option: Keypad Tamper Enable/Disable TEKNİM PARS SERIES INTRUDER ALARM SYSTEM INSTALLATION AND PROGRAMMING MANUAL 57 / 81...
- Page 59 6. User Selected 5. Option: Friday 42 07 7. User 6. Option: Saturday 42 08 8. User 7. Option: Sunday 42 09 9. User 42 10 10. User TEKNİM PARS SERIES INTRUDER ALARM SYSTEM INSTALLATION AND PROGRAMMING MANUAL 58 / 81...
- Page 60 All Selected 50 15 Partition C Calls 4. Option: 4. User Phone 50 16 Partition D Calls 5. Option: 5. User Phone 6. Option: 6. User Phone TEKNİM PARS SERIES INTRUDER ALARM SYSTEM INSTALLATION AND PROGRAMMING MANUAL 59 / 81...
- Page 61 User 7 Remote Erase 61 08 User 8 Remote Erase 61 09 User 9 Remote Erase 61 10 User 10 Remote Erase 61 11 Master Remote Erase TEKNİM PARS SERIES INTRUDER ALARM SYSTEM INSTALLATION AND PROGRAMMING MANUAL 60 / 81...
-
Page 62: Return To Factory Settings
First, “Reset Panel Settings” option must be selected in the Installer Menu. If this permission is not turned on, reset cannot be performed. Before resetting the panel settings, “Reset Jumper” on the panel board must be short-circuited. See Figure 22. TEKNİM PARS SERIES INTRUDER ALARM SYSTEM INSTALLATION AND PROGRAMMING MANUAL 61 / 81... - Page 63 [10] [03] → [Press 2 to reset all Panel Settings] → [√ OK] • LCD Keypad; [Panel Settings √ OK]→[General Settings √ OK]→[Def. Set. Req. Press 2 to Reset all Panel Settings]→[√ OK] TEKNİM PARS SERIES INTRUDER ALARM SYSTEM INSTALLATION AND PROGRAMMING MANUAL 62 / 81...
-
Page 64: Tests
[Fx] [8] → [Code XXXX] → [3- Siren Test]→[√ OK]→[1] (1. Siren Test) [Fx] [8] → [Code XXXX] → [3- Siren Test]→[√ OK]→[2] (2. Siren Test) To exit test menu press [X] key. TEKNİM PARS SERIES INTRUDER ALARM SYSTEM INSTALLATION AND PROGRAMMING MANUAL 63 / 81... -
Page 65: Pgm Test
Detector”, the PGM output gives -12V. The time of the PGM output will interrupt the feed is set in the PGM Parameter section. Smoke Detector Detector Base Figure 22: PGM Connection for Smoke Detector TEKNİM PARS SERIES INTRUDER ALARM SYSTEM INSTALLATION AND PROGRAMMING MANUAL 64 / 81... -
Page 66: Fire Siren Connection With Pgm Output
[Panel Settings √ OK]→[PGM Settings √ OK]→[ Use PGM as “Fire Siren”]→[√ OK]→[√ Tamam] 11.3 PARTITION Pars series alarm panels can be used by creating a total of four (4) different partitions. Zones for each partition can be specified and alarm notifications from each partition can be forwarded to the related persons. -
Page 67: Hareketsi̇zli̇kte Otomati̇k Alarm Kurma
Hangi bölümlerin hareketsizlik durumunda otomatik kurulacağı aşağıdaki gibi seçilir. • LED Keypad; [12] [07] → [1-2-3-4] → [√ OK] • LCD Keypad; [Panel Settings √ OK]→[Auto Arm/Disarm √ OK]→[Inactivity Arm A-B-C-D]→[√ OK] TEKNİM PARS SERIES INTRUDER ALARM SYSTEM INSTALLATION AND PROGRAMMING MANUAL 66 / 81... -
Page 68: Arm / Disarm With Calender
Away Arming basically has the same function as the whole system arming. Away You can use the shortcut key to arm whole system (Away Arming) as well. TEKNİM PARS SERIES INTRUDER ALARM SYSTEM INSTALLATION AND PROGRAMMING MANUAL 67 / 81... -
Page 69: Reports
Indicates the bypassed zone(s) on the Keypad. • LCD Keypad; [Fx] [6] → [Master Code] → [5-Bypassed Zones]→ [√ OK] Indicates the bypassed zone(s) on the Keypad. TEKNİM PARS SERIES INTRUDER ALARM SYSTEM INSTALLATION AND PROGRAMMING MANUAL 68 / 81... - Page 70 1-2-3-4-5: Signal Level Between %50 - %62,5 1-2-3-4-5-6: Signal Level Between %62,5 - %75 1-2-3-4-5-6-7: Signal Level Between %75 - %87,5 1-2-3-4-5-6-7-8: Signal Level Between %87,5 - %100 TEKNİM PARS SERIES INTRUDER ALARM SYSTEM INSTALLATION AND PROGRAMMING MANUAL 69 / 81...
- Page 71 In this case, a longer antenna may be need to installed in the GSM module or the alarm panel may need to be installed in a more suitable location. TEKNİM PARS SERIES INTRUDER ALARM SYSTEM INSTALLATION AND PROGRAMMING MANUAL 70 / 81...
-
Page 72: Keypad Usage
This section describes the Keypad used for all functions of the alarm system and for panel programming. Teknim Pars serisies alarm systems supports totally 4 keypad connection. Information on how to make the keypad connections can be found in section 6.5 Keypad... -
Page 73: Status Led Indicators
Use as Direction Keys: You can use these keys in the form of directional keys when the alarm panel is in programming mode or when navigating Figure 29: Partition and through any menu. Arrow Keys TEKNİM PARS SERIES INTRUDER ALARM SYSTEM INSTALLATION AND PROGRAMMING MANUAL 72 / 81... -
Page 74: Keypad
LED and LCD keypads have status notification lights to indicate the current status of the system. What these notification lights mean is explained in section 13.1 Status LED Indicators. LCD Keypad can also display all information about the system in writing. TEKNİM PARS SERIES INTRUDER ALARM SYSTEM INSTALLATION AND PROGRAMMING MANUAL 73 / 81... -
Page 75: Faqs
If the GSM module does not have a simcard, it switches to the GSM-GPRS module, the signal emergency mode, connects to the nearest base station strength is visible. and accesses the signal level. TEKNİM PARS SERIES INTRUDER ALARM SYSTEM INSTALLATION AND PROGRAMMING MANUAL 74 / 81... - Page 76 Your CMS account number, port number, or IP address GSM/GPRS module. may be incorrect. iv. There may not be Teknim Receiver software in CMS attempting to establish a connection. TEKNİM PARS SERIES INTRUDER ALARM SYSTEM INSTALLATION AND PROGRAMMING MANUAL 75 / 81...
- Page 77 When the user code is deleted, When the user code is deleted, the remote control keyfob will the remote keyfob which is also automatically deleted. connected to the user code work? TEKNİM PARS SERIES INTRUDER ALARM SYSTEM INSTALLATION AND PROGRAMMING MANUAL 76 / 81...
- Page 78 I'm arming the system as Stay Mode. Panel functions do not work After firmware upgrade, the control panel settings return properly after firmware upgrade. to the factory defaults. TEKNİM PARS SERIES INTRUDER ALARM SYSTEM INSTALLATION AND PROGRAMMING MANUAL 77 / 81...
- Page 79 SMS sending. Try again when all calls and SMS are finished. v. There may be a open or improperly connected zone while you try arming. TEKNİM PARS SERIES INTRUDER ALARM SYSTEM INSTALLATION AND PROGRAMMING MANUAL 78 / 81...
- Page 80 NOTES; TEKNİM PARS SERIES INTRUDER ALARM SYSTEM INSTALLATION AND PROGRAMMING MANUAL 79 / 81...
- Page 81 Dudullu OSB 1. Cadde İsmet Tarman İş Merkezi No: 1 Kat: 2 No: 32 Ümraniye / İstanbul Telefon: +90 216 455 88 46 Faks: +90 216 455 99 06 www.bilgielektronik.com.tr www.teknim.com sales@bilgielektronik.com.tr TEKNİM PARS SERIES INTRUDER ALARM SYSTEM INSTALLATION AND PROGRAMMING MANUAL 80 / 81...
Need help?
Do you have a question about the PARS Series and is the answer not in the manual?
Questions and answers