Nibe S1155 Installer Manual
Ground source heat pump 1x230v
Hide thumbs
Also See for S1155:
- Installer manual (96 pages) ,
- User manual (20 pages) ,
- Safety information manual (12 pages)
Table of Contents
Advertisement
Advertisement
Table of Contents

Related Manuals for Nibe S1155


Summary of Contents for Nibe S1155
- Page 1 IHB EN 2001-1 INSTALLER MANUAL 531210 Ground source heat pump NIBE S1155 1x230V...
- Page 2 When there is new software to download, you This function page is only visible in installations with a can do it here (provided that S1155 is connected to my- water heater. Uplink).
-
Page 3: Table Of Contents
General Connections 13 Technical data Settings Dimensions and setting-out coordinates Electrical data 6 Commissioning and adjusting Technical specifications Preparations Energy labelling Filling and venting Start-up and inspection Item register Setting the heating curve Contact information NIBE S1155 Table of Contents... -
Page 4: Important Information
The serial number can be found at the bottom right on ures for implementation by specialists. S1155, in the display on the home screen "Product overview" and on the type plate (PZ1). The manual must be left with the customer. -
Page 5: Country Specific Information
Scheme. Visit centralheating.co.uk information. Warranty and insurance information Thank you for installing a new NIBE heat pump in your home. NIBE heat pumps are manufactured in Sweden to the very highest standard so we are pleased to offer our customers a comprehensive guarantee. -
Page 6: Inspection Of The Installation
Shut off valves Circulation pump setting Electricity Connections Main voltage Phase voltage Fuses heat pump Fuses property Outside sensor Room sensor Safety breaker Earth circuit-breaker Set emergency mode in menu 7.1.8.2 Miscellaneous Warranty Benchmark checklist Chapter 1 | Important information NIBE S1155... -
Page 7: Delivery And Handling
Approx. 50 mm free space is required on each side, to remove the side panels (see image). The panels do not need to be removed during service. All service on S1155 can be carried out from the front. Leave space between... -
Page 8: Supplied Components
6 kW 1 x G1 1 x G3/4 12 kW 1 x G1 1 x G1 1/4 LOCATION The kit of supplied items is placed in packaging on top of the heat pump. Chapter 2 | Delivery and handling NIBE S1155... - Page 9 Hook the other corner in place. REMOVE SIDE PANEL The side panels can be removed to facilitate the install- ation. Remove the screws from the upper and lower edges. Check the display is straight. Adjust if necessary. NIBE S1155 Chapter 2 | Delivery and handling...
- Page 10 Twist the panel slightly outwards. Move the panel outwards and backwards. Assembly takes place in the reverse order. Chapter 2 | Delivery and handling NIBE S1155...
-
Page 11: The Heat Pump Design
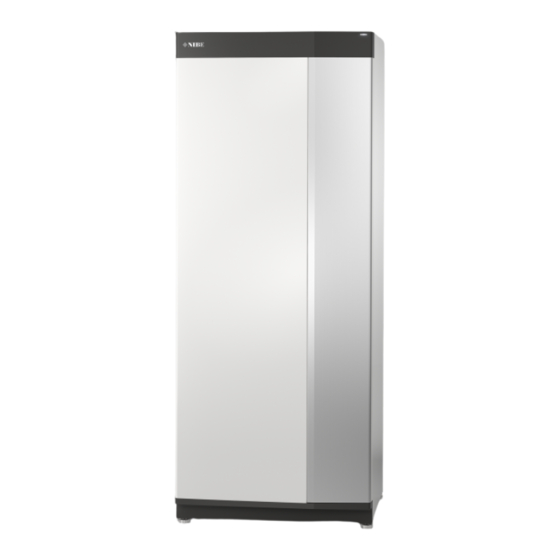
Miniature circuit breaker On/off button Network connection for myUplink MISCELLANEOUS Rating plate Identification plate, cooling module Cable gland Cable gland Cable gland, rear side, sensor Designations according to standard EN 81346-2. NIBE S1155 Chapter 3 | The heat pump design... -
Page 12: Distribution Boxes
Temperature sensor, brine in BT12 BT11 Temperature sensor, brine out BT12 Temperature sensor, condenser supply line BT14 Temperature sensor, hot gas BT10 BT15 Temperature sensor, fluid pipe BT17 Temperature sensor, suction gas BT11 Chapter 3 | The heat pump design NIBE S1155... - Page 13 ELECTRICAL COMPONENTS Input circuit board Capacitor EB10 Compressor heater QA40 Inverter Choke EMC-filter COOLING COMPONENTS Evaporator Condenser GQ10 Compressor Drying filter Expansion valve NIBE S1155 Chapter 3 | The heat pump design...
-
Page 14: Pipe Connections General
70 (65 °C with only There should not normally be any problem installing the compressor). S1155 in hard water areas, as the operating temperature S1155 is not equipped with external shut off valves; is 50-60°C. - Page 15 SYMBOL KEY SYSTEM DIAGRAM S1155 consists of heat pump, immersion heater, circu- Symbol Meaning lation pumps and control system. S1155 is connected Unit box to the brine and heating medium circuits. Shut-off valve In the heat pump evaporator, the brine (water mixed...
-
Page 16: Dimensions And Pipe Connections
NOTE Ensure that cleaning agent has been removed from the entire system before the anti-freeze is added. NIBE Energy Systems Limited recommends water treatments (supplied by e.g. Fernox and Sentinel) spe- cifically designed for heat pumps. SIDE CONNECTION It is possible to angle the brine connections, for connec- tion to the side instead of top connection. -
Page 17: Heating Medium Side
Cold and hot water CONNECTING THE HOT WATER HEATER NOTE -QZ20 If S1155 is not docked to a water heater or if it is to work with fixed condensing, the connec- tion for the water heater (XL9) must be plugged. -
Page 18: Docking Alternatives
7.1.2.8 "br pmp al set." must be changed to a suitable value to prevent freezing of the heat exchanger. FIXED CONDENSING If S1155 is to work towards a water heater with fixed -EP12 -EP12-AA25 condensing, you must connect external supply temper-... - Page 19 CONNECTING HOT WATER CIRCULATION Hot water circulation TWO OR MORE CLIMATE SYSTEMS A circulation pump can be controlled by S1155 to circu- In buildings with several climate systems that require late the hot water. The circulating water must have a...
-
Page 20: Electrical Connections
S1155 should be equipped with a separate one. and damage. • S1155 must be installed via an isolator switch. The cable area has to be dimensioned based on the fuse NOTE rating used. - Page 21 89 °C and it is reset manually. Resetting The temperature limiter (FQ10) can be accessed behind the front cover. Reset the temperature limiter by pressing its button (FQ10-S2). NIBE S1155 Chapter 5 | Electrical connections...
-
Page 22: Connections
Connect the sensor to terminal block AA2-X28:11 (or to one of the other selectable AUX inputs) and to any input on terminal block AA2-X29. Settings for hot water are made in menu 2 "Hot water". AA2-X28 AUX8 AUX7 AUX6 AUX5 AA2-X29 Chapter 5 | Electrical connections NIBE S1155... - Page 23 Connect temperature sensor, external supply line (BT25) on S1155, the room sensor must be fitted. The room to terminal block AA2-X28:12 and to any input on termin- sensor is connected on terminal block X28:13 and to al block AA2-X29.
- Page 24 "Accessories" for a list of the accessories that can be Integrated load monitor used with S1155. Connection for communication with S1155 is equipped with a simple form of integrated load the most common accessories is shown here. monitor, which limits the power steps for the electric...
- Page 25 – Blocking (A: Closed, B: Open) presented as an information message in the display. “SG Ready” is active. The compressor in S1155 and Potential-free signal of type NO or NC. additional heat are blocked in the same way as today’s tariff blocking.
-
Page 26: Settings
Setting maximum output in the electric additional heat The picture shows the relay in the alarm position. is done in menu 7.1.5.1. If S1155 is switched off or in emergency mode, the relay Power steps of the immersion heater is in alarm position. - Page 27 When the emergency mode is active, the status lamp turns yellow. To activate when S1155 is running: press and hold the on/off button (SF1) for 2 seconds and select "emergency mode" from the shutdown menu.
-
Page 28: Commissioning And Adjusting Preparations
The mixture should be NOTE protected against freezing down to about -15°C. The Do not start S1155 if there is a risk that the brine is topped up by connecting a filling pump. water in the system has frozen. -
Page 29: Start-Up And Inspection
To set the correct flow in the brine system, the brine started. The start guide instructions state what needs pump must run at the correct speed. S1155 has a brine to carried out at the first start together with a run pump that is controlled automatically in standard mode. - Page 30 To set the correct flow in the heating medium system, (kPa) the heating medium pump must run at the correct P100% speed. S1155 has a heating medium pump that can be automatically controlled in standard mode. Certain functions and accessories may require it to run manually P80% and the correct speed must then be set.
-
Page 31: Setting The Heating Curve
Utetemperatur ature, and thereby energy efficient operation. It is from (°C) this curve that the S1155 determines the temperature of the water to the climate system (the supply temper- SUPPLY TEMPERATURE – MAXIMUM AND ature) and thus the indoor temperature. - Page 32 1.30.7. TO READ OFF A HEATING CURVE Drag in the circle on the axis with outdoor temperat- ure. Read off the value for supply temperature in the circle on the other axis. Chapter 6 | Commissioning and adjusting NIBE S1155...
- Page 33 2 Under floor heating can be dimensioned very differently. The above example refers to a system where the supply temperature needs to be approximately 35 – 40 °C or 45 – 50 °C on the coldest day. NIBE S1155 Chapter 6 | Commissioning and adjusting...
-
Page 34: Myuplink
You need the following in order for myUplink to be able to communicate with your S1155: Range of services • wireless network or network cable • Internet connection to which S1155 can be connected myUplink gives you access to various levels of service. • account on myuplink.com... -
Page 35: Control - Introduction
5 seconds. You can activate the emergency mode both when S1155 is running and when it is switched off. To activate when S1155 is running: press and hold the THE STATUS LAMP on/off button (SF1) for 2 seconds and select "emergency mode"... -
Page 36: Navigation
FACTORY SETTING Navigation Factory set values are marked with *. S1155 has a touchscreen where you simply navigate by pressing and dragging with your finger. SELECT Most options and functions are activ- ated by lightly pressing on the display with your finger. - Page 37 Set temperature Works to set temperature The drop-down menu shows the current status for S1155, what is in operation and what S1155 is doing at Press the boards to adjust desired value. On certain the moment. function pages, you use your finger to drag up or down to obtain more cards.
- Page 38 Your system is working properly. Do you want help making changes? Yes please, take me to Smartguide. You can always press "X" to return to the home screens. MAIN MENU Indoor climate Hot water Info My system Connection Chapter 8 | Control - Introduction NIBE S1155...
-
Page 39: Control - Menus
1.30.8 - Point offset 1 Consult the accessory’s Installer Manual. MENU 1.1 TEMPERATURE Caution You make temperature settings for S1155 here. A slow heating system such as underfloor heating may be inappropriate for controlling In installations with several climate systems, temperat- with room sensors. - Page 40 Setting range: on/off outdoor temperature. It is from this heating curve that S1155 determines the temperature of the water to the Activate room sensors to control the room temperature climate system, the supply temperature, and therefore here.
- Page 41 The heating curve is affected at ± 5°C from set outdoor Set the minimum temperature on the supply temperat- temp. point. ure to the climate system. This means that S1155 never calculates a temperature lower than that set here. It is important that the correct heating curve is selected so that the room temperature is experienced as even.
- Page 42 "-2" and "change in curve" is increased until the desired room temperature is maintained. Caution Wait 24 hours before making a new setting, so that the room temperature has time to sta- bilise. Chapter 9 | Control - Menus NIBE S1155...
-
Page 43: Menu 2 - Hot Water
Menu 2 – Hot water OVERVIEW Hot water settings require S1155 to be docked to a water heater. 2.1 - More hot water 2.2 - Hot water demand 2.4 - Periodic increase 2.5 - Hot water circulation MENU 2.4 - PERIODIC INCREASE MENU 2.1 - MORE HOT WATER... -
Page 44: Menu 3 - Info
Setting range: 1 – 5 years Here, you can see a diagram showing how much energy S1155 supplies and consumes. You can select which parts of the installation will be included in the log. It is also possible to activate display of indoor and/or outdoor temperature. -
Page 45: Menu 4 - My System
Alternative: Heating Manual "Compressor" is the unit that produces heating and hot The operating mode for S1155 is normally set to "Auto". water for the home. You cannot deselect "compressor" It is also possible to use additional heat only. Select in manual mode. - Page 46 Setting range: 0 – 10 compressor operation only (immersion heater not per- mitted). You can select whether you want S1155 to adjust the In the case of overcapacity mode on "SG Ready", the indoor climate based on the weather forecast here.
- Page 47 Control method tion. Alternative: Price / CO NOTE If Smart Energy Source™ is activated S1155 prioritises This option locks after 24 hours, restart of dis- how / to what extent each docked energy source will play or program updating. be used. Here you can select whether the system will use the energy source that is cheapest at the time or MENU 4.11 - TOOLS...
-
Page 48: Menu 5 - Connection
Activate "Automatic". The installation now receives the TCP/IP settings using DHCP. Manual setting Select "IP address" and enter correct address using the keyboard. Repeat the procedure for "Network mask", "Gateway" and "DNS". Chapter 9 | Control - Menus NIBE S1155... -
Page 49: Menu 6 - Scheduling
Caution A schedule repeats according to the selected setting (e.g. every Monday) until you go into the menu and switch it off. NIBE S1155 Chapter 9 | Control - Menus... -
Page 50: Menu 7 - Service
7.9 - Logs 7.9.1 - Change log 7.9.2 - Extended alarm log 7.9.3 - Black box This menu is also shown in the subordinate heat pump’s limited menu system. Consult the accessory’s Installer Manual. Chapter 9 | Control - Menus NIBE S1155... - Page 51 Alternative: Auto, intermittent Start temperature Demand mode, small/medium/large Auto: The heating medium pump runs according to the current operating mode for S1155. Setting range: 5 – 70 °C Intermittent: The heating medium pump starts approx. Stop temperature 20 seconds before and stops 20 seconds after the Demand mode, small/medium/large compressor.
- Page 52 MENU 7.1.2.6 - OPERATING MODE BRINE Automatic reset PUMP Select "automatic reset" if you want S1155 to start automatically after brine alarm. Operating status Minimum brine temperature out Alternative: Intermittent, Continuously, 10 days con- Set the temperature at which the heat pump is to activ- tinuously ate the alarm for low temperature in outgoing brine.
- Page 53 Setting range: on/off MENU 7.1.6.2 - FLOW SETTING, CLIMATE SYSTEM Select how you want the S1155 to alert you that there is an alarm in the display here. Setting The different alternatives are that S1155 stops producing hot water and/or reduces the room temperature.
- Page 54 MENU 7.1.10.2 - AUTO MODE SETTINGS and activated are made in the sub-menus for this. MENU 7.2.1 - ADD/REMOVE ACCESSORIES Stop heating Here, you tell S1155 which accessories are installed. Setting range: -20 – 40°C To identify connected accessories automatically, select Stop additional heat "Search for accessories".
- Page 55 System settings: Here, you specify whether S1155 is change. Select one of the selectable components. the multi-installation’s main unit. In systems with only one heat pump, S1155 will be the main unit. If there is Symbol Description another main unit in the installation, you enter the ID Blocked that S1155 will have.
- Page 56 MENU 7.5.2 - UNDERFLOOR DRYING FUNCTION Here, you can choose to activate the screen lock for S1155. During activation, you will be asked to enter the required code (four digits). The code is also used to de- Length period 1 – 7 activate the screen lock as well as when changing code.
- Page 57 When resetting, the start guide is displayed the next time S1155 restarts. MENU 7.7 - START GUIDE When S1155 is started for the first time, the start guide is automatically activated. From this menu, you can start it manually. MENU 7.8 - QUICK START You can quick start the compressor here.
-
Page 58: Service
Maintenance may only be carried out by per- Anti-freeze with suitable refractometer. sons with the necessary expertise. Expansion vessel. When replacing components on S1155 only replacement parts from NIBE may be used. System pressure. Flow and return temperature. The difference must NOTE be 2 - 5 °C... - Page 59 When the emergency mode is active, the status lamp turns yellow. To activate when S1155 is running: press and hold the on/off button (SF1) for 2 seconds and select "emergency mode" from the shutdown menu.
- Page 60 Start S1155 and check that the circulation pump is working. EMPTYING THE BRINE SYSTEM It is often easier to start the circulation pump with S1155 In order to service the brine system it may be easier to running. If the circulation pump is helped to start with drain the system first.
- Page 61 Drain the compressor module according to the in- structions on page 59 QM33 QM31 QM34 QM32 Pull off the lock catches. 1 The images show examples of what a cooling module could look like. NIBE S1155 Chapter 10 | Service...
- Page 62 (QM32), (QM33) and (QM34). Remove the two screws. Disconnect the connectors (XF2), (XF11) and (XF22). Carefully pull out the cooling module. XF22 XF11 The cooling module is installed in reverse order. Chapter 10 | Service NIBE S1155...
- Page 63 Menu 8.2 - Logging Setting range: 1 s – 60 min Here you can choose how current measurement values from S1155 should be saved onto a log file on the USB memory. Set the desired interval between loggings. Select "Start logging".
- Page 64 Menu 8.3 - Manage settings Here you can manage (save as or retrieve from) all the menu settings (user and service menus) in S1155 with a USB memory. The menu settings can be saved to the USB memory using "Save settings", in order to restore them later or to copy the settings to another S1155.
-
Page 65: Disturbances In Comfort
11 Disturbances in comfort In most cases, S1155 notes a malfunction (a malfunction Caution can lead to disruption in comfort) and indicates this with To select "Auxiliary operation", an alarm action alarms, and instructions for action, in the display. must be selected in menu 7.1.8.1 – "Alarm ac- Info-menu tions". - Page 66 – Go to home screen heating or menu 1.30.1 (Curve, heat- – S1155 does not call on heating, cooling or hot water. ing) and adjust the heating curve offset upwards. If the • Compressor blocked due to the temperature condi- room temperature is only low in cold weather, the curve tions.
-
Page 67: Accessories
This accessory is used to enable connection and control DOCKING KIT SOLAR 40 of shunt controlled additional heat, step controlled addition- Solar 40 means that S1155 (together with VPAS) can be al heat, external circulation pump or ground water pump. connected to thermal solar heating. - Page 68 The room unit is an accessory that allows the control and Stainless Part no. 081 147 monitoring of S1155 to be carried out in a different part of steel your home to where it is located. Part no. 067 650...
-
Page 69: Technical Data
Dimensions and setting-out coordinates * This dimension applies at 90° angle on the brine pipes (side connection). The dimension can vary approx. ±100 mm vertically as the brine pipes consist in part of flexible pipes. NIBE S1155 Chapter 13 | Technical data... -
Page 70: Electrical Data
The system's room heating efficiency class 35 °C / 55 °C A+++ / A+++ A+++ / A+++ Efficiency class hot water heating / declared tap profile with water heater A / XL A / XXL VPB S300 VPB S300 Noise Chapter 13 | Technical data NIBE S1155... - Page 71 Scale for the product’s efficiency class room heating: A+++ to D. Scale for the system’s efficiency class room heating: A+++ to G. Reported efficiency for the system takes the product’s temperature regulator into account. Scale for efficiency class hot water: A+ to F. NIBE S1155 Chapter 13 | Technical data...
- Page 72 65 °C at -5 °C incoming brine temperature. Diagram for dimensioning a heat pump. The percentage shows approximate compressor speed. The working range below 75 % for S1155-6 and the Arbetsområde under 75% för F1155-1255 6kW, för hela arbetsområdet 12 och 16 kW.
- Page 73 Incoming brine temp, °C Supply temperature, heating medium 50 °°C Framledningstemp. Värmebärare 50 °C för F1155-1255 -6 kW. S1155-6 Avgiven kyleffekt Specified cooling output, kW 100% °C Köldbärare in, temperatur Incoming brine temp, °C NIBE S1155 Chapter 13 | Technical data...
-
Page 74: Energy Labelling
208 / 162 Water heating energy efficiency, cold climate Seasonal space heating energy efficiency, warm cli- 201 / 151 204 / 158 mate Water heating energy efficiency, warm climate Sound power level L outdoors Chapter 13 | Technical data NIBE S1155... - Page 75 The reported efficiency of the package also takes the controller into account. If an external supplementary boiler or solar heating is added to the package, the overall efficiency of the package should be recalculated. NIBE S1155 Chapter 13 | Technical data...
- Page 76 Daily energy consumption 7.73 Daily fuel consumption elec fuel Annual energy consumption 1,642 Annual fuel consumption Contact information NIBE Energy Systems – Box 14 – Hannabadsvägen 5 – 285 21 Markaryd – Sweden Chapter 13 | Technical data NIBE S1155...
- Page 77 Daily energy consumption 7.78 Daily fuel consumption elec fuel Annual energy consumption 1,709 Annual fuel consumption Contact information NIBE Energy Systems – Box 14 – Hannabadsvägen 5 – 285 21 Markaryd – Sweden NIBE S1155 Chapter 13 | Technical data...
-
Page 78: Item Register
Data for energy efficiency of the package, 75 Removing the covers, 8 Information sheet, 74 Supplied components, 8 Technical documentation, 76 Transport, 7 External connection options, 24 Diagram, dimensioning compressor speed, 72 Possible selection for AUX inputs, 25 Item register NIBE S1155... - Page 79 Cleaning the climate system, 14 Energy labelling, 74 Heating medium side, 17 Data for energy efficiency of the system, 75 Pipe dimensions, 16 Information sheet, 74 Symbol key, 15 Technical documentation, 76 System diagram, 15 Technical Data, 70 NIBE S1155 Item register...
- Page 80 Component list electrical cabinets, 12 Component location cooling section, 12 Component location electrical cabinets, 12 Component locations, 11 List of components, 11 Transport, 7 Troubleshooting, 65 USB service outlet, 63 Warranty information, 5 Working range heat pump, 72 Item register NIBE S1155...
- Page 81 GROUND SOURCE HEAT PUMP COMMISSIONING CHECKLIST This Commissioning Checklist is to be completed in full by the competent person who commissioned the heat pump and associated equipment as a means of demonstrating compliance with the appropriate Building Regulations and then handed to the customer to keep for future reference. Failure to install and commission this equipment to the manufacturer’s instructions may invalidate the warranty but does not affect statutory rights Customer Name Address...
- Page 82 Service Record It is recommended that your heating system is serviced regularly and that the appropriate Service Interval Record is completed. Service Provider Before completing the appropriate Service Interval Record below, please ensure you have carried out the service as described in the manufacturer’s instructions.
- Page 84 WS release date: 2020-01-22 13:07 Publish date: 2020-02-03 12:52 This manual is a publication from NIBE Energy Systems. All product illustrations, facts and data are based on the available information at the time of the publication’s approval. NIBE Energy Systems makes reservations for any factual or printing errors in this manual.
Need help?
Do you have a question about the S1155 and is the answer not in the manual?
Questions and answers