Advertisement
INSTRUCTIONS
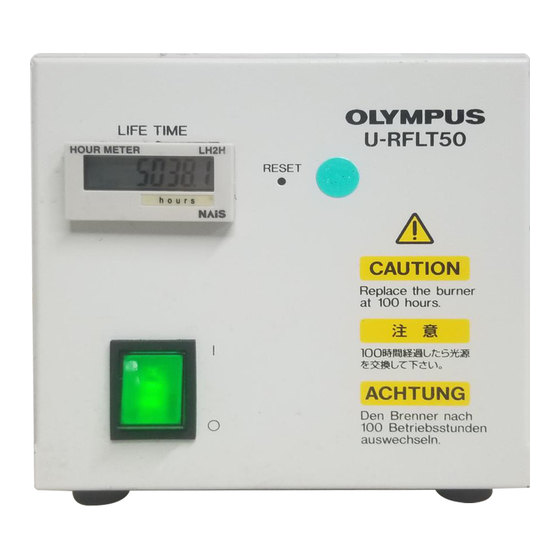
U-RFLT50
POWER SUPPLY UNIT
This instruction manual only covers the Olympus Power Supply Unit U-RFLT50. To ensure the safety,
obtain optimum performance and, to familiarize yourself fully with the use of this power supply unit,
we recommend that you also study the instruction manual for the microscope to be used. Retain
this instruction manual in an easily accessible place near the work desk for future reference.
A X 7 1 3 1
Advertisement
Table of Contents

Related Manuals for Olympus U-RFLT50


Summary of Contents for Olympus U-RFLT50
- Page 1 U-RFLT50 POWER SUPPLY UNIT This instruction manual only covers the Olympus Power Supply Unit U-RFLT50. To ensure the safety, obtain optimum performance and, to familiarize yourself fully with the use of this power supply unit, we recommend that you also study the instruction manual for the microscope to be used. Retain this instruction manual in an easily accessible place near the work desk for future reference.
- Page 2 11. Always use the power cord provided by Olympus. If on power cord is provided, please select the proper power cord by referring to the section “PROPER SELECTION OF THE POWER SUPPLY CORD” at the end of this instruction manual. If the proper power cord is not used, Olympus can no longer warrant the electrical safety and performance of the equipment.
- Page 3 Safety Symbols The following symbols are found on the attachment. Study the meaning of the symbols, and always use the equipment in the safest possible manner. Symbol Explanation Indicates that the surface becomes hot, and should not be touched with bare hands. Before use, carefully read the instruction manual.
- Page 4 Safety and EMC Precautions 1. Use only power cord which OLYMPUS specifies. Otherwise the safety and EMC performance of the product can not be assured. 2. Be sure to ground the product. Otherwise our intended electric safety and EMC performance of the product...
-
Page 5: Table Of Contents
U-RFLT50 CONTENTS NOMENCLATURE ASSEMBLY 2-1 Assembly Diagram ....................................1 2-2 Mounting the Mercury Burner .............................. 2 2-3 Setting the Voltage Selector Switch ........................... 3 2-4 Connecting Cords and Cables............................4 PREPARATION FOR OBSERVATION 3-1 Turning ON the Mercury Burner ............................5 3-2 Centering the Mercury Burner ............................ -
Page 6: Assembly
Fuse holder Output socket for lamp housing Starter reset switch AC receptacle Main switch Only use for U-LH50HG. ASSEMBLY 2-1 Assembly Diagram Mercury burner Lamp housing U-LH50HG Reflected light fluorescence vertical illuminator CX-RFA CH3-RFA, etc. Power cord Power supply unit U-RFLT50... -
Page 7: Mounting The Mercury Burner
U-RFLT50 2-2 Mounting the Mercury Burner (Figs. 1-4) þ ý Applicable Burner HBO50W/AC (OSRAM) CS50W4 (PHILIPS) } The type of burner should be registered in the power supply unit. Accordingly, check the burner’s container or the burner socket indication to see whether the burner is an L or L type burner. -
Page 8: Setting The Voltage Selector Switch
6. Press the reset button @ on the power supply unit’s front panel to reset the burner life indicator to “0.0”. } The counter shows elapsed time in hours. In order not to impair the safety of the equipment, replace the burner when the counter indicates “100.0” hours. -
Page 9: Connecting Cords And Cables
² on the power supply unit. Only use for U-LH50HG. ³ Always use the power cord provided by Olympus. If no power cord is provided, please select the proper power cord by referring to the section “PROPER SELECTION OF THE POWER SUPPLY CORD” at the end of this instruction manual. -
Page 10: Preparation For Observation
PREPARATION FOR OBSERVATION 3-1 Turning ON the Mercury Burner Turning ON the Mercury Burner # Confirm that the power supply voltage setting, frequency setting, and burner type setting are correct. Improper settings may reduce the burner life time considerably. Press the power supply unit’s main switch to “ I ” (ON). Between 5 to 10 minutes are required for the arc to stabilize after the burner is ignited. -
Page 11: Specifications
U-RFLT50 SPECIFICATIONS Module Specifications Power Supply Unit Ignition system: Auto ignition U-RFLT50-100 Life time hour counter: Displays accumulated hours of operation (100V configuration) Input ratings: Input voltage selector provided 100/110/120V 2.5/2.3/2.0A 50/60Hz Dimensions: 150 (W) x 322 (D) x 150 (H) mm Weight: 12 kg (26.4 lb) -
Page 12: Troubleshooting Guide
Under certain conditions, performance of this unit may be adversely affected by factors other than defects. If problems occur, please review the following list and take remedial action as appropriate. If you cannot solve the problem after checking the entire list, please contact your local Olympus representative for assistance. Problem... -
Page 13: Proper Selection Of The Power Supply Cord
If no power supply cord is provided, please select the proper power supply cord for the equipment by referring to “ Specifications ” and “ Certified Cord ” below: CAUTION: In case you use a non-approved power supply cord for Olympus products, Olympus can no longer warrant the electrical safety of the equipment. - Page 14 Table 2 HAR Flexible Cord APPROVAL ORGANIZATIONS AND CORDAGE HARMONIZATION MARKING METHODS Alternative Marking Utilizing Printed or Embossed Harmoni- Black-Red-Yellow Thread (Length zation Marking (May be located of color section in mm) Approval Organization on jacket or insulation of internal wiring) Black Yellow...
- Page 15 Refer to your local Olympus distributor in EU for return and/or collection systems available in your country. NOTE: This equipment has been tested and found to comply with the limits for a Class A digital device, pursuant to Part 15 of the FCC Rules.
- Page 16 Manufactured by Shinjuku Monolith, 2-3-1 Nishi-Shinjuku, Shinjuku-ku, Tokyo 163-0914, Japan Distributed by 48 Woerd Avenue Waltham, MA 02453, U.S.A. 8F Olympus Tower, 446 Bongeunsa-ro, Gangnam-gu, Seoul, Korea 135-509 AX7131 07...
Need help?
Do you have a question about the U-RFLT50 and is the answer not in the manual?
Questions and answers