Table of Contents
Advertisement
Modules described in this manual
CKX-RFA
U-LH50HG
INSTRUCTIONS
U-RFLT50
CKX-NU
REFLECTED
FLUORESCENCE
SYSTEM
FOR CKX41
This instruction manual is for the Olympus Reflected Fluorescence System for
use with the CKX41 culture microscope. To ensure the safety, obtain optimum
performance and to familiarize yourself fully with the use of this system, we
recommend that you study this manual thoroughly before operating the system.
Retain this instruction manual in an easily accessible place near the work desk
for future reference.
A X 7 3 8 9
This publication is printed on 100% recycled paper
Advertisement
Table of Contents

Subscribe to Our Youtube Channel
Related Manuals for Olympus U-LH50HG


Summary of Contents for Olympus U-LH50HG
- Page 1 FLUORESCENCE SYSTEM FOR CKX41 This instruction manual is for the Olympus Reflected Fluorescence System for use with the CKX41 culture microscope. To ensure the safety, obtain optimum performance and to familiarize yourself fully with the use of this system, we recommend that you study this manual thoroughly before operating the system.
-
Page 3: Table Of Contents
REFLECTED FLUORESCENCE SYSTEM FOR CKX41 CONTENTS To let the reflected fluorescence system manifest its full performance, it is critical that you assemble and adjust the system properly. If you want to assemble the system yourself, read Chapter 7, “ASSEMBLY” (pages 21 to 28) first. IMPORTANT - Be sure to read this first for safe use of the equipment. -
Page 4: Important
12 . To replace the lithium battery (for the hour counter) built into the power supply unit, consult Olympus. As the power supply unit incorporates a lithium battery, it should be disposed of in the same way as a used mercury burner, i.e., in compliance with the ordinances or regulations of your national or local... - Page 5 Always heed the warnings. Lamp housing Warning indication position [Warning against high temperature] U-LH50HG Getting Ready 1. The system is composed of precision instruments. Handle it with care and avoid subjecting it to sudden or severe impact. 2. Do not use the system where it is subjected to direct sunlight, high temperature and humidity, dust or vibrations.
- Page 6 3. The surfaces of the dichroic mirror and excitation/barrier filters are very delicate. When it becomes necessary to clean it, please contact Olympus. 4. Do not disassemble any part of the system as this could result in malfunction or reduced performance.
-
Page 7: Nomenclature
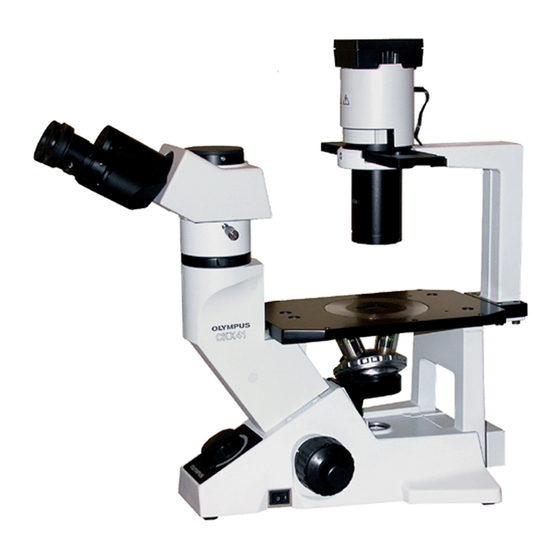
REFLECTED FLUORESCENCE SYSTEM FOR CKX41 NOMENCLATURE Reflected Fluorescence Illuminator Excitation light CKX-RFA protective shield Lamp Housing for 50 W Mercury Burner U-LH50HG ND Filter 32ND6/12/25/50 Fluorescent objectives (See pages 11 & 12.) Microscope CKX41 Power Supply Unit · U-RFLT50-100 Reflected fluorescent mirror slider ·... -
Page 8: Controls Of Each Module
* View of light path indicators from the front side of microscope ND Filter 32ND6/12/25/50 Light Path G-excitation B-excitation Brightfield View No indication Lamp Housing U-LH50HG Rear view Collector Burner up/down focusing knob centering knob Mirror left/right centering screw Mirror focusing... - Page 9 # The depth dimensions of the 100 V and 200 V models differ from each other. Frequency Reset button switch Hour counter Burner type Voltage switch switch Fuse holders Power cord Lamp housing connector connector Main switch For exclusive use with Starter reset : ON the U-LH50HG. switch : OFF...
-
Page 10: Summary Of Reflected Fluorescence Observation Procedure
SUMMARY OF REFLECTED FLUORESCENCE OBSER- VATION PROCEDURE }If you view excitation light during observation, the light may be slightly glaring except when it is seen through the excitation light protective shield. However, as the lamp housing incorporates a UV cut filter, the excitation light is not hazardous even if it enters your eye. - Page 11 REFLECTED FLUORESCENCE SYSTEM FOR CKX41 Excitation light protective shield }Make a photocopy of the observation procedure pages on separate sheets and post it near your microscope.
-
Page 12: Using The Controls
USING THE CONTROLS General Precautions for Observation 1. Confirm that the power supply unit has been set to the proper power supply voltage, power supply frequency and burner type. Improper setting of these items may degrade burner service life considerably. 2. - Page 13 REFLECTED FLUORESCENCE SYSTEM FOR CKX41 Selecting the Reflected Light Fluorescent Mirror }The reflected light fluorescent mirrors for B-excitation and G-excitation have been installed in the fluorescent mirror slider at the factory. If required, the optional CKX-NU mirror for U-excitation can be mounted in the open position or by removing the B- or G-excitation mirror.
-
Page 14: Applicable Fluorescence Objectives
Applicable Fluorescence Objectives UIS2 Series Microscopy Fluorescence Excitation B, G U, B, G Specimen Plastic petri dish Slide glass Slide glass Applicable PlanCN 4X UPlanFLN 4X objectives PlanCN 10X UPlanFLN 10X UPlanFLN 20X LCAchN 20XPh/PhP LUCPlanFLN 40X PlanCN 20X LUCPlanFLN 20X LUCPlanFLN 40X Fluorescence/Phase Contrast Microscopy... - Page 15 REFLECTED FLUORESCENCE SYSTEM FOR CKX41 UIS Series Microscopy Fluorescence Excitation B, G U, B, G Specimen Plastic petri dish Slide glass Slide glass Applicable UPlanFl 4X PlanC 4X objectives UPlanFl 10X PlanC 10X UPlanFl 20X LCAch 20XPh/PhP LUCPlanFl 40X Ach 20X LCPlanFl 20X LCPlanFl 40X Fluorescence/Phase Contrast...
- Page 16 Turning On the Mercury Burner (Fig. 1) · Set the main switch of the power supply unit to “ ” (ON). The arc will stabilize in 5 to 10 minutes after ignition. # Some mercury burners may not ignite the first time the power is turned ON due to variance in production, and the safety mechanism in the starter of the power supply unit is activated to reset the starter in such a case.
-
Page 17: Centering The Mercury Burner
REFLECTED FLUORESCENCE SYSTEM FOR CKX41 Centering the Mercury Burner (Figs. 2 to 6) }Before proceeding to center the burner, wait for the arc image to stabilize. To protect against glare during arc image centering, it should be viewed across the excitation light protective shield. - Page 18 5 . Project the arc image on the white paper, then center and sharpen it by manipulating the collector focusing knob 6, Š burner left/right centering knob 7 and burner up/down centering knob 8 on the lamp housing. (Figs. 4 & 5) ‹...
- Page 19 REFLECTED FLUORESCENCE SYSTEM FOR CKX41 Centering the Field Iris Diaphragm (Figs. 7 & 8) 1. Engage the 10X objective in the light path, push in the fluo- rescent mirror switching knob to engage the B-excitation mirror in the light path, and set the filter slider to the central open position or the position of the ND filter.
-
Page 20: Switching The Filter Slider
Switching the Filter Slider (Fig. 9) }Hold the knob of the filter slider 1 on the illuminator and move the knob to the left and right to select one of the three positions, which are arranged in order of the filter pocket, open position and shutter from the right to the left. -
Page 21: Troubleshooting Guide
Under certain conditions, performance of the system may be adversely affected by factors other than defects. If problems occur, please review the following list and take remedial action as needed. If you cannot solve the problem after checking the entire list, please contact Olympus for assistance. Problem... - Page 22 Problem Cause Remedy Page b) The main switch can be set The lamp housing connecting Connect it properly to the con- to ON but the burner does cord is connected improperly. nectors. not ignite. The mercury burner is not Attach a mercury burner. 25, 26 mounted.
-
Page 23: Specifications
Lamp Housing for 50W Mercury Burner centering, Up/down, left/right. Burner Mirror centering: Up/down, left/right. U-LH50HG Burner focusing: Collector focusing and mirror focusing screw system. Safety mechanism: Interlock switch, UV cut filter built in. << Applicable high-pressure mercury burners >> · HBO50W/AC (OSRAM) ·... -
Page 24: Assembly
# When assembling the microscope system, make sure that all parts are free of dust and dirt, and avoid scratching any parts or touching the glass surfaces. Mercury burner Lamp Housing U-LH50HG Dust cover Reflected Fluorescence Illuminator CKX-RFA... -
Page 25: Assembly
REFLECTED FLUORESCENCE SYSTEM FOR CKX41 7-2 Detailed Assembly Procedure Removing the Dummy Cover (Fig. 10) 1. Rotate the coarse adjustment knob 1 in the direction of the arrow to raise the revolving nosepiece to the upper limit. 2. Hook you finger into the pulling hole 3 on the cover 2 and remove the cover. - Page 26 Attaching the CKX-RFA Reflected (Fig. 13) Fluorescence Illuminator 1. Gently insert the illuminator into the place from which the dummy cover has been removed. 2. Using the Allen wrench, tighten the three screws provided with the illuminator. # Push the illuminator down while tightening the screws so that the illuminator does not go upward.
- Page 27 2, and then tighten the two clamping screws 3. Fig. 15 Attaching the U-LH50HG Lamp Housing (Fig. 16) Insert the collector 1 of the lamp housing into the illuminator, rotate the lamp housing so that its top panel 2 becomes horizontal, then tighten the two clamping screws 3 on the illuminator using the Allen wrench.
- Page 28 Attaching the High-Pressure Mercury Burner (Figs. 17 & 18) << Applicable burners >> · HBO50W/AC (OSRAM) · CS50W4 (PHILIPS) CAUTION Burner type information must be set in the power supply unit, so check the burner box or burner base to confirm whether it is of type L1 or L2. 1.
- Page 29 REFLECTED FLUORESCENCE SYSTEM FOR CKX41 5. Set the burner type switch 5 on the rear of the power supply unit according to the type of the mounted burner (L1 or L2). (Fig. 19) # If the burner socket clamping screw 1 is loosened while the burner is on, the interlock switch turns off the burner.
- Page 30 4 on the power supply unit. (Fig. 22) Always use the U-LH50HG Lamp Housing. Always use the power cord provided by Olympus. If no power cord is provided, please select the proper power cord by referring to the section “PROPER SELECTION OF THE POWER SUPPLY CORD”...
- Page 31 REFLECTED FLUORESCENCE SYSTEM FOR CKX41 Fuse replacement (Fig. 24) # Set the main switch to “ ” (OFF) and unplug the power cord before replacing fuses. 1. Remove each of the fuse holders 9 by turning it counter- clockwise using a flat-blade screwdriver and pulling out. 2.
-
Page 32: U-Excitation Filter Set Ckx-Nu (Optional)
Removing the UV cut filter (Fig. 25) Loosen the holder ring 2 of the UV cut filter 1 in the front of the collector of the U-LH50HG lamp housing by turning the ring counterclockwise, and then take out the filter. -
Page 33: Proper Selection Of The Power Supply Cord
If no power supply cord is provided, please select the proper power supply cord for the equipment by referring to “ Specifications ” and “ Certified Cord ” below: CAUTION: In case you use a non-approved power supply cord for Olympus products, Olympus can no longer warrant the electrical safety of the equipment. - Page 34 Table 2 HAR Flexible Cord APPROVAL ORGANIZATIONS AND CORDAGE HARMONIZATION MARKING METHODS Alternative Marking Utilizing Printed or Embossed Har- Black-Red-Yellow Thread (Length monization Marking (May be Approval Organization of color section in mm) located on jacket or insula- tion of internal wiring) Black Yellow Comite Electrotechnique Belge...
- Page 36 2-43-2, Hatagaya, Shibuya-ku, Tokyo, Japan Postfach 10 49 08, 20034, Hamburg, Germany 2 Corporate Center Drive, Melville, NY 11747-3157, U.S.A. 491B River Valley Road, #12-01/04 Valley Point Office Tower, Singapore 248373 2-8 Honduras Street, London EC1Y OTX, United Kingdom. 31 Gilby Road, Mt. Waverley, VIC 3149, Melbourne, Australia. 6100 Blue Lagoon Drive, Suite 390 Miami, FL 33126-2087, U.S.A.
Need help?
Do you have a question about the U-LH50HG and is the answer not in the manual?
Questions and answers