Table of Contents
Advertisement
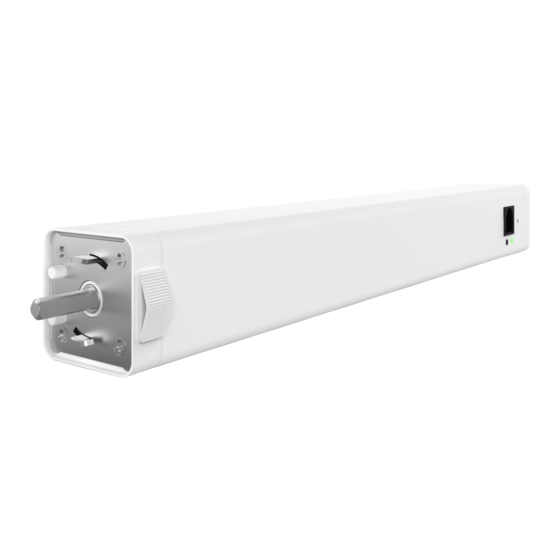
AUTOMATE
Modular Curtain Motor
MT01-2101-069002
433 MHZ
ELECTRONIC
BI-DIRECTIONAL
LIMIT
AUTOMATE™ | ARC™ Curtain motor is compatible with popular drapery track systems for
easy incorporation of curtains into the ARC motorized platform. The Soft Touch feature
enables manual operation when needed.
The AUTOMATE modular curtain motor now offers the option to power the motor with a
battery or continuous AC.
FEATURES:
• Electronic Torque sensing "Auto-set" Limits
• 433 MHz Bi-Directional RF Communication
• Leveling Control
• Inverted or Standard Mount
• Favorite Position
• Soft start / stop
™
FAVORITE
LEVEL
POSITION
CONTROL
• AC or Battery powered option
• Soft touch control
• Speed Control
• Top exit option for power cord
QUIET
SOFT TOUCH
OPERATION
SELECTABLE
RPM
Advertisement
Table of Contents

Subscribe to Our Youtube Channel
Related Manuals for rollease acmeda AUTOMATE MT01-2101-069002


Summary of Contents for rollease acmeda AUTOMATE MT01-2101-069002
- Page 1 AUTOMATE ™ Modular Curtain Motor MT01-2101-069002 433 MHZ QUIET SELECTABLE ELECTRONIC FAVORITE LEVEL SOFT TOUCH BI-DIRECTIONAL LIMIT POSITION CONTROL OPERATION AUTOMATE™ | ARC™ Curtain motor is compatible with popular drapery track systems for easy incorporation of curtains into the ARC motorized platform. The Soft Touch feature enables manual operation when needed.
-
Page 2: Table Of Contents
9.3 Using pre-existing controller to add or delete a controller or channel FAVORITE POSITIONING 10.1 Set a favorite position 10.2 Send to favorite position 10.3 Delete favorite position 2 | Automate ROLLEASE ACMEDA Programming Instructions | Modular Curtain Motor ™... - Page 3 15.2 Exit Sleep Mode EXTERNAL LOW VOLTAGE SWITCH MODE 16.1 Two Button Spring Return Switch (Default Mode) 16.2 Three Button Spring Return Switch 16.3 Single Button Spring Return Switch TROUBLESHOOTING 3 | Automate ROLLEASE ACMEDA Programming Instructions | Modular Curtain Motor ™...
- Page 4 Installation and programming to be performed by a suitably qualified installer. • For use within curtains and drapes. • Use only Rollease Acmeda hardware. • Before installation, remove any unnecessary cords and disable any equipment not needed for powered operation. •...
-
Page 5: Curtain Motor Specifications
OL - 90mm (3.54") (OL x2) + 6mm (0.24") NOTES : 1. Above figures are for STRAIGHT TRACKS only 2. Deductions are constant across centre close and one way configurations 5 | Automate ROLLEASE ACMEDA Programming Instructions | Modular Curtain Motor ™... -
Page 6: Wiring (Ac Modules)
Connect the motor according to the information in the table below. Ensure cable is kept clear of fabric. Field Plug FIELD PLUG POWER NEUTRAL LIVE EARTH MTAC- FIELDPLUG 120V AC / 60Hz White Black Green 6 | Automate Programming Instructions | Modular Curtain Motor ROLLEASE ACMEDA ™... -
Page 7: Assembly
GENERAL SCHEMATIC SYSTEM INDEX: Motor End Pully Modular Curtain Motor 4c. AC Power Adapter (Long Cable) 1b. Overlap Return Pulley 4a. Battery Curtain Track 4b. AC Power Adapter 7 | Automate ROLLEASE ACMEDA Programming Instructions | Modular Curtain Motor ™... - Page 8 This requires using a field installed plug to replace the motor grounding plug. 2. Attach Motor to drive pulley 3. Attach Battery to motor (Or AC Module) 8 | Automate ROLLEASE ACMEDA Programming Instructions | Modular Curtain Motor ™...
-
Page 9: Attaching And Removing The Motor
Slide the lock button fully left against the spring pressure force STEP 2 Pull the Motor away from the Drive Pulley STEP 3 Push to Lock Button fully to the right to ensure they two are securely attached. 9 | Automate ROLLEASE ACMEDA Programming Instructions | Modular Curtain Motor ™... -
Page 10: Attaching And Removing The Battery Or Ac Module
STEP 2 STEP 3 Pull the battery or AC modlue away from the motor Push to Lock Button fully to the right to ensure they two are securely attached. 10 | Automate ROLLEASE ACMEDA Programming Instructions | Modular Curtain Motor ™... -
Page 11: Charging
Before first use, charge battery fully until LED indicator turns Green (Solid) Solid Red = Charging Solid Green = Fully Charged Charge battery using 5V Micro USB Battery Charge LED Indicator 11 | Automate ROLLEASE ACMEDA Programming Instructions | Modular Curtain Motor ™... -
Page 12: P1 Button Functions
GREEN LED Activate Pairing Mode Approx. P1 Button RJ45 Antenna Hole Sleep Mode Approx. Approx. Enter Setting Mode Approx. Approx. Approx. Reset To Factory Settings Approx. Approx. Approx. Approx. 12 | Automate Programming Instructions | Modular Curtain Motor ROLLEASE ACMEDA ™... -
Page 13: Initial Set Up
Until the motor responds. Quick Press = Step Motor Response Long Press = Continuous Travel Approx. IMPORTANT Reversing motor direction using this method is only possible during initial set-up 13 | Automate Programming Instructions | Modular Curtain Motor ROLLEASE ACMEDA ™... -
Page 14: Check/ Change Motor Direction (Initial Set Up)
THREE TIMES at the same position, the limit will automatically reset. Note: If the motor encounters an obstacle, collision detection will stop the motor to prevent damage. Initial set-up is now complete 14 | Automate ROLLEASE ACMEDA Programming Instructions | Modular Curtain Motor ™... -
Page 15: Adjusting Limits
• Once in limit adjustment mode, button selection on the remote must be made within 2 minutes, if not, motor will exit adjustment mode. • To exit limit adjustment mode without making changes, press P1 or P2 and limits will remain unchanged. 15 | Automate Programming Instructions | Modular Curtain Motor ROLLEASE ACMEDA ™... -
Page 16: Delete Limits
Motor Response CONTROLLERS AND CHANNELS Using motor P1 button Hold P1 button on motor Hold STOP on controller to add or remove head. Motor Response Motor Response Approx. 16 | Automate Programming Instructions | Modular Curtain Motor ROLLEASE ACMEDA ™... -
Page 17: Using Existing Controller To Add A New Controller Or Channel
Press P2 on Press P2 on controller A controller B to controller A remove it Motor Response Motor Response Motor Response IMPORTANT Consult user manual for your controller or sensor 17 | Automate ROLLEASE ACMEDA Programming Instructions | Modular Curtain Motor ™... -
Page 18: Favorite Positioning
10.2 Send to favorite position Press STOP on controller. Approx. 10.3 Delete favorite position Press P2 on controller. Press STOP on controller. Press STOP on controller. Motor Response Motor Response Motor Response 18 | Automate ROLLEASE ACMEDA Programming Instructions | Modular Curtain Motor ™... -
Page 19: Adjust Motor Speed
Press P2 Press UP Press UP Motor Response Motor Response Motor Response 11.2 Decrease motor speed Press P2 Press DOWN Press DOWN Motor Response Motor Response Motor Response 19 | Automate ROLLEASE ACMEDA Programming Instructions | Modular Curtain Motor ™... -
Page 20: Soft Touch Function
Press STOP on controller to switch soft touch Continuously hold P1 button on function on or off. motor head for 10 seconds Motor Response Motor Response Approx. Approx. Approx. 20 | Automate ROLLEASE ACMEDA Programming Instructions | Modular Curtain Motor ™... -
Page 21: Battery Check Function
Motors must be paired one at a time with control PC when multiple motors are to be connected on a network. 14.1 Enable RS485 communication Continuously hold P1 button on Hold UP on controller for 5 seconds motor head for 2 seconds Motor Response Motor Response 21 | Automate ROLLEASE ACMEDA Programming Instructions | Modular Curtain Motor ™... -
Page 22: Disable Rs485 Communication
RS485 failure reminder when trying to turn on RS485 function of battery powered motor: Continuously hold P1 button on Hold UP on controller for 5 seconds motor head for 2 seconds Motor Response Motor Response 22 | Automate ROLLEASE ACMEDA Programming Instructions | Modular Curtain Motor ™... -
Page 23: Sleep Mode
Press and release P1 button on the motor head Motor Response Motor will move in last default direction to limit position Exit Sleep Mode: Method 2 Remove power and then re-power the motor. 23 | Automate ROLLEASE ACMEDA Programming Instructions | Modular Curtain Motor ™... -
Page 24: External Low Voltage Switch Mode
Press P2 on REPEAT 2X Press P1 on motor for 10 seconds to enter controller 2 seconds setting mode Motor Response Motor Response Motor Response Approx. Approx. Approx. 24 | Automate ROLLEASE ACMEDA Programming Instructions | Modular Curtain Motor ™... -
Page 25: Single Button Spring Return Switch
Press P2 on REPEAT 3X Press P1 on motor for 10 seconds to enter controller 2 seconds setting mode Motor Response Motor Response Motor Response Approx. Approx. Approx. 25 | Automate ROLLEASE ACMEDA Programming Instructions | Modular Curtain Motor ™... -
Page 26: Troubleshooting
(multiple motors respond) same channel. individual control for each motor for programming purposes Place all other motors into sleep mode (ref to section 15) 26 | Automate ROLLEASE ACMEDA Programming Instructions | Modular Curtain Motor ™... - Page 27 NOTES 27 | Automate ROLLEASE ACMEDA Programming Instructions | Modular Curtain Motor ™...
- Page 28 NOTES 28 | Automate ROLLEASE ACMEDA Programming Instructions | Modular Curtain Motor ™...
- Page 29 NOTES 29 | Automate ROLLEASE ACMEDA Programming Instructions | Modular Curtain Motor ™...
- Page 30 ROLLEASE ACMEDA AUSTRALIA 110 Northcorp Boulevard, Queensland Branch Broadmeadows VIC 3047 Unit 2/62 Borthwick Avenue, T +61 3 9355 0100 | F +61 3 9355 0110 Murarrie QLD 4172 ROLLEASE ACMEDA 750 East Main Street, 7th Floor Stanford, CT 06902...
Need help?
Do you have a question about the AUTOMATE MT01-2101-069002 and is the answer not in the manual?
Questions and answers