Polycom RealPresence Group Series Setting Up
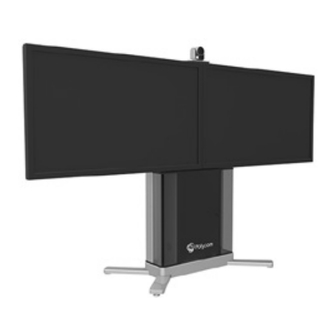
Media center with 65” dual displays
Hide thumbs
Also See for RealPresence Group Series:
- Reference manual (425 pages) ,
- Administrator's manual (369 pages) ,
- User manual (113 pages)
Advertisement
Setting Up the Polycom
Group Series Media Center with 65" Dual Displays
This supplement describes how to attach 65" dual displays on the Polycom
Media Center. Follow the instructions in Setting Up the Polycom RealPresence Group Series Media Center,
1725-08510-00X, and use this supplement to replace the steps to install the displays.
Single 55/65" Lower Display Rail, 1354-67626-001
(2) Dual 65" Lower Display Rail Extension, 1354-68667-001
Dual 65" Center Top Display Rail, 1354-68669-001
(2) Dual 65" Upper Display Rail Extension, 1354-68671-001
For more information about the components of the RealPresence Group Series Media Center,
refer to the documentation at
http://support.polycom.com/PolycomService/support/us/support/video/group_series/group_packaged_solutions.html.
The Media Center components are heavy. Polycom recommends that two people perform the installation.
© 2014, Polycom, Inc. All rights reserved. POLYCOM® and the names and marks associated with Polycom's products are trademarks and/or service marks of
Polycom, Inc. and are registered and/or common law marks in the United States and various other countries. No portion hereof may be reproduced
or transmitted in any form or by any means, for any purpose other than the recipient's personal use, without the express written permission of Polycom.
®
®
RealPresence
www.polycom.com
1725-68117-001/A
®
RealPresence
®
Group Series
(4) Display Mounting Bracket
Assembly
2342-67629-001
(4) M8 x 20 Button Head Cap Screw
1601-52713-001
(4) M8 Hex Flange Nut
1600-52845-001
(4) M10 x 25 Flanged Socket Head
Cap Screw
1601-67617-001
M8 Wrench
1102-68064-001
1
Advertisement
Table of Contents

Subscribe to Our Youtube Channel
Related Manuals for Polycom RealPresence Group Series


Summary of Contents for Polycom RealPresence Group Series
- Page 1 Polycom, Inc. and are registered and/or common law marks in the United States and various other countries. No portion hereof may be reproduced or transmitted in any form or by any means, for any purpose other than the recipient’s personal use, without the express written permission of Polycom.
- Page 2 M8 wrench. Attach an upper display rail extension to each end of the center top display rail using two M10 x 25 flanged socket head cap screws per extension. Setting up the Polycom® RealPresence® Group Series Media Center...
- Page 3 Using the L-key, tighten the socket head cap screws at the bottom of the base, the lower display rail, and the upper display rail. Remove the rear door. Setting up the Polycom® RealPresence® Group Series Media Center...
- Page 4 (1). Repeat with the second display. Adjust the leveler screws as needed to help eliminate any gap between the two displays when they are tightly abutted (2). Setting up the Polycom® RealPresence® Group Series Media Center...
- Page 5 For further information concerning the individual components of this equipment, please refer to the respective product literature. For support or service, please contact your Polycom® distributor or go to Polycom Support at www.polycom.com/support. Setting up the Polycom® RealPresence® Group Series Media Center...
Need help?
Do you have a question about the RealPresence Group Series and is the answer not in the manual?
Questions and answers