Hunter Douglas Duette Installation Operation Care
Honeycomb shades, hard-wired motorized lifting system
Hide thumbs
Also See for Duette:
- Installation operation care (40 pages) ,
- Owner's manual (28 pages) ,
- Installation and care (20 pages)

Related Manuals for Hunter Douglas Duette


Summary of Contents for Hunter Douglas Duette
- Page 1 Installation Operation Care • • Duette Honeycomb Shades ® Hard-Wired Motorized Lifting System...
-
Page 2: Table Of Contents
Any changes or modifi cations not expressly approved by the party responsible for compliance could void the user’s authority to operate the equipment. © 2009 Hunter Douglas Inc. ® Registered trademark of Hunter Douglas Inc. ™ Trademark of Hunter Douglas Inc. -
Page 3: Getting Started
Bottom Sill Installation Components Needed Shade Brackets Width Required Duette Hard-Wired Motorized shades ship with a motor ONLY, 12" – 38" ™ unless a power supply, the Platinum wall switch and remote " – 72" control are specifi ed at the time of ordering. - Page 4 14AWG-3 Conductor + Ground Wire (only 2 conductors are used for low voltage systems). Hunter Douglas recommends 14 gauge-3 conductor wire plus ground wire (14/4) be run from every window location to a central location (aka “homerun”) for every installation, when pre-wiring a project.
-
Page 5: Power Supply Requirements
GETTING STARTED In addition, you will need fasteners designed to work with your specifi c mounting surface(s). #6 Hex Head Screws (Provided). Two 1 ∕ " screws are provided per installation bracket. Longer Hex Head Screws (Not Provided). If using spacer blocks, use a #6 screw long enough for a secure attachment. -
Page 6: Product View
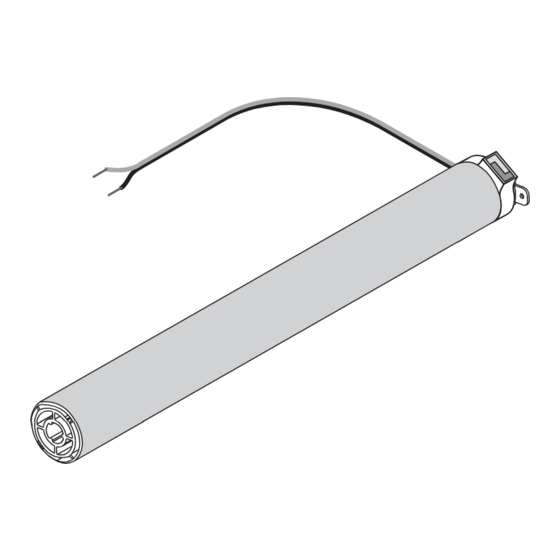
GETTING STARTED Product View Motor Installation Brackets Lift Headrail Bottom Rail Pocket Ferrule... -
Page 7: Installation
INSTALLATION Mount The Installation Brackets — Inside Mount Measure 2" in from each jamb for bracket location. ® If more than two installation brackets came with your order, space additional brackets evenly between the two end brackets and mark their location. Jamb Jamb 2"... -
Page 8: Mount The Installation Brackets - Outside Mount
INSTALLATION Mount The Installation Brackets — Outside Mount The motor wire must be long enough to reach the wire coming from the switch, but not so long that it could tangle with the moving parts inside the headrail. ® Trim off any unneeded length and store excess wire in between the headrail and the installation bracket. -
Page 9: Install The Shade
INSTALLATION If using spacer blocks, fasten these to a fl at vertical mounting surface with two screws long enough for a secure installation. (Screws not provided.) Spacer Block " " The solid side of the spacer blocks faces the ® mounting surface. -
Page 10: Test The Shade
™ select Hard-Wired Motorization systems Third Party Remote Control Operation Third party infrared (IR) remote controls (i.e. unversal remotes) can be used to operate Duette ® Hard-Wired Motorized honeycomb shades wired directly to a Platinum Technology wall switch. These remotes can “learn” the commands... -
Page 11: Troubleshooting
First review the guide that came with your Platinum ™ remote control or Platinum wall switch. Refer to the table bellow for specifi c solutions for your shade. If questions remain, please contact the Hunter Douglas Customer Information Center at 1-888-501-8364. Problem Solution... - Page 12 OPERATION Problem Solution The shade If the red light on the remote control operates using (indicator LED) does not light up IR Channel Indicator Selector the Platinum ™ when the UP L/DOWN M button is Switch Technology wall pressed, replace the batteries in the switch, but does remote control.
- Page 13 OPERATION Problem Solution One shade does Press the UP L/DOWN M button longer when operating shades. It not consistently can take longer for the signal to activate one of the shades. respond to the Check at different areas of the room (home). There could be blind “Group”...
- Page 14 OPERATION Problem Solution The shade A memory stop position may have been set within the Platinum ™ does not raise Technology wall switch. See the Appendix section, Setting And completely. Clearing Intermediate Positions on page 22. The upper rail limit may not be set properly. See the Troubleshooting section, Adjusting The Bottom Rail’s Upper Position on page 15 for adjusting the rail limit stops.
- Page 15 OPERATION Problem Solution The shade Check that the installation brackets are aligned and level. The raises or lowers window may be out of square. To check if the window is square, unevenly, or the measure the diagonals. Level the headrail by shimming the bottom rail is installation brackets, if necessary.
- Page 16 OPERATION Problem Solution The shade does An intermediate stop position may have been set within the ™ not raise or Platinum Technology wall switch. See the Appendix section, Setting lower, but the And Clearing Intermediate Positions on page 24. motor seems The moving rail limits may not be set properly.
- Page 17 OPERATION Problem Solution (Adjusting The Bottom Rail Limit Stops Continued) If The Bottom Rail Lowers Farther Than The Desired Bottom Position Or Raises After Reaching The Desired Bottom Position, with the black button in the recessed position, move the wall switch to the UP L position to operate the shade until the moving rail reaches the desired bottom rail position.
-
Page 18: Care
CARE Cleaning Procedures ® Hunter Douglas Duette honeycomb shades are made of an anti-static, dust-resistant fabric which repels dirt and dust. For most honeycomb fabrics, the following options are available if your shade needs cleaning. Dusting Regular light dusting with a feather duster is all the cleaning that is needed in most circumstances. -
Page 19: Removing The Shade
CARE Ultrasonic Cleaning Some honeycomb fabrics can be ultrasonically cleaned by a professional. Specify that a mild detergent solution be used. Never immerse the headrail into the solution. Dry the shade completely in the lowered position. CAUTION: Do not ultrasonically clean Commercial, Opalessence ™... -
Page 20: Appendix
(where the fi rst shade is wired to the second shade, the second to the third shade, and the third shade to the switch). IMPORTANT: Hunter Douglas recommends 14 gauge -3 conductor wire plus ground wire for all installations. -
Page 21: Wiring For The Platinum ™ Technology Wall Switch
APPENDIX ™ Wiring For The Platinum Technology Wall Switch CAUTION: To prevent accidental short circuits and avoid possible component damage, do not plug the power supply into the wall outlet until the wiring connections are complete. MOTOR Use the diagram IMPORTANT: RF Module BACK OF and Dry-Contact harness... - Page 22 APPENDIX Multiple Shades Wiring Connect one shade to one switch. However, in multiple shade installations, you can group the power wires from multiple switches together and connect them to one power supply. IMPORTANT: Do not install the switch plate to the switch box until after you have tested the shade to make sure the switch operates the shade in the proper direction.
-
Page 23: Calibrating The Shade
APPENDIX Calibrating The Shade ™ Before operating and/or programming the shade, you must fi rst calibrate it to the Platinum Technology wall switch. IMPORTANT: A Platinum Technology remote control is required to initiate the calibration sequence. Calibration Sequence FRONT OF THE PLATINUM TECHNOLOGY ™... -
Page 24: Setting And Clearing Intermediate Positions
APPENDIX Setting And Clearing Intermediate Positions ™ If using a Platinum Technology wall switch to operate a shade, up to two intermediate stops can be set between the fully raised and the fully lowered shade positions. This feature allows the shade to be preset so that it can be stopped at the same height each time the shade is raised or lowered. - Page 25 APPENDIX To Clear The Lower Intermediate Position: Lower the shade completely. Press the DOWN M button on the wall switch. The LED on the wall switch will begin blinking. Continue pressing the DOWN M button for 5 seconds, the LED will become a solid light, indicating the lower position has been cleared.
- Page 26 Notes...
- Page 27 2. Visit hunterdouglas.com/customersupport for additional warranty information and frequently asked questions. 3. Contact Hunter Douglas Inc. at 1-888-501-8364 (9:00 AM - 8:00 PM EST) for technical support, certain parts free of charge, for assistance in obtaining warranty service or for further explanation of our warranty.
Need help?
Do you have a question about the Duette and is the answer not in the manual?
Questions and answers