Table of Contents
Advertisement
Quick Links
INSTALLATION AND OPERATION INSTRUCTIONS
AGRICULTURAL AIR HEATER
MODELS:
VF80CE-L5 DSI, VF80CE-N5 DSI
OWNER/INSTALLER: For your safety this manual must be carefully read before installing, operating or
servicing this air heater. This air heater is intended for use with either Natural Gas or Propane Gas. It must
be installed by a qualified service person or a licensed contractor in accordance with state and local codes.
WARNING: Improper installation, adjustment, alteration, service or maintenance can cause injury, property
damage or death. Refer to this manual. For assistance or additional information, consult a qualified
installer, service agency or the gas supplier.
INSPECT all combustion air openings into the building and, if necessary, clear as they become blocked by
litter, dust, feathers or other matter.
FOR YOUR SAFETY: EXHAUST FANS MUST be operating on an appropriate cycle when air heaters are
operating to avoid a high concentration of carbon monoxide. When used without fresh air, this air heater
may give off carbon monoxide, an odorless and poisonous gas. CARBON MONOXIDE POISONING MAY LEAD
TO DEATH. Early signs of carbon monoxide poisoning resemble the flu with headaches, dizziness and
nausea. If you experience these signs, GET FRESH AIR IMMEDIATELY! Have the air heaters serviced as soon
as possible and check the ventilation in the house.
These air heaters are designed for agricultural applications and may operate with the use of either Natural
Gas or Liquid Propane (LP) Gas. Check the air heater's nameplate to determine the correct gas type before
proceeding with installation.
IF YOU SMELL GAS:
! DO NOT try to light any appliance.
! DO NOT touch any electrical switch; do not use any
telephone in your building.
! IMMEDIATELY call your gas supplier from a neighbor's
telephone. Follow the gas supplier's instructions. If you
cannot reach your gas supplier, call the fire department.
!IMPORTANT: SAVE THIS MANUAL FOR FUTURE REFERENCE.
Phone 01473 830551 Fax: 01473 832055 E-mail:
FOR YOUR SAFETY
Gas Fired Products (UK) Ltd.
Chapel Lane, Claydon, Ipswich, Suffolk IP6 0JL, England
DO NOT store or use gasoline or other
flammable vapors and liquids in the
vicinity of this or any other appliance.
SAVE THIS MANUAL
FOR FUTURE REFERENCE.
info@spaceray.co.uk www.spaceray.com.uk
Form No. 43539470
Oct 2019 A
Advertisement
Table of Contents
Troubleshooting

Related Manuals for Space-Ray VF80CE-L5 DSI


Summary of Contents for Space-Ray VF80CE-L5 DSI
- Page 1 AGRICULTURAL AIR HEATER MODELS: VF80CE-L5 DSI, VF80CE-N5 DSI OWNER/INSTALLER: For your safety this manual must be carefully read before installing, operating or servicing this air heater. This air heater is intended for use with either Natural Gas or Propane Gas. It must be installed by a qualified service person or a licensed contractor in accordance with state and local codes.
- Page 2 GENERAL HAZARD WARNING Failure to comply with the precautions and instructions provided with this appliance, can result in death, serious bodily injury and property loss or damage from hazards of fire, explosion, burn, asphyxiation, carbon monoxide poisoning, and/or electrical shock.
- Page 3 PPD and other materials to catch on fire at wall penetration point. Use only genuine accessories designed and supplied by Space-Ray®. Excessive backpressure from accessories not approved by Space-Ray® can cause heater operational performance issues and cause excessive Carbon Monoxide, heater component overheating, etc.
-
Page 4: Table Of Contents
TABLE OF CONTENTS Section Description Page 1.0) SAFETY .......................... 4 2.0) INSTALLER RESPONSIBILITY ..................4 3.0) GENERAL INFORMATION .................... 5 4.0) MINIMUM CLEARANCES TO COMBUSTIBLES ............6 5.0) SPECIFICATIONS ......................7 6.0) DIMENSIONS ........................ 8 7.0) INSTALLATION – SUSPENSION. HANGING AND LEVELING THE HEATER .... 9 8.0) GAS CONNECTIONS ..................... -
Page 5: Safety
1.0) SAFETY This heater is a self-contained air heater. Safety information required during installation and operation of this heater is provided in this manual and the labels on the product. The installation, service and maintenance of this heater must be performed by a contractor qualified in the installation and service of gas fired heating equipment. All personnel in contact with the heater must read and understand all safety information, instructions and labels before operation. -
Page 6: General Information
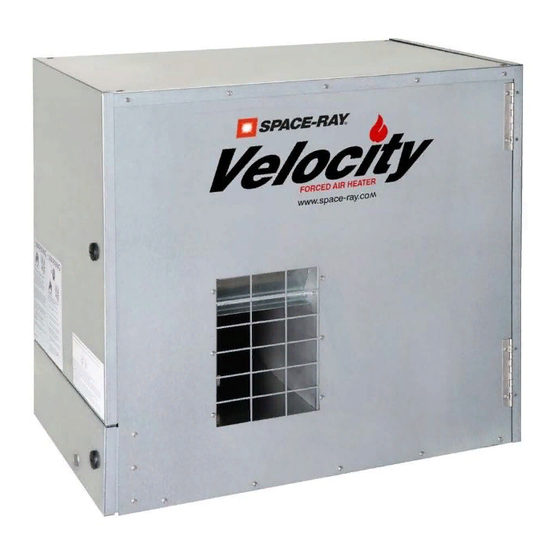
3.0) GENERAL INFORMATION This is a self-contained agricultural air heater for use in locations where flammable gases or vapors are not generally present and is intended for heating of agricultural animal confinement buildings. The intended use is heating of agricultural animal confinement buildings. INSTALLATION REQUIREMENTS Installation of this heater must be in accordance with all applicable codes shown in the instructions and/or the local codes and authorities having jurisdiction. -
Page 7: Minimum Clearances To Combustibles
“specify the maximum permissible stacking height to maintain the required clearances from the heater to combustibles.” Space-Ray® recommends posting these signs adjacent to the heater thermostat or other suitable location that will provide enhanced visibility. -
Page 8: Specifications
MODEL IDENTIFICATION: Complete Model No. Gas Type Description VF80CE-N5 DSI Natural Direct Spark Ignition NG – 73.3 kW VF80CE-L5 DSI Propane Direct Spark Ignition LP – 73.3 kW Module Electrical Rating: Direct Spark Ignition DSI Input-Control: 18-30 VAC 3 ignition trials... -
Page 9: Dimensions
6.0) DIMENSIONS Model No. W (width) D (depth) H (height) VF80CE-N5 DSI 779mm 465mm 722mm VF80CE-L5 DSI Form No. 43539470 Oct 2019 A –8–... -
Page 10: Installation - Suspension. Hanging And Leveling The Heater
7.0) INSTALLATION – SUSPENSION, HANGING AND LEVELING THE HEATER 1. Heater must be secured by only noncombustible materials. 2. Heater must be installed using best building practices. 3. All hanging material such as chains, etc. must have a minimum working load capacity of 150 lbs (68 kg). 4. -
Page 11: Gas Connections
8.0) GAS CONNECTIONS IMPORTANT BEFORE CONNECTING THE GAS TO THE HEATER 1. Connect to the supply tank or manifold in accordance with state or local building codes. Authorities having jurisdiction should be consulted before the installation is made. 2. Check that the gas fuel on the burner rating plate matches the fuel for the application. 3. -
Page 12: Sediment Trap And Gas Leak Checks
8.1) SEDIMENT TRAP AND GAS LEAK CHECKS A sediment trap kit is furnished with each heater and is to be installed by qualified contractor in accordance with the manufacturer’s instructions and all codes and requirements of the authority having jurisdiction. Failure to follow instructions could result in death, serious injury or property damage. -
Page 13: Instructions For Pressure Test Gauge Connection
8.3) INSTRUCTIONS FOR PRESSURE TEST GAUGE CONNECTION INLET GAS PRESSURE CHECK 1. Turn off all electrical power and manual gas shutoff valve to the system to connect manometer hoses. 2. Turn the pressure test screw in the center of the inlet pressure boss (see Figure 1 below) not more than one turn counterclockwise. -
Page 14: Electrical Requirements
9.0) ELECTRICAL REQUIREMENTS The electrical wiring to this heater must be installed in accordance with the latest or current National Regulations and any Local Regulations, which apply. Electrical supply 230V~50Hz 500W Current rating 2.0A Fuse externally 5.0A 1. Using flexible international harmonized 3-wire PVC (thermoplastic jacket) supply cable with earth (0.75 mm to National or Local standard specifications) connect the power supply leads to the terminal block and earth connection located inside the control housing as follows: Brown... - Page 15 INTERNAL CONNECTION WIRING DIAGRAM – DSI SYSTEM Module Terminal Designations - DSI Flame sensor 24Vac transformer ground to module 24Vac transformer ground to Gas valve 24 VAC 24Vac supply to module L1 (HOT) 230Vac supply to module 230Vac supply to blower motor Gas valve output 24Vac Sail switch return 24Vac 24Vac supply to module...
-
Page 16: Lighting And Shutdown Instructions
10.0) LIGHTING AND SHUTDOWN INSTRUCTIONS 10.1) DIRECT SPARK (DS) IGNITION SYSTEM 1. Turn on the gas and electrical supply. 2. Set the thermostat to call for heat. The blower motor will energize. 3. Ignition should occur after the 3 second air pre-purge. 4. -
Page 17: Variable Heat Output Adjustment
11.2) VARIBLE HEAT OUTPUT ADJUSTMENT The heater is equipped with a manual ball valve. This manual ball valve can be adjusted for variable heat output by rotating the handle in the positions shown. NOTE: The manual ball valve is not a gas shut-off valve. 12.0) VENTILATION FOR YOUR SAFETY: Exhaust fans must be operating on an appropriate cycle when heating the building to avoid high concentrations of carbon monoxide and water vapor. -
Page 18: Cleaning And Annual Maintenance
PPD and other materials to catch on fire at wall penetration point. Only genuine air ducts designed and supplied by Space-Ray® must be used to avoid excessive backpressure which will cause heater operational performance issues and cause excessive Carbon Monoxide, heater component overheating, etc. -
Page 19: Servicing
Main Burner and Orifice: Check the Main burner and orifice; remove any dirt or debris including spider webs. Periodic Cleaning of Cabinet: Periodically clean the external part of the cabinet areas first by blowing the cabinet off with compressed air then using water spray and brushing lightly. CAUTION: The heater shall not be operated for one hour following any wash-down. -
Page 20: Motor And Blower Assembly
14.1) MOTOR AND BLOWER ASSEMBLY The motor (including the capacitor) and blower wheel are not serviceable. If the blower assembly makes excessive noise the motor bearings have failed and the motor needs replacing. Replace the motor when 230Vac are supplied but it does not turn. If the blower assembly makes excessive vibration the impellor may require cleaning. -
Page 21: Transformer
14.4) TRANSFORMER The transformer is not serviceable Check that the transformer is receiving 230VAC power supply. Blue and brown wires Check that there is 24VAC on the outlet side of the transformer. Red and yellow wires Replace if necessary. 14.5) HIGH TEMPERATURE LIMIT SWITCH The high temperature limit switch is not serviceable. -
Page 22: Gas Valve (Dsi)
Inspect the burner ports for dirt, dust or other debris. Clean with a bristle brush and blow out with compressed air. Replace if necessary. 15.0) REPLACING PARTS Use only genuine Space-Ray® replacement parts. Parts are available from the factory for replacement by a licensed person. Refer to the Replacement Parts Guide in Section 17 for all replacement parts. 15.1) -
Page 23: Removal Of Air Proving (Sail) Switch
15.2) REMOVAL OF AIR PROVING (SAIL) SWITCH Replacement procedure: Rotate the latching knob and open the door at the motor and blower compartment. Disconnect the lead wires from the switch. Remove the (2) sheet metal screws holding the sail switch and housing sub-assembly. Remove clip on cover and the (2) nuts holding the sail switch to the housing. -
Page 24: Removal Of Ignition Control Module - Dsi Models
15.3) REMOVAL OF IGNITION CONTROL MODULE – DSI MODELS Replacement procedure: Rotate the latching knob and open the small door of the module/transformer control compartment. Disconnect the wire leads from the defective module. Remove the (2) sheet metal screws holding the module and remove it. Replace module in reverse order. -
Page 25: Removal Of High Temperature Limit Switch - All Models
REMOVAL OF HIGH TEMPERATURE LIMIT SWITCH – ALL MODELS 15.5) Replacement procedure: Rotate the latching knob and open the large size door at the burner/gas valve compartment. Disconnect the lead wires from the limit switch. Remove the (2) sheet metal screws holding the high temperature limit switch and remove it. Replace high temperature limit switch in reverse order. -
Page 26: Removal Of Electrode And Hot Surface Igniter - Dsi Models
15.7) REMOVAL OF SPARK ELECTRODE AND HOT SURFACE IGNITER – DSI MODELS Replacement procedure: Rotate the latching knob and open the large size door at the burner/gas valve compartment. Disconnect the wire lead wire from the spark electrode. Remove the (1) sheet metal screw holding the electrode and remove it. Replace this in reverse order. -
Page 27: Removal Of Main Burner - All Models
15.9) REMOVAL OF MAIN BURNER – ALL MODELS Replacement procedure: Rotate the latching knob and open the large size door at the burner/gas valve compartment. Remove the gas valve as described in 14.9 Remove the screw attaching the ground wiring onto the burner. For Pilot models disconnect the pilot assembly from the main burner by removing the wing screw. -
Page 28: Troubleshooting
17.0) TROUBLESHOOTING 17.1) TROUBLESHOOTING CHART – DSI CONTINUE TO DIRECT SPARK IGNITION (DSI) Form No. 43539470 Oct 2019 A –27–... -
Page 29: Troubleshooting Chart - Dsi
17.2) TROUBLESHOOTING CHART – DSI Form No. 43539470 Oct 2019 A –28–... -
Page 30: Replacement Parts Guide
18.0) REPLACEMENT PARTS GUIDE Only use genuine Space-Ray® replacement parts. Parts are available from the factory for replacement by a licensed person. Refer to the Replacement Parts Guide in Section 17.0) for all replacement parts. MODELS USED ON: VF80CE (DSI) - LP & NG MODEL SUFFIXES Item No. - Page 31 Housing Output Side 250K Heater 44602060 Housing Side 250K Heater 44601530 Cover Gas Valve 250K Heater 50000320 Clamp Cable Nylon .390 Heyco –not shown- 43539470 MANUAL (not shown) 42013149 Logo, Space-Ray “VELOCITY”(UK) 43311290 Label, Nameplate Form No. 43539470 Oct 2019 A –30–...
- Page 32 44593930 Label Kit – DSI UK (not shown) 43269730 Label, Symbol – Voltage Danger (230V) 44593010 Label, Combination Hazards & Ventilation 44593020 Label, Wash-Down Hazards 44593039 Label, Electrical Grounding 44593049 Label, Variable Heat Adjustment 44593059 Label, Blower Rotation 44593069 Label, Access Panel (closed) 44593160 Label, Lighting/Shutdown –...
- Page 33 Form No. 43539470 Oct 2019 A –32–...
- Page 34 Form No. 43539470 Oct 2019 A –33–...
- Page 35 Form No. 43539470 Oct 2019 A –34–...
-
Page 36: Warranty
GAS-FIRED PRODUCTS LIMITED WARRANTY LIMITED WARRANTY Gas-Fired Products (UK) Ltd., (GFP), the manufacturer, warrants the original owner of any Space-Ray Poultry Heating Product that it will be free from defects in material or workmanship under normal use and service. The heater(s) shall be installed, used and maintained strictly in accordance with the manufacturer's instructions. - Page 37 When presenting warranty claims, proof of date of purchase must be submitted. No Representative is authorised to assume for the manufacturer, any liability except as set forth above. FOR YOUR RECORDS: Space-Ray® Brooder Model Number: ______________________________ Date Installed: ____________ Serial Numbers: _____________________________________________________________________ For replacement parts, please contact your local distributor or: Gas Fired Products (UK) Ltd.
Need help?
Do you have a question about the VF80CE-L5 DSI and is the answer not in the manual?
Questions and answers