Advertisement
Table of Contents
- 1 Table of Contents
- 2 Installation
- 3 Using the Detachable Front Panel
- 4 Wiring Iagram D
- 5 Operations
- 6 Location and Function of Controls
- 7 General Perations O
- 8 Radio Perations O
- 9 RDS (Radio Data System) Operations
- 10 CD/MP3/WMA Disc Operations
- 11 2 Mixed- Mode CD Perations O
- 12 Aux Input Operations
- 13 4 Bluetooth Hands-Free Unction F
- 14 8 Specifications
- Download this manual
Advertisement
Table of Contents

Subscribe to Our Youtube Channel
Related Manuals for Caliber RCD 263BT


Summary of Contents for Caliber RCD 263BT
-
Page 2: Table Of Contents
CONTENTS Page Contents Installation Using the detachable front panel Wiring iagram Operations Location and function of controls General perations Radio perations RDS (Radio Data System) operations CD/MP3 /WMA disc o perations Mixed- mode CD perations USB perations SD/MMC ard perations AUX in put o perations... -
Page 3: Installation
Take Out Screw Before Installation Installation Before install the unit, please remove the two screws. Notes: - Choose the mounting location where the unit will not interfere with the normal driving function of the driver. - Before finally installing the unit, connect the wiring temporarily and make sure it is all connected up properly and the unit and the 1. - Page 4 10. Reconnect the cable to the vehicle 6. Mount the sleeve by inserting the sleeve into the opening of the dashboard and bend battery's negative (-) terminal. Then open the tabs located around the sleeve replace the outer trim ring and install the with a screwdriver.
-
Page 5: Using The Detachable Front Panel
Using the detachable front panel Using the detachable front panel 2. DIN REAR-MOUNT (Method B) Removing and protecting detachable If your vehicle is a Nissan, Toyota, follow front panel this mounting instruction. Use the screw The front panel of the unit may be removed holes marked T (Toyota), N (Nissan) as a theft deterrent. -
Page 6: Wiring Iagram D
Wiring diagram RCA connector to front left output (White) RCA connector to rear left output (White) Antenna Socket ISO CONNECTOR RCA connector to rear right output (Red) RCA connector to front right output (Red) YELLOW TO MEMORY B+ BLACK BLUE GROUND B- TO ANTENNA ACC B+... -
Page 7: Operations
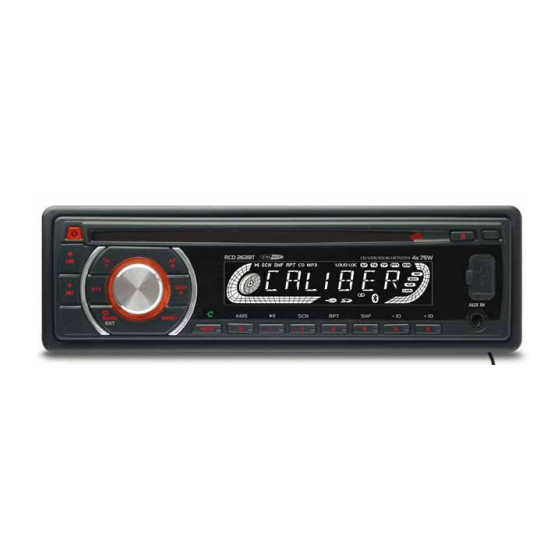
Operations Location and function of controls Front panel: CD/USB/SD/BLUETOOTH 14 15 The car radio after removing the front panel: Descriptions of Function Controls Power on/off Button ( ), Mute Button (14) Preset Station (1-6) Buttons Volume Control, Audio/Menu Selector (SEL) (15) Random(SHF) Playback, Numeric 4 Button TEL Menu Button (MENU) -
Page 8: General Perations O
“MASK DPI or MASK ALL” “TAVOL 17” General Operations (traffic announcement volume) “CLOCK 24 or 12” (Clock format) “BEEP ON/OFF” Reset the unit (beep sound on/off EXIT When operating the unit for the first time, after replacing the car battery or changing After selecting the desired menu item, the connections, you must reset the unit. - Page 9 “RETUNE L or RETUNE S” (long/short disabled. retune): Rotate the volume control to select switch This function allows you to set the duration on or off the confirmation beep sound after which the automatic search for traffic information or a station with an identical PI Mute on/off should be carried out.
-
Page 10: Radio Perations O
Note: The selected information is displayed Radio operations for 5 seconds, then the radio goes back to the first display mode after 5 seconds. To select a radio band In radio mode, press the BAND button Clock display and adjustment repeatedly to select a radio broadcasting - To view the current time band you would like to hear. -
Page 11: Rds (Radio Data System) Operations
Short pressing the button, the radio When regional mode on, the radio accepts searches for each preset station that saved RDS stations with regional variants, in the memories of the current band. If the current listening program remains field strength level is more than the unchanged ;... -
Page 12: Cd/Mp3/Wma Disc Operations
Listening to Traffic Announcement CD/MP3/WMA disc operations It is possible to program the car radio so that it interrupts disc mode, radio mode, Loading/Removing a Disc AUX mode or the current radio station when 1. Turn the power on. a traffic announcement is broadcast. 2. -
Page 13: 2 Mixed- Mode Cd Perations O
Repeat playback c) Once the folder has been selected, press In CD or MP3/WMA file playback, briefly BAND (ENTER) button to start play, the press the button to continuously play first the track or file of the selected folder the current track. The word “RPT” appears will be played. -
Page 14: Aux Input Operations
USB operations SD/MMC card operations The unit is equipped with a USB port on the This unit equipped with you a memory card front panel of the unit, you can connect a slot. USB stick through the USB port. Using the SD/MMC card: Using the USB stick: When you insert a SD/MMC card into the When you insert a USB stick through the... -
Page 15: 4 Bluetooth Hands-Free Unction F
3. DIAL CALL Bluetooth hands-free function Dial with the mobile phone directly. When linking up your mobile phone to this Dial with the ~ numeric button. bluetooth hands-free system, you can dial 3.2.1 When the phone is paired, press the or receive calls via this bluetooth device and hold the MENU... - Page 16 DIALED: List of latest 10 outgoing phone 8. Using the A2DP Function numbers. If your mobile phone support A2DP function MISSED: List of the latest 10 missed-call ( Advance Audio Distribution Profile) which phone numbers. is designed for transmitting stereo music to AUTO ANS(MANU ANS): Switch between bluetooth devices, you can listen to the...
- Page 17 - Do not warp discs. Disc notes - A disc should always be kept in its case when not in use to prevent from damage. A. Notes on discs: - Do not place discs in the following places: 1. Attempting to use non-standard shape 1.
- Page 18 Trouble shooting The following chart will help in solving most problems that may occur. If you still have questions after going through the checklist, please consult your local customer service representative. Before going through this check list, refer the wiring and operating procedures. Symptom Cause Solution...
-
Page 19: 8 Specifications
Specifications 1. GENERAL Power Supply Requirements DC 12 Volts, Negative Ground Chassis Dimensions 178(W)x160(D)x 50(H) mm Tone Controls - Bass (at 100 Hz) ±10 dB - Treble (at 10 kHz) ±10 dB Maximum Output Power 4x75 watts Current Drain 15 Ampere (max.) 2.
Need help?
Do you have a question about the RCD 263BT and is the answer not in the manual?
Questions and answers