Roland JUPITER-X Owner's Manual
Hide thumbs
Also See for JUPITER-X:
- User manual ,
- Reference manual (58 pages) ,
- Owner's manual (31 pages)
Table of Contents
Advertisement
Quick Links
Owner's Manual
Owner's Manual
(this document)
Read this first. It explains the basic things you need to know in order to use the JUPITER-X.
PDF Manual
(download from the Web)
5 Reference Manual
This explains all functions of the unit.
5 Parameter Guide
This explains parameters of the unit.
5 Sound List
This lists the sounds that are built into the unit.
5 MIDI Implementation
This is detailed reference material regarding MIDI messages.
To obtain the PDF manual
1.
Enter the following URL in your
computer.
http://www.roland.com/manuals/
I
2.
Choose
"JUPITER-X"
as the product name.
Advertisement
Table of Contents

Related Manuals for Roland JUPITER-X


Summary of Contents for Roland JUPITER-X
- Page 1 Owner’s Manual Owner’s Manual (this document) Read this first. It explains the basic things you need to know in order to use the JUPITER-X. PDF Manual (download from the Web) 5 Reference Manual To obtain the PDF manual This explains all functions of the unit.
-
Page 2: Using The Unit Safely
WARNING WARNING For a list of Roland service centers and official Roland dealers, refer to the Roland website. To completely turn off power to the Do not place in a location that is... -
Page 3: Important Notes
• Do not allow objects to remain on top of the to use a separate electrical outlet, connect a may be impossible. Roland assumes no liability keyboard. This can be the cause of malfunction, power supply noise filter between this unit and concerning the restoration of any stored content such as keys ceasing to produce sound. -
Page 4: Main Specifications
16.9 kg / 37 lbs 5 oz Weight * This document explains the specifications of the product at the time that Owner’s Manual Accessories the document was issued. For the latest information, refer to the Roland Power cord website. -
Page 5: Introduction
Placing the JUPITER-X on a Stand If you want to place the JUPITER-X on a stand, use the Roland KS-10Z or KS-12. Place the JUPITER-X on the stand as follows. Be sure to follow the instructions in the Owner’s Manual carefully when placing this unit on a stand. If it is not set up properly, you risk creating an unstable situation which could lead to the unit falling or the stand toppling, and may result in injury. -
Page 6: Table Of Contents
: Performing with a Connected Pedal ... . . 13 Using the JUPITER-X as a MIDI Keyboard for a Music App : Differentiating Multiple JUPITER-X Units Selecting and Playing Tones . -
Page 7: An Overview Of The Jupiter-X
Each model is equipped with different unique parameters and effects, and the effect of operating the knobs and other controllers will also differ. This means that you can use a single JUPITER-X unit as if you owned a variety of units. -
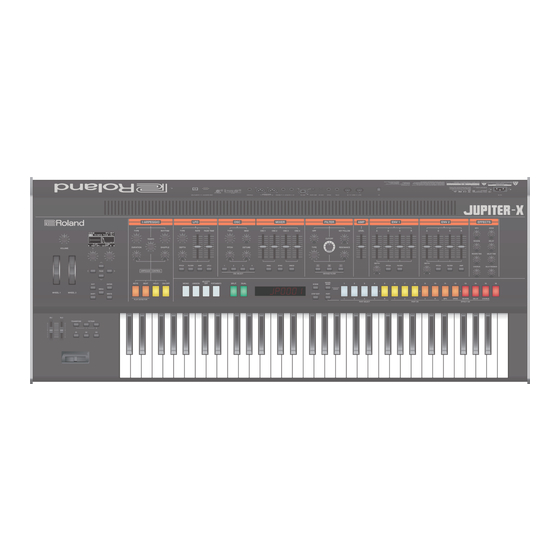
Page 8: Panel Descriptions
Panel Descriptions Top Panel * Some controllers are not operable in some modes. For details, refer to “Reference Manual” (PDF). Common section I-ARPEGGIO Display 1 [TYPE] knob Shows various information for the operation. Selects the arpeggio type. [1] [2] knobs [RHYTHM] knob Use these knobs to move the cursor or change a value. - Page 9 If a vintage type model is selected, these buttons change the type When the button is unlit, this section makes settings for LFO1. of filter. models a Roland filter, and model the filters of vintage synthesizers made by other manufacturers.
- Page 10 Panel Descriptions [1]–[16] buttons EFFECTS These buttons have various functions depending on the mode. [MFX] knob Sound select mode Adjusts the MFX depth (individually for each part). The buttons select tones of the models that are assigned to the buttons. [DRIVE] knob By holding down the [MODEL BANK] button...
-
Page 11: Rear Panel (Connecting Your Equipment)
You can connect a USB flash drive here. Connect an expression pedal (EV-5; sold separately). Connect or disconnect the USB flash drive while the JUPITER-X is * Use only the specified expression pedal. By connecting any other expression pedals, you risk causing malfunction and/or damage to the powered-off. -
Page 12: Turning The Jupiter-X On
Adjust the [VOLUME] knob. * In order to protect its circuitry, the JUPITER-X waits for a while after being powered-on before it begins operating. Switch on power to the connected equipment, and raise the Using the Built-In Speakers volume to an appropriate level. -
Page 13: Using The Scene Function
Using the Scene Function (SCENE) SCENE top screen Scene Edit This is the screen that appears first when you press the [SCENE] button. Here’s how to edit the scene parameters. Scene bank–Scene number Scene name Press the [SCENE] button to access the top screen. Current internal Press the PAGE [>] button to move to the SCENE COMMON temperature... -
Page 14: Selecting And Playing Tones (Model Bank)
In MODEL BANK mode, you can change the model or sound from the Tones that you download or tones that you exported from another top screen, or select tones from models registered in a model bank unit can be imported into the JUPITER-X as added tones. ([1]–[16] buttons). -
Page 15: Using The Performance Functions
To return to the original state, press the OCTAVE [-] buttons. NOTE Transposing the keyboard in semitone steps (Transpose) The JUPITER-X supports dynamic microphones and electret Hold down the [TRANSPOSE] button and press the OCTAVE condenser microphone (plug-in power system). It does not support [-] [+] button. -
Page 16: Editing The Sound
Saving a Sound You’ve Created (WRITE) The sound you create will change if you move a knob or select a Selecting the oscillator to edit different tone, and will be lost when you switch off the JUPITER-X’s Press the OSC SELECT [1]–[4] button. -
Page 17: Using I-Arpeggio
Using I-ARPEGGIO I-ARPEGGIO is a completely new type of arpeggiator that uses AI to transform your keyboard playing into the ideal arpeggiated phrases. You can use it to generate ideas for songs, or use it in your live performances. Type Arpeggio pattern Arpeggio pattern Part 1... -
Page 18: Automatically Changing The Arpeggio
Using I-ARPEGGIO Automatically Changing the Arpeggio Item Operating the Unit PAGE [ ] [ ] buttons Move between pages (PLAY DETECTOR) Exit step edit and return [EXIT] button PLAY DETECTOR is a function that varies the arpeggio in real time by to the top screen detecting your keyboard playing. -
Page 19: Using The Bluetooth® Functionality
[2] knob to turn it “ON.” MEMO Using the JUPITER-X as a MIDI Keyboard for If you want to save the setting, execute the System Write operation. a Music App &“Saving the System Settings (System Write)” (p. 23) -
Page 20: Differentiating Multiple Jupiter-X Units
Using the Bluetooth® Functionality Differentiating Multiple JUPITER-X Units Disabling the Bluetooth Functionality (Bluetooth ID) Disable the Bluetooth functionality if you don’t want this unit to be connected via Bluetooth with your mobile device. You can specify a number that is added following the device name of this unit when it is displayed by a Bluetooth connected application. -
Page 21: Connecting External Equipment
IN 4 (output of the JUPITER-X’s part 4) USB cable IN 5 (output of the JUPITER-X’s part 5) IN MIC (output of the signal that is input from the JUPITER-X’s MIC IN jack) Audio output device Device Name Port Name... -
Page 22: Connecting A Usb Flash Drive
5 All user data are rewritten when you execute the restore operation. If your Formatting a USB Flash Drive JUPITER-X contains important data, assign it a different name and back it (FORMAT USB MEMORY) up to an USB flash drive before you restore. -
Page 23: Settings For The Entire Unit
Value Explanation [1] knob [2] knob Here’s how the settings that you edited and saved on the JUPITER-X AGING can be returned to their factory-set condition. Specifies whether the character of the sound * When you execute this operation, all saved settings including the sound (pitch variance) changes according to the parameters will be lost. - Page 24 Adjusts the brightness when the LEDs are lit. LED On Bright from a connected MIDI device, turn this “OFF. ” When the JUPITER-X is operating, you can make SYS: SysCtrlSrc1–4 are used for tone control. the LEDs remain dimly lit when off instead of 0–30...
- Page 25 Settings for the Entire Unit Parameter Value Parameter Value Explanation Explanation [1] knob [2] knob [1] knob [2] knob PEDAL Func Specifies the time from when the input to the 0.1, 1, 2,... 100 mic compressor exceeds the Comp Thres level CompAttack [ms] Specifies whether the function assigned to the...
- Page 26 Settings for the Entire Unit List of functions that can be assigned to the controllers Parameter Value Explanation [1] knob [2] knob S1 Func SYSTEM COLOR SET (*2) Function S2 Func HOLD Ctrl Wheel1 Wheel2 Saves and switches color settings for each set 1–10 Color Set S3 Func...
Need help?
Do you have a question about the JUPITER-X and is the answer not in the manual?
Questions and answers