Table of Contents
Advertisement
Quick Links
Advertisement
Table of Contents

Related Manuals for OpenEye OE-C7564-AWR REVB


Summary of Contents for OpenEye OE-C7564-AWR REVB
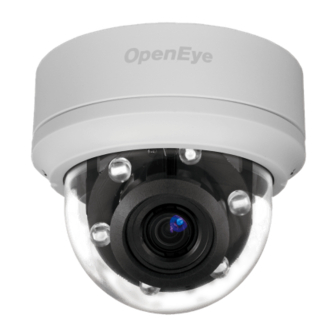
- Page 1 4MP WDR IP Dome Camera User Manual Camera OE-C7564-AWR REVB...
- Page 2 The information in this publication is provided “as is” without warranty of any kind. The entire risk arising out of the use of this information remains with recipient. In no event shall OPENEYE be liable for any direct, consequential, incidental, special, punitive, or other damages whatsoever (including without...
- Page 3 Important Safeguards 1. Read Instructions Read all of the safety and operating instructions before using the product. 2. Retain Instructions Save these instructions for future reference. 3. Attachments / Accessories Do not use attachments or accessories unless recommended by the appliance manufacturer as they may cause hazards, damage product and void warranty.
- Page 4 Disposal and Recycling Information When this product has reached the end of its useful life, please dispose of it according to your local environmental laws and guidelines. Installation and Storage Do not install the camera in areas of extreme temperatures in excess of the allowable range; •...
- Page 5 Warning DANGEROUS HIGH VOLTAGES ARE PRESENT INSIDE THE ENCLOSURE. DO NOT OPEN THE CABINET. REFER SERVICING TO QUALIFIED PERSONNEL ONLY. THE CAMERA IS TO BE CONNECTED ONLY TO POE NETWORKS WITHOUT ROUTING TO THE OUTSIDE PLANT. Caution Risk of explosion if battery is replaced by an incorrect type. Dispose of used batteries according to the instructions.
-
Page 6: Table Of Contents
TABLE OF CONTENTS INTRODUCTION ......................6 Overview ..............................6 Product Features ..........................6 GETTING STARTED ...................... 7 Box Contents ............................7 Camera Overview ............................. 8 Camera Dimensions ..........................8 Connections ............................9 Network Camera Manager ......................... 10 Launching Network Camera Manager ....................10 Camera Configuration ........................ -
Page 7: Introduction
4MP. This camera is capable of dual and quad streaming, allowing up to three simultaneous streams. The OE-C7564-AWR REVB comes equipped with high-powered IR LEDs and a mechanical IR cut filter for true day/night operation. The Smart Compression option reduces storage requirements by up to 70% while maintaining high resolution video allowing you to meet video retention and resolution requirements for less. -
Page 8: Getting Started
GETTING STARTED BOX CONTENTS Before proceeding, please check that the box contains the items listed here. Contact your dealer for assistance if any item is missing or has defects. OE-C7564-AWR REVB IP Dome 2-Pin Power Terminal Block Camera Plastic Conduit NPT... -
Page 9: Camera Overview
CAMERA OVERVIEW CAMERA DIMENSIONS... -
Page 10: Connections
CONNECTIONS Connection Definition RJ-45 For network and PoE connections For analog video output 24vAC 1 24vAC 2 Power (12vDC / Power connection 24vAC) 12vDC 1 12vDC 2 To restore the camera to factory defaults: 1. Disconnect power for 30 seconds. Reset Button 2. -
Page 11: Network Camera Manager
NETWORK CAMERA MANAGER OpenEye Network Camera Manager (NCM) is a software tool that allows you to quickly and easily connect and configure your OpenEye IP Cameras. This software allows you to assign IP addresses, configure video settings, and update firmware on multiple cameras at once. -
Page 12: Viewing A Network Camera
2. Enter the Username and Password for the camera. The username and password are case sensitive. USERNAME AND PASSWORD *OpenEye IP cameras ship without a default password. The admin user password can be set using the following methods: 1. Network Camera Manager 2. -
Page 13: Live
LIVE Snapshot – Click the button, and a JPEG snapshot will automatically be saved in the appointed place. The default location is: C:\ Full Screen – This will display the live feed in full screen. Microphone – PC audio to camera, enables audio through an audio out on the camera. Live Audio –... -
Page 14: Setup
SETUP The Setup menu includes System Settings, Picture Setup, and Streaming Settings. Note The Setup menu displays limited setup options. For a complete list of setup options, see the Advanced section. SYSTEM SETTING Camera Name Host Name – The Host Name is used to identify the camera on your system. If camera side Motion Detection is enabled and is set to send alarm message by Mail/FTP, the host name entered here will display in the alarm message. -
Page 15: Ip Address
Every network device has a unique Media Access Control (MAC) address that can be used for identification. The MAC address is located on the bottom of each camera, and on the box label (OpenEye Network Camera Manager also displays the MAC address for identification). Record your camera’s MAC address for identification in the future. - Page 16 4. Click Apply to confirm the new setting. When using static IP address to log in to the IP Camera, you can access it either through OpenEye IP Finder software or type the IP address directly in the address bar of your Internet Explorer.
-
Page 17: File Location
Use the Camera Tab section to modify picture settings for the camera. The sample image will change as you modify the picture settings. Note These settings can drastically affect the camera image. OpenEye suggests that these settings are only modified by a CCTV professional, or at the instruction or a technical support representative. - Page 18 Picture Adjustment Each of the Picture Adjustment settings is set to the recommended default. Brightness – Adjust the image’s brightness on the camera. The Backlight value is adjustable from 0 (dim) ~ +20 (brightest). Sharpness – Increasing the sharpness level can make the image looked sharper; it especially enhances an object’s edge.
- Page 19 Add Detection Area 1. Use the Motion Detection dropdown to select a motion detection preset. 2. Select the Enable brush check box under Motion Region Paint and then use the cursor on the live view pane to highlight the desired motion detection area. 3.
-
Page 20: Streaming Settings
STREAMING SETTINGS VIDEO RESOLUTION The camera allows you to configure each of the streams independently. Encoding – enable Stream 2~Stream 4 encoding. Encode Type – select the preferred encode type (H.265, H.264, MJPEG). Resolution – set the resolution of stream. Rate Control –... -
Page 21: Stream Urls / Rtsp
It is possible to connect to OpenEye IP cameras using third party software like VLC media player. To connect some types of software will need to know the stream URL. All OpenEye IP cameras are capable of delivering two RTSP streams, as well as streaming MJPEG over HTTP. - Page 22 Video Rotation Mirror Yes - Flip the video across the vertical axis. No - Do not mirror video. Rotate Type 0 - The video will be oriented as the camera position dictates. 90 - Rotate video 90 degrees clockwise. 180 - Rotate video 180 degrees clockwise. 270 - Rotate video 270 degrees clockwise.
-
Page 23: Advanced
ADVANCED SYSTEM SETTING NETWORK SETUP OpenEye IP cameras are set to DHCP by default. If a DHCP server is not detected after 2 minutes, the camera will default to IP address 192.168.51.2. If you are not using a DHCP server, NCM will allow you to batch configure a static IP address. -
Page 24: Network Advanced
NETWORK ADVANCED Quality of Service allows you to prioritize network traffic services of the camera’s functions. The QoS function utilizes the Differentiated Services prioritized using Codepoint values (DSCP). Note Routers and switches on the network must be QoS or DSCP capable, and have these settings enable for this function to operate on your network. -
Page 25: Alarm Application
ALARM APPLICATION The alarms menu is where alarm connections are configured. Alarm Switch – Designate when the alarm will be active; Off, On, or By Schedule. Alarm Type – Designate if the alarm is normally open or normally closed. Example: A door sticker consists of two contacts that are connected when under normal conditions. -
Page 26: Tampering And Network Failure Detection
SD CARD All OpenEye IP cameras include an integrated microSD™ card slot that can be used to record video or images. The card slot is compatible with a microSD™ card up to 64GB. Device Information – Displays the storage total size and free space information of the included microSD™... -
Page 27: Network Share
NETWORK SHARE Network Share is a network protocol that runs a variety of different system platforms, allowing for file sharing between computers operating on Windows and computers operating on Unix. This serves as an additional storage type. Configuration requires the host IP address, share name, and credentials. Once configured, cameras can record events to the network share. -
Page 28: Recording Schedule
RECORDING SCHEDULE The recording schedule allows you to set up scheduled recording to the microSD™ card or to Network Sharing. Recording This section allows you to define recording schedules for the camera. For continuous recording: 1. Select type of Recording Storage. microSD™... -
Page 29: Maintenance
Schedule This section allows you to establish schedules to use in other section. To create a schedule: 1. Select a Schedule set (1-10). 2. Check the desired weekday check boxes. 3. Select Day or Night. 4. Designate a Start Time and Duration. 5. - Page 30 Configuration Export Configuration: 1. Click Export Configurations. 2. The .bin file will be saved. Note The default location for exported configurations is C:\ Upload (Import) Configuration: 1. Click Browse in the Configuration Import box. 2. Select a .bin file that you want to import. 3.
-
Page 31: Software
SOFTWARE 1. Click Browse and find the upgrade file. Note Do not change the file name, or the system will fail to find the file. 2. Click Upgrade. The system will check to find the upgrade file, and then start to upload the upgrade file. -
Page 32: Hot Spot
HOT SPOT The Hot Spot feature allows you to transmit different parts of the camera image on separate streams. Each stream displays a portion of the image at the full size of a regular image. This is useful for focusing on details in different areas of a single camera view. -
Page 33: Streaming Setting
STREAMING SETTING AUDIO Transmission Mode: Full-duplex (Talk and list simultaneously) Half-duplex (Talk or listen, not at the same time) Simplex (Talk only) Simplex (Listen Only) Disable Server Gain Setting: Input gain – sets the amplification that the camera applies to the incoming audio before transmitting. - Page 34 All rights reserved. No part of this publication may be reproduced by any means without written permission from OpenEye. The information in this publication is believed to be accurate in all respects. However, OpenEye cannot assume responsibility for any consequences resulting from the use thereof.
Need help?
Do you have a question about the OE-C7564-AWR REVB and is the answer not in the manual?
Questions and answers