Fresenius Kabi Volumat MC Agilia Instructions For Use Manual
Volumetric infusion pump
Hide thumbs
Also See for Volumat MC Agilia:
- Instructions for use manual (148 pages) ,
- User training manual (24 pages) ,
- Quick reference manual (12 pages)
Table of Contents
Advertisement
Advertisement
Table of Contents

Related Manuals for Fresenius Kabi Volumat MC Agilia


Summary of Contents for Fresenius Kabi Volumat MC Agilia
- Page 1 Volumat MC Agilia Volumetric Infusion Pump Instructions for Use...
-
Page 2: Table Of Contents
Contents 1. INTRODUCTION ............................4 Programming modes ............................ 4 Infusion modes ............................. 4 Intended use ..............................5 Precautions to be taken ..........................5 2. DESCRIPTION ............................. 6 3. INSTALLATION ............................8 4. OPERATIONS ............................13 No drug name and flow rate ml/h modes....................13 Other infusion modes in flow rate ml/h ....................... - Page 3 Electromagnetic immunity - Table 202 ....................... 59 Electromagnetic immunity - Table 204 ....................... 60 Recommended separation distances between portable and mobile RF communication equipment and Volumat MC Agilia - Table 206 ........................61 13. CLEANING AND USE CONDITIONS ......................62 Cleaning and disinfecting..........................62 Environmental conditions..........................
-
Page 4: Introduction
Ramp mode, Sequential mode, etc. It is intuitive and easy to learn, like all devices of the Agilia range. Thanks to its various programming modes, infusion modes, customisation capabilities and its extensive set range, Volumat MC Agilia can be used in any unit of the hospital: general wards, paediatr ics , intensive care, oncology, etc. -
Page 5: Intended Use
EEG, ECG, etc. If Volumat MC Agilia is placed near devices like HF surgical equipment, X-rays, NMR, mobile phones or Wi-Fi access points, it is essential to observe a minimum distance between the Volumat MC Agilia and this equipment (see page 60 -Electromagnetic Immunity). -
Page 6: Description
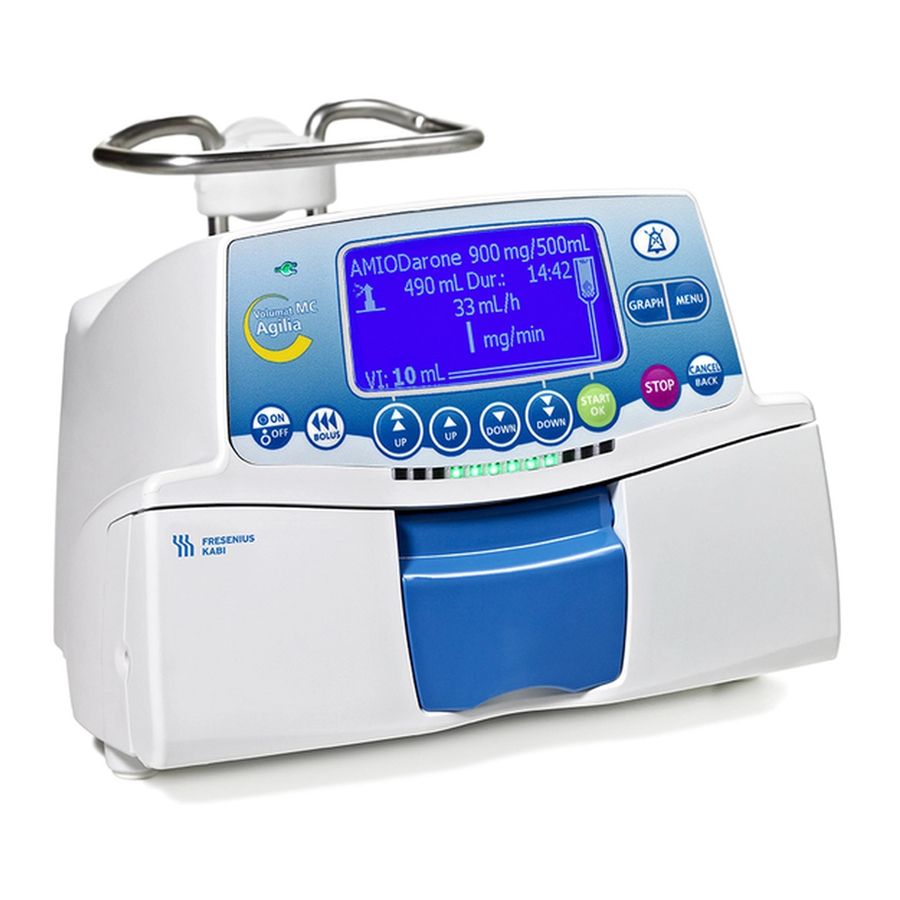
2. Description 1 - Handle 5 - Infrared cell 9 - Fixing button 2 - Pump door 6 - Mains power 10 - Drop sensor connection socket 3 - Door lever 7 - Communication port and DC power input-output 4 - Assembly bolt 8 - Fixing clamp... - Page 7 11 - Mains indicator 17 - OK/Start/Enter 23 - BOLUS or PRIME 12 - SILENCE ALARM 18 - Indicator lights (LEDs) 24 - ON/OFF 13 - MENU 19 - Fast decrement 25 - Monitoring screen 14 - Graphic Function 20 - Decrement (see page 12) 15 - Correction/Back 21 - Increment...
-
Page 8: Installation
3. Installation Positioning the pump(s) on a pole on a rail on a table Several Agilia devices can be When two Agilia devices are Agilia products are easily assembled on a pole in any order. stacked together, the Agilia Duo transportable. - Page 9 Using the fixing clamp The fixing clamp is only orientable when closed against the pump. It is maintained in its vertical or horizontal position with the fixing button. The following images show how to modify the pump installation, from a pole to a rail position. Unscrew the clamp screw (A) and disengage the Fold the fixing clamp against the pump.
- Page 10 The test performs a complete alarms and safety Volumat MC Agilia can operate with its battery, but features check. It is recommended if the device the mains supply should be used under normal has not been used recently, and is mandatory in conditions to ensure the battery is charged.
- Page 11 Installing the tubing set in the pump Open the pump door by lifting the door lever. 1. Align the tubing set horizontally along the tube Note: The pump automatically switches on when guides so that the green connector is positioned connected to mains (see Ward option [Par 28], to the right (green) and the blue clamp is page 48).
- Page 12 Installing the tubing set in the pump The final installation should look like this: Place the container outside the pump The container should be placed between Towards the patient 20 and 80 cm To wards the patient above the pump The set should be positioned in the pump so as to avoid any tension Monitoring screen...
-
Page 13: Operations
4. Operations No drug name and flow rate ml/h modes The V/R infusion mode and No drug name programming mode are described. For another infusion mode, go to page 14; for another programming mode, go to page 25 or page 26. 1 - Flow rate/Start... -
Page 14: Other Infusion Modes In Flow Rate Ml/H
Other infusion modes in flow rate ml/h The infusion mode set by default is displayed, but you can select another infusion mode (Volume/Time/Rate, Volume/Time, Time/Rate, Simple rate, Ramp, Sequence or Drops/min), provided it is preselected in the Ward option [Par 29] (see page 48). Note: The infusion mode menu is accessible before starting the infusion and in <STOP>... - Page 15 Time/Rate Simple rate „ Select a time, then press OK. „ Select a flow rate, then press OK and Start. „ Select a flow rate, then press OK and Start. Note 1: This infusion mode only works with the drop Note: The volume to be infused (VTBI) is calculated sensor fixed on the drip chamber and connected to the automatically and cannot be modified directly.
- Page 16 Ramp mode This infusion mode allows, with a simple adjustment of the rise and fall times, the infusion flow rate to be increased gradually by 10 intermediate stages until the maximum plateau flow rate is reached. At the end of the infusion, the flow rate will be gradually reduced to zero.
- Page 17 Sequential mode Up to 20 infusion sequences can be programmed, each with their own volumes to be infused and infusion flow rates. Pause (Stop) or Keep Vein Open (KVO) periods can also be programmed in sequential mode. Note: This mode is accessible only in flow rate ml/h mode. „...
- Page 18 Secondary mode This infusion mode deliver s the content of a secondary bag / bottle, by means of a secondary line connected to the main line called primary line. Once the secondary infusion is completed, the user can either continue another secondary infusion, or resume the primary infusion (initial infusion) which parameters are restored.
- Page 19 3 - End of secondary infusion „ Once the secondary infusion is completed, press „ Press Yes to continue a secondary infusion. Go back to step 1. key. „ Press No to go back to the primary infusion. 4 - Start again primary infusion „...
-
Page 20: No Drug Name And Dose Rate Mode
No drug name and dose rate mode V/R infusion mode is described. For another infusion mode, see page 14. 1 - Start-up screen 2 - Dilution units „ Choose dose rate mode, then press OK. „ Use the arrows to select the dilution units. Note: You can select "unit/ml"... - Page 21 5 - Patient Note: This screen only appears if you have selected a flow rate unit of "mg/kg/h" (Weight adjustment) or "mg/m /h" (Surface area adjustment) type. The default weight is set in the Ward option [Par 23] (see page 48). „...
-
Page 22: Loading Dose
7 - Flow rate selection 8 - Starting the infusion „ Select the dose rate, then press OK. „ Open roller clamp. Check that there is no free flow or air remaining inside the infusion line. Note: The flow rate in ml/h is calculated automatically „... - Page 23 11 - Loading dose settings 12 - Loading dose start „ Set up the loading dose parameters and „ Press C to change the loading dose parameters. press OK. Return to step 10. „ Press Start to i nitiate the loading dose. 13 - Loading dose interruption „...
-
Page 24: Other Infusion Modes In Dose Rate
Other infusion modes in dose rate The infusion mode set by default is displayed, but you can select another infusion mode (Volume/Time/Rate, Volume/Time, Time/Rate, Simple rate), provided it is preselected in the Ward option [Par 29] (see page 48). Note: The infusion mode menu is accessible before starting the infusion and in <STOP> mode. Menu selection Infusion mode selection „... -
Page 25: Drug Labelling Mode
Time/Rate Simple rate „ Select a time, then press OK. „ Select a dose rate, then press OK and Start. „ Select a dose rate, then press OK and Start. Note 1: This infusion mode only works with the drop sensor fixed on the drip chamber and connected to the Note: The volume to be infused (VTBI) is calculated pump (for its installation, see page 35). -
Page 26: Vigilant Drug'lib Mode
Drug’Lib mode ® Drug’Lib is the safest and simplest mode to administ er a drug via the Volumat MC Agilia. You Vigilant need to select a drug from a drug library in which the drugs have been predefined with all their infusion ®... -
Page 27: Special Features
Special features Programmed bolus Via <MENU> key Via <BOLUS> key „ Press the „ Press the key: key. „ Press prog. The "Programmed bolus" screen „ Select "Programmed bolus" in the menu. appears. Go to step 1. „ Press Enter. 1 - Bolus unit 2 - Bolus parameters „... - Page 28 3 - Bolus start 4 - Bolus interruption „ Press C to modify the bolus values. Return „ Press the key to interrupt the bolus. to step 1. Answer the question: "Continue?" „ Press Start to i nitiate the bolus. - If you press no, the bolus is deleted.
- Page 29 The first two features are available only if preselected in the Ward option [Par 19] (see page 48). Prime set See air bubble „ Press the key to start-up the pump. Note: This feature is available only when an air alarm The infusion mode defined in the options is displayed is triggered (air volume exceeded or air bubble in front after the OCS screen.
-
Page 30: General Operations
General operations The following operations can be repeated and/or modified during the infusion process. Note: For information on LEDs, see Indicator lights in chapter "Display and symbols", page 36. Stop Switch-off „ To stop the infusion, press the „ Press the key. - Page 31 VTBI selection during infusion Pressure management „ During infusion it is possible to adjust the VTBI. „ The pressure parameters for the infusion can be „ Press the defined from the pressure management menu. key to access the menu and select „...
-
Page 32: History
History To display the history when the infusion is in progress, press the graphic key. This key also allows the numerical and graphical infusion screen to be selected. Press the button with short press until you reach the history menu. Choose the history with the selection value keys. - Page 33 Pressure history (in mmHg) The date and user pressure limit is displayed on the upper line. The dotted curve represents the limit. The limit is adjustable in User Menu [User 4: pressure] (see page 46). It is also adjustable during infusion in the Pressure section of the menu.
- Page 34 8. Follow instructions as described from pages 11 to 13 (set installation and infusion adjustments). Pre-programming the infusion The Volumat MC Agilia can be pre-programmed C will allow parameter modifications and exit validates before installing the tubing set. the program parameters and the device will display the "Install set"...
- Page 35 Warning function Function activation Function deactivation „ Press the „ Press the key to access the menu and key to access the menu and select . Press enter. select . Press enter. „ Select an offset period to set an alarm activation „...
-
Page 36: Display And Symbols
5. Display and symbols Volumat MC Agilia displays the infusion parameters in progress through specific symbols. A drop falling into the drip Infusion in progress chamber (see also Indicator lights for infusion in progress). STOP remains in the centre of the Pause screen until the pause is over. - Page 37 Mains disconnection alarm Pressure increase Pressure drop Alarms and safety Main symbols for alarm and features safety features. Upper soft limit exceeded Lower soft limit exceeded Maximum volume infused exceeded Fast increment key Keys for selecting volume, time, Increment key flow rate and other values.
- Page 38 Pressure Volume to be infused Patient Battery life Macro/Micro History Programming mode The menu gives access to the MENU Maintenance infusion options selected by the user. Sound level Date/time Locking keyboard Pause Drug library Night mode Warning This symbol expresses a set flow OTHER Drops per minute rate in drops per minute.
-
Page 39: Alarms And Safety Features
6. Alarms and safety features Volumat MC Agilia has a continuous inspection system that operates as soon as the pump is in use. If an alarm occurs, the infusion stops, visual (red LEDs) and sound signals are emitted. A clear message is expressed by means of words and pictograms. - Page 40 Infusion System Message Type Activation / Action stop Pressure increase Warning The pressure is increasing in the line. This warning (DPS) can be selected as an option [User 4] see page 46. Check if infusion line is occluded (stop-cock, catheter, folded line). Occlusion Pre- In-line pressure has reached 50 mmHg below the...
- Page 41 Infusion System Message Type Activation / Action stop Connect drop Alarm Only if drop sensor is compulsory (see page 48). At sensor start-up: drop sensor not connected Connect the drop sensor to the pump and the drip chamber (see page 35). No drop sensor Alarm Only if drop sensor is compulsory (see page 48).
-
Page 42: Menu
7. Menu Operation Access menu or Escape menu Select Confirm (corresponds to on the screen) Selected _ / Not selected † Permanent menu Function Description Operation Symbol „ New setting Volume to be infused Adjustment of VTBI during infusion „ Clearing of volume infused Volume infused Total infused volume „... -
Page 43: Menu Selected In Option Mode
Menu selected in option mode Function Description Operation Symbol „ Maintenance date Maintenance Information on „ SN (serial number) maintenance, version, functioning duration, etc. „ Software version, etc. „ Pressure limit History Recording of up to 1500 „ Flow rate, etc. events „... - Page 44 Function Description Operation Symbol „ The parameters to set are the same Primary/Secondary Programming a as in the primary mode secondary infusion „ Weight when the unit is in kg Patient Information on Patient „ Body surface when the unit is in m parameters.
-
Page 45: Options
8. Options The following options have different functions that you can select or deselect to customise your Volumat MC Agilia. Operation (when the device is turned off, press Options access simultaneously on both keys, <ON> and <MENU>) Option selection Confirm (corresponds to on the screen) Selected _ / Not selected †... - Page 46 Option Function Choice User [User 4] Pressure „ Variable mode: One initial „ 3 levels mode: 3 fixed Mode pressure value that can be pressure limits that can be adjusted during infusion selected during the infusion „ YES/NO „ YES: DPS can be activated DPS (Dynamic Pressure System) during infusion...
- Page 47 Ward options are authorised options that you can select or not in User options (see previous table). Option Function Choice „ Code: Ward Ward code (0200 by default) Use increment and/or decrement keys, then OK for each digit „ 1 tonality „...
- Page 48 Option Function Choice „ Manual bolus „ See air bubble „ Prime set Ward [Par 19] Authorised functions „ Loading dose „ Programmed bolus „ Dilution units (Select/Deselect) [Par 20] Authorised units „ Dose rate units (Select/Deselect) „ „ [Par 21] Mode displayed Last mode: At switch ON, the Question mode: At switch ON, device will operate using the...
- Page 49 Option Function Choice „ Defines the pre-alarm parameters [Par 31] Pre alarm end VTBI Note: The parameters of the pre-alarms can be readjusted. Nevertheless, the following situation should be carefully considered: the end of infusion pre-alarm should not be deactivated in case of short half-life drugs or for infusion with rigid bottles.
-
Page 50: User Test
9. User test This protocol allows a quick check of pump functionality. Volumat MC Agilia serial number (ID/N): Name: ________________________________ _____________________________ Ward: ________________________________ Date: ________________________________ YES _ NO † Actions 1. Check the state of the device: † - absence of impact marks and noises (turn the device upside down), - presence of all labels as well as their legibility, mains lead. -
Page 51: Performance
10. Performance Rates range Modes Rates range Infusion rate (ml/h) From 1 to 1500 ml/h, Maximum infusion rate can Macro with 1 ml/h increments be configured in Ward option [Par 4] page 47 From 0.1 to 100 ml/h, Micro with 0.1 ml/h increments Manual Bolus rate (ml/h) From 200 to 1500 ml/h, Maximum infusion rate can... -
Page 52: Dose Range
Dose range Setting range Patient data „ Increment of 0.01 from 0.25 to 0.99 Weight (kg) „ Increment of 0.1 from 1 to 9.9 „ Increment of 1 from 10 to 250 „ Increment of 0.01 from 0.05 to 4.5 Surface (m „... -
Page 53: Accuracy
Accuracy Nominal flow rate ± 5% on 96h with an infusion of 10 lit re s maximum accuracy In accordance with the Manual bolus ± 5% or ± 0.2 ml NF EN/IEC 60601-2-24 standard. ± 5% on 96h with an infusion of 10 lit re s Accuracy with back pressure of ±13.33 kPa maximum... -
Page 54: Bolus Volume At Occlusion Release
Bolus volume at occlusion release Rate Bolus volume < 0.2 ml < 100 ml/h < 0.3 ml > 100 ml/h Calculation rules First parameters set up after switch During infusion: press on selection keys on and in stop mode Modify V, T is calculated according R is modified and T is calculated according to T = V/R to T = V/R Modify T, R is calculated according... -
Page 55: Units And Conversion Rules
Units and conversion rules Dilution units ng, µg, mg, g mU, U, kU mmol Cal, kCal /ml, /Xml ng/h ng/kg/min ng/kg/h ng/m /24h µg/min µg/h µg/kg/min µg/kg/h µg/m /min µg/m mg/min mg/h mg/24h mg/kg/min mg/kg/h mg/kg/24h mg/m /min mg/m g/kg/min g/kg/h /min /24h... -
Page 56: Technical Characteristics
Power output Infrared communication Volumat MC Agilia is equipped with an infrared cell located at the back of the device. It is used for data communication with the Agilia link rack. Data can then be transmitted by dedicated communication cables. -
Page 57: Dimensions - Weight
Dimensions - Weight H/W/D 135 x 190 x 170 mm Weight approximately 2 kg Screen size 70 x 35 mm Trumpet curves Trumpet curves demonstrate the evolution of the minimum and maximum variance of the pump/set combination versus flow rate. The test protocol used to obtain these results is described in EN/IEC 60601-2-24. - Page 58 100 ml/h 100 ml/h Programmed flow rate Accuracy upper limit (+5%) Accuracy lower limit (-5%) Time (minutes) Observation windows (minutes) RAMP mode SEQUENTIAL mode 140,0 Measured flow rate Measured flow rate Programmed flow rate Programmed flow rate 120,0 100,0 80,0 60,0 40,0 20,0...
-
Page 59: Guidance And Manufacturer's Declaration On Emc
Does not apply IEC 61000-3-3 Electromagnetic immunity - Table 202 Volumat MC Agilia is intended for use in the electromagnetic environment specified below. The user of Volumat MC Agilia should make sure it is used in such environment. IEC 60601-1-2 Compliance level... -
Page 60: Electromagnetic Immunity - Table 204
Electromagnetic immunity - Table 204 Volumat MC Agilia is intended for use in the electromagnetic environment specified below. The user of Volumat MC Agilia should make sure it is used in such an environment. IEC 60601-1-2 Compliance level IEC 60601-2-24... -
Page 61: Recommended Separation Distances Between Portable And Mobile Rf Communication Equipment And Volumat Mc Agilia - Table 206
RF communication equipment and Volumat MC Agilia - Table 206 Volumat MC Agilia is intended for use in an electromagnetic environment in which radiated RF disturbances are controlled. The user of Volumat MC Agilia can help prevent electromagnetic interference by maintaining a minimum distance between portable and mobile RF communications equipment (transmitters) and Volumat MC Agilia as recommended below, according to the maximum output power of the communication equipment. -
Page 62: Cleaning And Use Conditions
13. Cleaning and use conditions Cleaning and disinfecting „ Volumat MC Agilia is part of the patient’s immediate environment. It is advisable to clean and disinfect the device external surfaces regularly and especially before connecting a new patient and before any maintenance operation in order to protect patient and staff. -
Page 63: Use Of The Internal Battery
Use of the internal battery This device is provided with a Li-ion battery. When the device is disconnected from the mains, it automatically switches to battery mode. Before starting for the first time, charge the battery for approx. 5 hours by connecting the power supply cord without using the device. -
Page 64: Recommendations
Recommendations „ Fresenius Kabi will not be liable for any damages or claims, medical or otherwise, of any nature whatsoever, whether direct or consequential, caused by improper use of this device. „ In order to e nsure that all the safety features of the device are activated, the pump should be switched ON prior to being connected to the patient. - Page 65 „ If there is no one way valve on a gravity infusion line during a multi-line infusion, this will make it impossible to detect occlusions on the patient side, and could result in accumulation of the drug being infused in the gravity line, which could later be infused in an uncontrolled manner when the occlusion is released.
-
Page 66: Services
„ The serial number (ID/N°) must not have been altered, changed, or erased. „ In case of non-respect of these conditions, Fresenius Kabi will prepare an estimate for repair covering the parts and labor required. „ When return and repair of a device is necessary, please contact Fresenius Kabi Customer or After-Sales Department. -
Page 67: Data Racks, Accessories And Maintenance Tools
Data racks, accessories and maintenance tools Volumat MC Agilia is compatible with the range of Agilia accessories. For operating with these accessories or any further information, please contact our Sales Department. Duo Agilia 2 channels accessory for power supply centralisation... -
Page 68: Data Management
Because of the evolution of the standards, lawful texts and material, the characteristics indicated by the text and the images of this document are applicable only for the device that it accompanies. ® This user guide may not be reproduced in whole or in part without the written consent of Fresenius Kabi Australia Pty Limited . Vigilant ® Agilia are registered trademarks in the name of Fresenius Kabi in selected countries. - Page 69 Notes...
- Page 70 Fresenius Kabi Australia Pty Limited 964 Pacific Highway Pymble NSW 2073 Tel: 1300 732 001 Fax: 1300 304 384 www.fresenius-kabi.com.au PM2010. 218...
Need help?
Do you have a question about the Volumat MC Agilia and is the answer not in the manual?
Questions and answers