Table of Contents
Advertisement
Quick Links
Advertisement
Table of Contents

Related Manuals for Fresenius Kabi Volumat Agilia


Summary of Contents for Fresenius Kabi Volumat Agilia
- Page 1 C E S Volumat Agilia ® Technical Manual...
- Page 2 Revisions table TM Volumat Agilia Eng ref CC3176 valid for pumps with serial numbers from 19830250 till… Date Revision Chapter Description July 5th, 2007 Creation index "a" Jan.15th, 2008 Index "b" Insertion of Volumat MC July 7th, 2008 Index "c"...
-
Page 3: Table Of Contents
Table of contents 1 Introduction ...................... 7 1.1 General introduction ................7 1.2 Operation diagram ................. 8 1.3 Precautions for use................9 1.4 Operation safety ..................9 1.5 Technical characteristics ..............10 1.5.1 Electrical details ....................... 10 1.5.2 Electronic details ...................... 10 1.5.3 Mechanical details.................... - Page 4 4.4.6 Test 4, Events ......................37 4.4.7 Test 5, Upstream pressure..................38 4.4.8 Test 6, Downstream pressure .................. 38 4.4.9 Test 7, Door ......................39 4.4.10 Test 8, battery information ..................40 4.4.11 Test 9, Signalisation ....................41 4.4.12 Test 10, Keyboard ....................41 4.4.13 Test 11, Ageing test ....................
- Page 5 Procedure N°8: Pumping system ............105 Procedure N°9: Motor ................111 Procedure N°10: Pressure sensor ............117 Procedure N°11: OCS clamp motor............123 7 Calibrations....................127 7.1 Calibrations procedure ..............127 7.1.1 Access to the calibrations ..................127 7.1.2 Etal 1, Pressures....................129 7.1.3 Etal 2, Door ......................
- Page 6 TM_Volumat_Agilia_Eng_TDM.fm...
-
Page 7: Introduction
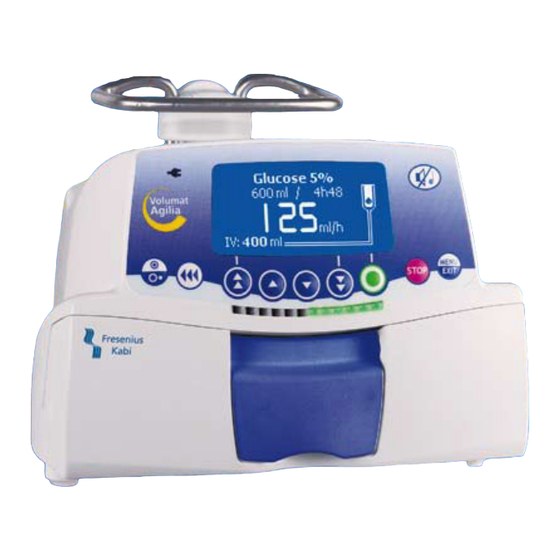
Volumat Agilia has its own control keyboard and a LCD screen. It has an internal battery which ensures a minimum battery life of 8 hours for a flow rate of 125ml/h. Volumat Agilia has a range of flow rates from 1 to 1200mL/h in macro mode and from 0.1 to 100ml/h in micro mode. -
Page 8: Operation Diagram
1.2 Operation diagram va01_001e_Eng.fm... -
Page 9: Precautions For Use
The limitation of the radiation emitted avoids undesirable interference with other equipment such as EEG, ECG, etc. If a Volumat Agilia is placed near devices such as surgical equipment HF, X-rays, NMR, mobile phones or Wifi points, then minimal distances between equipment must be respected. -
Page 10: Technical Characteristics
Battery: 7.2V - 2.2Ah. (LI-ion) External power supply: 9VDC. Power > 15W. Communication port and 11-30VDC power. 1.5.2 Electronic details Volumat Agilia contains 5 electronic boards: Power supply board Mains board CPU board Display board ... -
Page 11: Compliance To Standards
Components Materials Air detector support Door Door plate Polyarylamide Moulded lever + hooks Polyarylamide Right and left door hinge Polyamide 6 OCS fuse Polyacetal OCS unclamping finger Polyamide Mechanical spring cap Polyamide OCS detector cradle Polyarylamide Pumping block Polyamide Star motor ring Polyacetal Motor pulley Polyamide... - Page 12 va01_001e_Eng.fm...
-
Page 13: Description And Operation
Air bubbles detector Cover Door Base Control panel Volumat Agilia pump is made up of 3 main parts: an angle bracket, a cover and a base. The cover contains: a display board. The base supports: a CPU board, ... -
Page 14: The Display Board
2.1.1 The display board The display board is situated underneath the front of the command panel and contains all the essential parts for man-machine interaction: Keyboard Synoptics and control indicators LCD screen Buzzer Display board This board is connected to the other parts by means of connectors. J1 connector to keyboard Signal Description... - Page 15 J2 connector to CPU board Signal Description Ground +3V3 +3.3V power supply TON/OFF Keyboard ON/OFF key MISO SPI bus MISO signal Ground MOSI SPI bus MOSI signal Ground SPI bus clock signal Ground RESET/ Control signal RSLCD Control signal (intended for LCD display) CSLCD/ Control signal CSLDCD/...
-
Page 16: Cpu Board
2.1.2 CPU board The CPU board is made up of a main micro controller, FLASH and RAM memories and various analogue or power functions, namely: Two single step bipolar motor commands A power supply cut out - elevator type (BOOST) ... - Page 17 J3 connector to downstream pressure sensor Description Ground +3V3_PS Power supply +3.3V filtered for pressure sensor + Pressure sensor resistance bridge Ground - Pressure sensor resistance bridge Ground J4 connector to upstream pressure sensor Description Ground +3V3_PS Power supply +3.3V filtered for pressure sensor + Pressure sensor resistance bridge Ground - Pressure sensor resistance bridge...
- Page 18 J10 connector to opto motor Description Ground MP_OPTO/ Motor opto rotation state MP_CD_OPTO Opto power supply Opto power supply return J11 connector to display board Description Ground VBAT Battery power supply or + "10V mains" Diagnostic signal (correct boards connection) +3V3- PERM_PROT Not connected...
- Page 19 J13 connector to air detector Description Ground DA_ANA_AIR Analogue signal sent by the air detector Ground DA_DISCH Air detector reset command +3V3 +3.3V power supply DA_GAIN Air detector gain adjustment command +3V3 +3.3V power supply DA_SCL I²C bus clock signal between main micro controller and air detector DA_SDA I²C bus data signal between main micro controller...
-
Page 20: The Power Supply Board
2.1.3 The power supply board The power supply board is made up of a micro controller (ATmega48, as a secondary in relation to the one on the CPU board and in relation to its attributed functions) and the different analogue or power functions, namely: ... - Page 21 J1 to CPU board connector Description SDA_ALIM Signal Data of the I²C bus data signal between main (CPU) and secondary (Power supply) micro controller Ground RXIR Infrared cell reception signal TXIR Infrared cell emission signal Ground Serial bus clock signal Ground External plug data reception signal External plug data emission signal...
- Page 22 J5 connector to external plug Signal Description Serial connection clock Serial connection data emission Serial connection data reception Power supply accessories (supplied by the board) Ground RELAIS Relay command (open collector) Ground +10V0 External power supply (supplied by the board) Ground Ground va02_001e_Eng.fm...
-
Page 23: The Mains Board
2.1.4 The mains board The mains board contains the mains plug, the ECG filter as well as F1 and F2 fuses. It is the interface between the mains and the power supply board. The mains board is situated on the angle bracket. It enables the power supply board to be changed without the need for soldering.... -
Page 24: The Air Detection Board
2.1.5 The air detection board The air detection board is made up of an input amplifier and an output amplifier which are linked to the ceramic elements for reception and emission. The air detection board is fixed to the base. It transmits the air bubbles volume in the administration set in the form of analogue data to the CPU board. -
Page 25: Operational Description
2.2 Operational description From an operational point of view, the Volumat Agilia pump is made up of 3 sub-assemblies: a sub-assembly to maintain and to check the correct positioning of the administration set. a motorisation sub-assembly. an external connection sub-assembly. - Page 26 va02_001e_Eng.fm...
-
Page 27: Description Of The Menus
3 Description of the menus 3.1 Options menu The options menu enables the Volumat Agilia to be adapted to the specific needs of each ward. It accesses the menus that customise the infusion parameters. Fresenius Kabi recommends the presence of its qualified staff, or a member of your Technical Department, who will assist you in implementing the configuration procedures you wish to select. -
Page 28: Calibration Menu
3.3 After-Sales Service test menu The After-Sales Service test menu is reserved for qualified personnel. It enables a series of checks that can be carried out on the Volumat Agilia to confirm that it is operating correctly. (See section "Checks".) ... -
Page 29: Maintenance Options Menu
3.4 Maintenance options menu Maintenance options menu allows to enter parameters for the 3 following options: SAV 1, Maintenance date, SAV 2, Initial set up, SAV 3, Data log event. va03.1_001e_Eng.fm... - Page 30 va03.1_001e_Eng.fm...
-
Page 31: Preventive Maintenance
4 Preventive maintenance 4.1 Recommendations The device can only be checked, serviced or repaired by Fresenius Kabi or by a certified and approved maintenance service. Any abnormal functioning of the pump must be brought to the attention of your in-house qualified technical personnel or our Technical Service. -
Page 32: Training
4.3 Training For training, please contact Fresenius Kabi. The Training levels, listed below, outline the specifics needed to maintain and preserve the device. They are defined below: Level 1 is intended to the user for on-site maintenance, using the technical documentation of the device and specific tools. -
Page 33: Checks
Maintenance préventive 4.4 Checks A quality control certificate is available at the end of this section. In order to ensure the smooth running of the checking procedure, recharge the battery for 16 hours beforehand. 4.4.1 Accessing the tests Keyboard description. Function ON switches on the pump. -
Page 34: Visual Check
Moving to the After-Sales Service test mode. Press "MENU/EXIT" key. Keep it pressed down and press "ON". When the "Options" main menu displays, release "MENU/EXIT" and "ON" keys. Choose your "Maintenance" menu using the selection keys. ... -
Page 35: Test 1, Identification
4.4.3 Test 1, identification This test displays: the device information screen, serial number screen, language information screen zone information screen boot information screen. Test 1 , press "enter". The main menu "Identification" displays. ... -
Page 36: Test 2, Maintenance
4.4.4 Test 2, Maintenance This test displays: the running time since the last maintenance service in hours, days or months the date of the last maintenance service the total running time in hours, days or months and the number of cycles executed by the pumping unit. -
Page 37: Test 3, Maintenance Messages
4.4.5 Test 3, Maintenance messages This test displays information concerning the Technical Service interventions. Test 3 , press "enter". The "Messages" main menu displays. Scroll through the information from screen to screen using the selection keys. Press "exit" to return to the "Test" menu. ... -
Page 38: Test 5, Upstream Pressure
4.4.7 Test 5, Upstream pressure This test displays: the upstream pressure value in mV, the calibration values of the different upstream pressures in mV, the date and calibration counter. Test 5 , select "enter". The "Upstream pressure" main menu displays. ... -
Page 39: Test 7, Door
Date: Number: Date and number of calibrations. Select "exit" to return to the "Test" menu. Refer to section 7, "Calibration / Calibration procedure / Etal 1 pressure", if one of the values is out of range. 4.4.9 Test 7, Door This test displays:... -
Page 40: Test 8, Battery Information
4.4.10 Test 8, battery information This test displays: the battery running time displayed in hours, days and months the number of discharge cycles equivalent to the number of hours of battery use / 7h the start date for the battery running time counter; the battery voltage in mV and in 1/100 volts ... -
Page 41: Test 9, Signalisation
4.4.11 Test 9, Signalisation This test checks that the indicator lights and buzzer are functioning correctly. Test 9 , press "enter". The main screen displays. All LED and the mains LED are lit up. Press "OK" to start the test. The "Signalisation"... -
Page 42: Test 11, Ageing Test
4.4.13 Test 11, Ageing test This text checks the motor block/pumping system is functioning correctly as well as the pump occlusivity. Test 11 , press "enter". The main, "Ageing test" menu displays. When the pump is fitted with a tube, open the administration set clamp by pressing the bolus key. -
Page 43: Test 12, Battery Life
4.4.14 Test 12, Battery life This test displays: the amount of battery charge the date of the last automatic extinction the pump’s battery running time before the pre-alarm and battery alarm were triggered the alarm’s running time till the battery is off. Test 12 ... -
Page 44: Test 14, Air Sensor
4.4.16 Test 14, Air sensor This test displays: the air detector value in mV, the calibration values in mV, the date and calibration counter. Test 14 , press "enter". The main "Air sensor" menu displays. ... -
Page 45: Test 15, Clamp Motor
4.4.17 Test 15, Clamp motor This test checks the clamp motor is functioning correctly when carrying out displacement. Test 15 , press "enter". The main "Clamp motor" menu displays. Select your sub-menu using the "OK" key. Mode: declamping, continuous, go back, go forward or ... -
Page 46: Test 16, Flow Rate
The IS flow rate software dedicated to this procedure is available from Fresenius Kabi. Any flow rate test using the "default values" menu with a minimum/maximum volume indication is facilitating the checking of the result obtained when this test is carried out with a scale or a test administration set. -
Page 47: Test 17, Flow Rate Correction
4.4.19 Test 17, Flow rate correction This test displays the flow rate corrective coefficient on the device, the date and calibration counter. Test 17 , press "enter". The main "Flow rate correction" menu displays. Scroll through the information, from screen to screen, using the selection keys. -
Page 48: Checking The Presence Limit Alarm
4.4.22 Checking the presence limit alarm To carry out this operation, exit the test mode and press "OFF". Carry out the following assembly 50 cm Manometer 3-way stopcock Pump Container Press the "ON/OFF"key. Place the administration set on the device and close to ... -
Page 49: Battery Life Check
4.4.24 Battery life check Carry out a complete battery recharge before proceeding with the test. The duration of the charging procedure is: < 6 h device switched off < 20 h device functioning (See test 12, Battery life) ... -
Page 50: Maintenance Options
4.5 Maintenance options 4.5.1 Access to test Keyboard description. Function ON, switches on the device. OFF stops the device by pressing for more than three seconds. MENU/EXIT, accesses the options menu. The selection keys are used to scroll through the numbers and letters on the tenths, units and tens and move to the next menu. -
Page 51: Sav 1, Maintenance Date
4.5.2 SAV 1, Maintenance date This screen selects the date for the next maintenance. The "Maintenance date" main menu displays. Modify the day using the selection keys: for the tens, increase and decrease using the double arrows for the units, increase and decrease using the single arrows. -
Page 52: Sav 3, Data Log Event
4.5.4 SAV 3, Data log event This test displays the list of the alarms stamped with date and time (like Test 4). The "Data log event" main menu displays. Scroll through the information, from screen to screen, using the selection keys. -
Page 53: Quality Control Certificate
Maintenance préventive 4.5.5 Quality Control Certificate Use this table to summarise the results obtained from the various tests. These tests can be carried out using a software dedicated to the Agilia devices. Device type: Code: Device serial n°: Conformity N°... - Page 54 Conformity N° Procedure Value Obtained Check the occlusivity, test 11. Connect the water manometer at the administration set outlet. Press the Bolus key to unclamp the administration set. Start the test with at a flow rate of 500ml/h and confirm all other steps. ...
-
Page 55: Flow Rate Check
4.6 Flow rate check 4.6.1 Measuring by computer Measuring the flow rate using a computer requires Fresenius Kabi IS Flow rate software. For further information, contact our Technical Service. The operating mode defined in this software follows the infusion pump norm protocol which is adapted to the user’s software. - Page 56 Installation Following the diagram below: Catheter extension bracket support 50 cm 1 cm RS 232 Anti-vibration measuring table cable Observe the equipment horizontal installation plan. Fill the container with 600ml or more of distilled water. Connect an administration set with the container. ...
- Page 57 Operating mode The software operates according to the operating mode described in the EN 60601-2-24 standard for infusion pumps. Start the acquisition programme for the scale. Enter the necessary programme data without confirming the flow rate. Adjust the device to the specific flow rate. ...
-
Page 58: Measuring With A Scale
4.6.2 Measuring with a scale Use a new administration set [otherwise, make a hole in the filter of the administration set (if equipped with) and use this set for maximum 10 calibrations]. Do not recycle medical water. Keep the container clean changing it as often as necessary. - Page 59 Fill the test administration set or the beaker with some water ensuring the canula is dipped in the water (> 1cm). Add several drops of oil to create a greasy film on the surface of the water. This way the user will avoid any measurement error due to evaporation of the water.
-
Page 60: Measuring With A Test Tube
4.6.3 Measuring with a test tube Use a new administration set [otherwise, make a hole in the filter of the administration set (if equipped with) and use this set for maximum 10 calibrations]. Do not recycle medical water. ... - Page 61 Operating mode Carry out a flow rate selection. For low flow rates (< 5ml/h), confirm and wait 1 hour for the infusion to stabilise. For higher flow rates, wait 10 to 30 minutes after the end of the infusion. ...
- Page 62 va04.4_001e_Eng.fm...
-
Page 63: Cleaning And Disinfecting
Preventive maintenance 4.7 Cleaning and disinfecting Volumat Agilia is part of the patient’s immediate environment. It is advisable to clean and disinfect the device’s external surfaces regularly and especially before connecting a new patient and before any maintenance operation in order to protect patient and staff. -
Page 64: Use Of The Internal Battery
4.9 Use of the internal battery This device is provided with Li-Ion battery. When the device is disconnected from the mains, it automatically switches to battery mode. Before starting for the first time, charge the battery for approx. 5 hours by connecting the power supply cord without using the device. -
Page 65: Troubleshooting
5 Troubleshooting 5.1 Breakdown guide Displayed Meaning Cause Action message Door opened The Hall effect Check that the magnet is alarm sensor detects that present on the door the door is open Calibrate the door sensor Replace the door sensor Administration ... - Page 66 Displayed Meaning Cause Action message Flow rate Flow rate has Check the flow rate and flashing alarm been modified but confirm with the OK key has not been confirmed End of infusion The remaining Check if the volume remaining pre-alarm VTBI is less than ...
- Page 67 Displayed Meaning Cause Action message Over flow rate Flow rate Check the administration set alarm detected by the position drop detector is Check the drop detector greater than the position set flow rate Check the liquid volume in the drip chamber ...
- Page 68 Displayed Meaning Cause Action message Upstream The pressure Check the container and the occlusion alarm level in the line pumping system Check the roller clamp upstream line is Check that the administration too low set is not pinched ...
- Page 69 Problem Cause Recommended action Flow rate A mechanical part of the Carry out a flow rate test, variance too great pumping mechanism or the calibrate the infusion corrector CPU board has been coefficient changed without the Redo the test to ensure that the calibration of the infusion correction is right corrector coefficient being...
- Page 70 va05.1_001e_Eng.fm...
-
Page 71: Errors Messages
Diagnostic 5.2 Errors messages Error Description Recommended action Code Software and electronic command faults Rotation check Check correct functioning of the motor. Check the flexible Cl Opto and CPU board connection. Check the correct functioning of the motor optical switch rotation. - Page 72 Error Description Recommended action Code Battery temperature Check the battery status. Replace the battery. 3.3 V missing of power Check the status of the ribbon cable supply connection between power supply board and CPU board. ...
- Page 73 Error Description Recommended action Code Date Time stamp Replace the CPU board, the Date Time stamp is integrated in the main Microcontroller. Replace the power supply board, the time keeper is integrated in the secondary microcontroller. Carry out a complete configuration of the CPU board using the maintenance software.
- Page 74 Error Description Recommended action Code Upstream pressure sensor Select test 5. out of range Check the change in the state of the sensor by applying pressure to the sensor. Check the connections. Calibrate the upstream pressure sensor. ...
-
Page 75: Intervention Procedures
Use ONLY recommended accessories and options delivered with the device. NO PART IS REPAIRABLE. When replacing components, only use Fresenius Kabi spare parts. Please refer to the "Spare parts catalogue" for ordering. Any instrument or device used for maintenance must be regularly checked or re-calibrated according to its specifications and local regulations. - Page 76 va06.0_001g_Eng.fm...
-
Page 77: Procedure N°1: Battery And Battery Door
Intervention procedure Procedure N°1: Battery and battery door Safety: For safety reasons, the technician should not intervene when the device is connected to the mains voltage. Disconnect the power supply cord from the mains. Switch off the device. Material needed: ... - Page 78 Disconnect the J4 connector and remove the battery (marker 3). Re-assembling Carry out the dismantling procedure in reverse order to re-assemble the unit. Carry out the regular servicing tests (see Quality Control Certificate). va06.0_0110g_Eng.fm...
-
Page 79: Procedure N°2: Upper Case
Intervention procedures Procedure N°2: Upper case Safety: For safety reasons, the technician should not intervene when the device is connected to the mains voltage. Disconnect the power supply cord from the mains. Switch off the device. Disconnect the battery before opening the device (see procedure n°1). Material needed: ... - Page 80 Dismantling When working with electronic components, we recommend wearing an anti-static bracelet connected to earth and working on a foam anti-static mat. Remove the angle bracket (marker 2) being careful not to pull out the CPU board flat cable.
- Page 81 Re-assembling Carry out the dismantling procedure in reverse order to re-assemble the unit. Carry out the regular servicing tests (see Quality Control Certificate). va06.0_0011g_Eng.fm...
- Page 82 va06.0_0011g_Eng.fm...
-
Page 83: Procedure N°3: Display Board
Fiches d’intervention Procedure N°3: Display board Safety: For safety reasons, the technician should not intervene when the device is connected to the mains voltage. Disconnect the power supply cord from the mains. Switch off the device. Disconnect the battery before opening the device (see procedure n°1). Material needed: ... - Page 84 Dismantling When working with electronic components, we recommend wearing an anti-static bracelet connected to earth and working on a foam anti-static mat. Remove the angle bracket (marker 2) being careful not to pull out the CPU board flat cable.
- Page 85 Disconnect the keyboard/display board connection at (J1). Unscrew the 4 fixing screws (marker 6) holding the board to the upper cover. Remove the display board/display unit. Disconnect the display board /display connection at (J3). Unclip and separate the display board from the display. Re-assembling ...
- Page 86 va06.0_0021g_Eng.fm...
-
Page 87: Procedure N°4: Cpu Board
Fiches d’intervention Procedure N°4: CPU board Safety: For safety reasons, the technician should not intervene when the device is connected to the mains voltage. Disconnect the power supply cord from the mains. Switch off the device. Disconnect the battery before opening the device (see procedure n°1). Material needed: ... - Page 88 Dismantling When working with electronic components, we recommend wearing an anti-static bracelet connected to earth and working on a foam anti-static mat. Remove the angle bracket (marker 2) being careful not to pull out the CPU board flat cable.
- Page 89 Disconnect the flat cables connected to the CPU board at: J2 and J13 J7, J3 and J10 J4 and J12 Unscrew the fixing screws (marker 6) holding the CPU board to the flange. Remove the CPU board unit being careful not to pull out the flat cable on the inside. Disconnect the flat cables (J14 and J11) if necessary.
- Page 90 When replacing the CPU board, carry out a complete configuration of the device. Each Volumat Agilia has its own CPU board model. Be careful not to invert the different Volumat Agilia references. Order the one that corresponds to your device.
-
Page 91: Procedure N°5: Power Supply Board
Fiches d’intervention Procedure N°5: Power supply board Safety: For safety reasons, the technician should not intervene when the device is connected to the mains voltage. Disconnect the power supply cord from the mains. Switch off the device. Disconnect the battery before opening the device (see procedure n°1). - Page 92 Dismantling When working with electronic components, we recommend wearing an anti-static bracelet connected to earth and working on a foam anti-static mat. Remove the angle bracket (marker 2) being careful not to pull out the CPU board flat cable.
- Page 93 Re-assembling Carry out the dismantling procedure in reverse order to re-assemble the unit. Carry out the regular servicing tests (see Quality Control Certificate). Don’t forget to set insulator between the power supply and the mains boards. va06.0_0040g_Eng.fm...
- Page 94 va06.0_0040g_Eng.fm...
-
Page 95: Procedure N°6: Base Kit
Fiches d’intervention Procedure N°6: Base kit Safety: For safety reasons, the technician should not intervene when the device is connected to the mains voltage. Disconnect the power supply cord from the mains. Switch off the device. Disconnect the battery before opening the device (see procedure n°1). Material needed: ... - Page 96 Dismantling When working with electronic components, we recommend wearing an anti-static bracelet connected to earth and working on a foam anti-static mat. Remove the angle bracket (marker 2) being careful not to pull out the CPU board flat cable.
- Page 97 Disconnect the flat cables connected to the CPU board at: J2 and J13 J7 and J3 and J10 J4 and J12 Unscrew the holding screws (marker 6) holding the CPU board to the flange. ...
- Page 98 Unscrew the button screw (marker 7) and pull it out. Push the button and turn it to the left and remove it. Remove the spring. Unscrew the 2 screws (marker 8) on either side of the right and left flanges being careful not to damage the air bubble board.
- Page 99 Remove the left flange (marker 12). Take out the right flange (marker 13). Separate the base kit (marker 14) from the motor kit (marker 15). va06.0_0050g_Eng.fm...
- Page 100 Re-assembling Carry out the dismantling procedure in reverse order to re-assemble the unit. Carry out the regular servicing tests (see Quality Control Certificate). va06.0_0050g_Eng.fm...
-
Page 101: Procedure N°7: Air Detector Board
Fiches d’intervention Procedure N°7: Air detector board Safety: For safety reasons, the technician should not intervene when the device is connected to the mains voltage. Disconnect the power supply cord from the mains. Switch off the device. Disconnect the battery before opening the device (see procedure n°1). - Page 102 Dismantling When working with electronic components, we recommend wearing an anti-static bracelet connected to earth and working on a foam anti-static mat. Remove the angle bracket (marker 2) being careful not to pull out the CPU board flat cable.
- Page 103 Unscrew the 2 screws (marker 6) of the air detector board (marker 7). Remove the board being careful not to pull out the flat cable. Disconnect the flat cable connected to the board at J1. Re-assembling Carry out the dismantling procedure in reverse order to re-assemble the unit. ...
- Page 104 va06.0_0060g_Eng.fm...
-
Page 105: Procedure N°8: Pumping System
Fiches d’intervention Procedure N°8: Pumping system Safety: For safety reasons, the technician should not intervene when the device is connected to the mains voltage. Disconnect the power supply cord from the mains. Switch off the device. Disconnect the battery before opening the device (see procedure n°1). Material needed: ... - Page 106 Dismantling When working with electronic components, we recommend wearing an anti-static bracelet connected to earth and working on a foam anti-static mat. Remove the angle bracket (marker 2) being careful not to pull out the CPU board flat cable.
- Page 107 Disconnect the flat cable connected to the CPU board at: J2 and J13 J7, J3 and J10 J4 and J12 Unscrew the holding screws (marker 6) holding the CPU to the flange. Remove the whole CPU board being careful not to pull out the flat cable on the inside. va06.0_0070g_Eng.fm...
- Page 108 Unscrew the button screw (marker 7) and pull it out. Push the button and turn it to the left and remove it. Pull out the spring. Unscrew the screw (marker 8) holding the left flange. Pivot the device on its front. ...
- Page 109 Remove the left flange (marker 12). Remove the pumping system. Re-assembling Carry out the dismantling procedure in reverse order to re-assemble the unit. Carry out the regular servicing tests (see Quality Control Certificate). va06.0_0070g_Eng.fm...
- Page 110 va06.0_0070g_Eng.fm...
-
Page 111: Procedure N°9: Motor
Fiches d’intervention Procedure N°9: Motor Safety: For safety reasons, the technician should not intervene when the device is connected to the mains voltage. Disconnect the power supply cord from the mains. Switch off the device. Disconnect the battery before opening the device (see procedure n°1). Material needed: ... - Page 112 Dismantling When working with electronic components, we recommend wearing an anti-static bracelet connected to earth and working on a foam anti-static mat. Remove the angle bracket (marker 2) being careful not to pull out the CPU board flat cable.
- Page 113 Disconnect the flat cables leading to the CPU board at: J2 and J13 J7 and J3 and J10 J4 and J12 Unscrew the holding screws (marker 6) holding the CPU board to the flange. ...
- Page 114 Pivot the device on its front. Unscrew the button screw (marker 7) and pull it out. Push the button and turn it to the left and remove it. Pull out the spring. Unscrew the screw (marker 8) holding the left flange. ...
- Page 115 Remove the left flange (marker 12). Pull out the pumping system. va06.0_0080g_Eng.fm...
- Page 116 Unscrew the 4 motor fixing nuts (marker 12). Pull out the 4 screws, and remove the motor with its silenblocks. Re-assembling Put the motor in position, motor wires on the left side of the mechanical bloc using a weak loctite ref.
-
Page 117: Procedure N°10: Pressure Sensor
Fiches d’intervention Procedure N°10: Pressure sensor Safety: For safety reasons, the technician should not intervene when the device is connected to the mains voltage. Disconnect the power supply cord from the mains. Switch off the device. Disconnect the battery before opening the device (see procedure n°1). Material needed: ... - Page 118 Dismantling When working with electronic components, we recommend wearing an anti-static bracelet connected to earth and working on a foam anti-static mat. Remove the angle bracket (marker 2) being careful not to pull out the CPU board flat cable.
- Page 119 Disconnect the flat cable leading from the CPU board to the display board at J2. Disconnect the flat cables leading to the CPU board at: J2 and J13 J7, J3 and J10 J4 and J12 ...
- Page 120 Unscrew the button screw (marker 7) and pull it out. Push the button and turn it to the left and remove it. Pull out the spring. Unscrew the screw (marker 8) holding the left flange. Pivot the device on its front side. ...
- Page 121 Pull out the left flange (marker 12). Pull out the pumping system. Unscrew the 2 upstream sensor and downstream sensor screws (markers 13 and 14). va06.0_0090g_Eng.fm...
- Page 122 Pull out the sensor. Re-assembling Carry out the dismantling procedure in reverse order to re-assemble the unit. Calibrate the sensors. Carry out the regular servicing tests (see Quality Control Certificate). va06.0_0090g_Eng.fm...
-
Page 123: Procedure N°11: Ocs Clamp Motor
Fiches d’intervention Procedure N°11: OCS clamp motor Safety: For safety reasons, the technician should not intervene when the device is connected to the mains voltage. Disconnect the power supply cord from the mains. Switch off the device. Disconnect the battery before opening the device (see procedure n°1). - Page 124 Dismantling When working with electronic components, we recommend wearing an anti-static bracelet connected to earth and working on a foam anti-static mat. Remove the angle bracket (marker 2) being careful not to pull out the CPU board flat cable.
- Page 125 Unscrew the 2 fixing screws (marker 6) holding the motor to the flange. This procedure should be handled with care in order to avoid any damage of the air bubble detector board/flat cable when using a scew driver. ...
- Page 126 Remove the motor (marker 7). Re-assembling Check the right position of the OCS motor fins when assembling the motor kit. The fins should be left side OCS optical sensor board. Position the OCS motor into the flask, wires position as indicated by marker 8 (left side and at the bottom).
-
Page 127: Calibrations
7 Calibrations 7.1 Calibrations procedure The calibration menu is reserved for qualified staff only. Its access is protected by a secret code. 7.1.1 Access to the calibrations Keyboard description Function ON switches on the device. OFF switches off the device when held down for more than three seconds. - Page 128 How to activate the "Calibration" configuration mode Press "MENU/EXIT". Keep it held down while pressing "ON/OFF". When the "Options" main menu displays, release "MENU/EXIT" and "ON/OFF" keys. Select your menu using the selection keys. Maintenance ...
-
Page 129: Etal 1, Pressures
7.1.2 Etal 1, Pressures Calibrating the pressures consists in calibrating the upstream and downstream pressures in several phases. A new administration set must be used for this procedure. Etal 1 , press "enter". The main "Pressures" menu displays. Open the door and remove the administration set.... - Page 130 The "pressure calibration" menu, 760mmHg with tube appears in mV. Apply a pressure of 760mmHg (around 1bar) at the tube outlet. Press "OK" to validate and move to the next step. The "Pressure calibration" menu, 0mmHg with tube appears in mV.
-
Page 131: Etal 2, Door
7.1.3 Etal 2, Door Calibrating the door consists of calibrating the door’s Hall Effect sensor in several phases. Etal 2 , press "enter". The main "Door" menu displays. Opened: open the door. Press "OK" to validate and move to the next step. The value is read and recorded. -
Page 132: Etal 3, Air Sensor
7.1.4 Etal 3, Air sensor The air sensor calibration consists in calibrating the air detector board in several phases A new administration set must be used for this procedure. Etal 3 , press "enter". The main menu "Air sensor" displays. ... -
Page 133: Elal 4, Flow Rate
7.1.5 Elal 4, Flow rate The flow rate calibration consists in defining the device coefficient corrector to calibrate the pump. A new administration set must be used for this procedure. Etal 4 , press "enter". The main menu "Flow rate" displays. ... - Page 134 va07.1_001g_Eng.fm...
-
Page 135: Spare Parts Catalogue
8 Spare parts catalogue Refer to the Volumat & Volumat MC Agilia spare parts catalogue. va08.0_001d_Eng.fm... - Page 136 va08.0_001d_Eng.fm...
- Page 137 This document may not be reproduced in whole or in part without the written consent of Fresenius Kabi. Injectomat®, Vigilant® and Agilia® are registered trademarks in the name of Fresenius Kabi in selected countries. Fresenius Kabi - Le Grand Chemin - 38590 Brézins (FRANCE) Technical Manual Volumat Agilia Eng...
- Page 138 Manufacturer Fresenius Vial S.A.S Le Grand Chemin 38590 Brézins France Tel: +33 (0)4 76 67 10 10 Fax: +33 (0)4 76 67 11 34 www.fresenius-kabi.com www.fresenius-kabi.com A Company of Fresenius Kabi...
Need help?
Do you have a question about the Volumat Agilia and is the answer not in the manual?
Questions and answers