Table of Contents
Advertisement
Quick Links
Advertisement
Table of Contents

Related Manuals for KTR ROTEX ZR


Summary of Contents for KTR ROTEX ZR
- Page 1 40215 EN Operating/Assembly instructions Sheet: 1 of 15 Type ZR Edition: ® ROTEX Torsionally flexible jaw couplings type ZR and their combinations Drawn: 2018-08-28 Pz Replacing: KTR-N dated 2014-03-11 Please observe protection note ISO 16016. Verified: 2018-09-11 Pz Replaced by:...
-
Page 2: Table Of Contents
Displacements - alignment of the couplings Critical bending speed Start-up Breakdowns, causes and elimination Disposal Maintenance and service Spares inventory, customer service addresses Drawn: 2018-08-28 Pz Replacing: KTR-N dated 2014-03-11 Please observe protection note ISO 16016. Verified: 2018-09-11 Pz Replaced by:... - Page 3 2) Bores H7 with keyway to DIN 6885 sheet 1 [JS9] and thread for setscrew 3) Torsion spring stiffness with 1 m length of the intermediate pipe = standard Drawn: 2018-08-28 Pz Replacing: KTR-N dated 2014-03-11 Please observe protection note ISO 16016. Verified: 2018-09-11 Pz Replaced by:...
- Page 4 = rated torque of the coupling T K max K rated 2) Torsion spring stiffness with 1 m length of the intermediate pipe Drawn: 2018-08-28 Pz Replacing: KTR-N dated 2014-03-11 Please observe protection note ISO 16016. Verified: 2018-09-11 Pz Replaced by:...
-
Page 5: Advice
Please pay special attention to the safety instructions! The operating/assembly instructions are part of your product. Please store them carefully and close to the coupling. The copyright for these operating/assembly instructions remains with KTR. 2.2 Safety and advice symbols This symbol indicates notes which may contribute to... -
Page 6: Coupling Selection
Typical drives subject to torsional vibrations are e. g. drives with diesel engines, piston pumps, piston compressors etc. If requested, KTR will perform the coupling selection and the torsional vibration calculation. -
Page 7: Assembly
64 ShD-GS Size 19 - 55 19 - 75 19 - 38 42 - 75 Material Polyurethane Polyurethane Hytrel Polyurethane Marking (colour) Drawn: 2018-08-28 Pz Replacing: KTR-N dated 2014-03-11 Please observe protection note ISO 16016. Verified: 2018-09-11 Pz Replaced by:... -
Page 8: Advice For Finish Bore
(KTR standard) If a feather keyway is intended to be used in the hub, it should correspond to the tolerance ISO JS9 (KTR standard) with normal operating conditions or ISO P9 with difficult operating conditions (frequently alternating torsional direction, shock loads, etc.). The keyway should preferably be located between the cams. With axial fastening by setscrews the tapping should be located on the keyway except for Al-D which should be located opposite the keyway. -
Page 9: Assembly Of The Coupling (General)
Fasten the hubs by tightening the setscrews DIN EN ISO 4029 with a cup point (tightening torque see table 3). Illustration 5: Assembly of the hubs Drawn: 2018-08-28 Pz Replacing: KTR-N dated 2014-03-11 Please observe protection note ISO 16016. Verified: 2018-09-11 Pz... -
Page 10: Assembly Of Dh Clamping Hubs
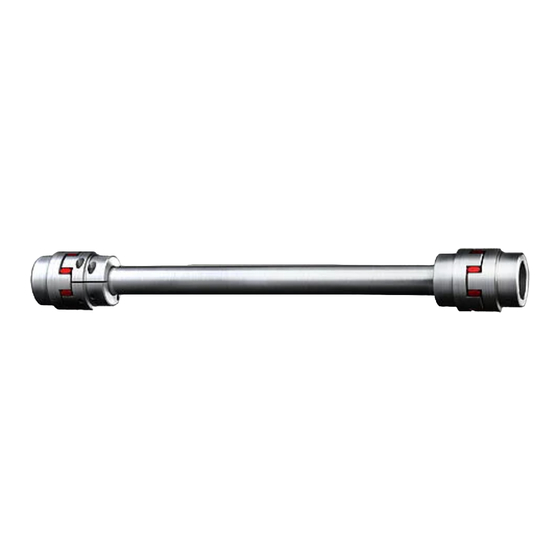
Illustration 10: Assembly of the ZR spacer ® With vertical assembly of ROTEX type ZR a special washer of KTR has to be inserted between the coupling hub at the bottom and the spider at the bottom. Drawn: 2018-08-28 Pz... -
Page 11: Displacements - Alignment Of The Couplings
60 % of the max. angular displacement 1° = 0.6° 100 % total Drawn: 2018-08-28 Pz Replacing: KTR-N dated 2014-03-11 Please observe protection note ISO 16016. Verified: 2018-09-11 Pz Replaced by:... -
Page 12: Critical Bending Speed
= tanK 4.8 Critical bending speed Please observe the critical bending speed of the coupling. Illustration 13: Critical bending speed of type ZR Drawn: 2018-08-28 Pz Replacing: KTR-N dated 2014-03-11 Please observe protection note ISO 16016. Verified: 2018-09-11 Pz Replaced by:... -
Page 13: Start-Up
Components are mixed up by mistake/assembled incorrectly. A wrong or no spider is inserted in the coupling. No original KTR components (purchased parts) are used. Old/already worn out spiders or spiders stored for too long are used. - Page 14 5) Inspect alignment, adjust if necessary 6) Find out the reason for the vibrations (possibly corrective by spider with lower or higher Shore hardness) Drawn: 2018-08-28 Pz Replacing: KTR-N dated 2014-03-11 Please observe protection note ISO 16016. Verified: 2018-09-11 Pz Replaced by:...
-
Page 15: Disposal
A basic requirement to ensure the readiness for use of the coupling is a stock of the most important spare parts on site. Contact addresses of the KTR partners for spare parts and orders can be obtained from the KTR homepage at www.ktr.com.
Need help?
Do you have a question about the ROTEX ZR and is the answer not in the manual?
Questions and answers