Table of Contents
Advertisement
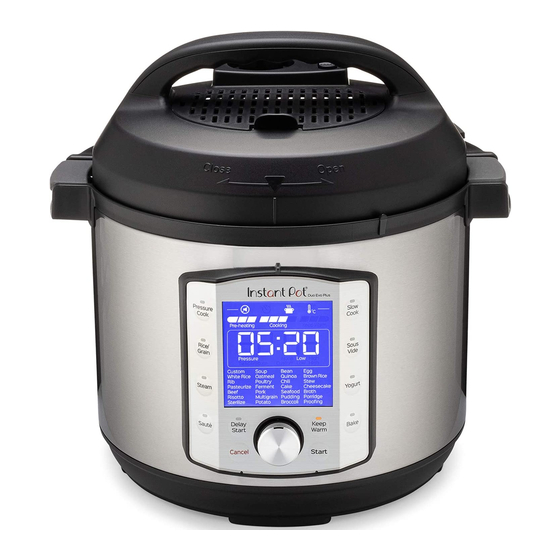
DUO EVO
5.7 and 8 Litre
Multi-Use Pressure Cookers
PLUS
TM
User Manual
Important Safeguards
Product Specifications
Initial Set-up
Product, Parts and Accessories
Smart Programme Settings
Cleaning Before First Use
Overview of Pressure Control
Features
Pressure Cooking with the
Duo Evo Plus
Initial Test Run (Water Test)
Recommended Cooking Times
Grain-to-Water Ratios
Care, Cleaning and Storage
Troubleshooting
Warranty
Contact Information
Advertisement
Table of Contents

Subscribe to Our Youtube Channel
Related Manuals for Instant Pot DUO EVO PLUS Series


Summary of Contents for Instant Pot DUO EVO PLUS Series
- Page 1 DUO EVO PLUS 5.7 and 8 Litre Multi-Use Pressure Cookers User Manual Important Safeguards Product Specifications Initial Set-up Product, Parts and Accessories Smart Programme Settings Cleaning Before First Use Overview of Pressure Control Features Pressure Cooking with the Duo Evo Plus Initial Test Run (Water Test) Recommended Cooking Times Grain-to-Water Ratios...
- Page 2 Welcome to the world of Instant cooking. Thank you for welcoming us into your kitchen. Having families ourselves, we developed the Instant Pot® Duo Evo™ Plus pressure cooker to allow busy families and professionals alike to cook healthy, delicious meals more easily and in less time.
-
Page 3: Table Of Contents
Table of Contents IMPORTANT SAFEGUARDS .................... 5 Special Lead Set Instructions ..................8 Product Specifications ....................8 Initial Setup ........................9 Product, Parts and Accessories ................... 10 Control Panel ........................16 Progress Indicator and Status Icons .................18 Status Messages ......................19 Smart Programme Settings ..................20 Turn Sound On or Off .................... - Page 4 Table of Contents Using Non-Pressure Cooking Smart Programmes ...........36 Smart Programme: Bake .................... 36 Smart Programme: Steam and Slow Cook .............. 38 Smart Programme: Sauté ..................40 Smart Programme: Sous Vide ................... 42 Sous Vide Cooking Guidelines ................. 44 Smart Programme: Yogurt ..................46 Smart Programme Overview ..................
-
Page 5: Important Safeguards
FOLLOW THESE SAFEGUARDS AND INSTRUCTIONS MAY RESULT IN INJURY AND/OR PROPERTY DAMAGE. Use only the Instant Pot Duo Evo Plus lid with the Instant Pot Duo Evo Plus cooker base. Using any other pressure cooker lids may cause injury and/or damage. - Page 6 14. The heating element surface inside the Instant Pot base is subject to residual heat after use; do not touch it. 15. Before each use, check that the valves, the steam release pipe, and the anti- Products, Parts and Accessories block shield are not obstructed.
- Page 7 IMPORTANT SAFEGUARDS 25. Unplug from the outlet when not in use, as well as before adding or removing parts or accessories, and before cleaning. To unplug, grasp the plug and pull from the outlet. To avoid damage to the power lead, never pull from the power lead.
-
Page 8: Special Lead Set Instructions
IMPORTANT SAFEGUARDS WARNING To avoid injury, read and understand instruction manual before using this appliance. WARNING Electric shock hazard. Use an earthed outlet only. DO NOT remove earthing. DO NOT use an adapter. DO NOT use an extension lead. Failure to follow instructions can cause electric shock or death. WARNING FAILURE TO FOLLOW ANY OF THE IMPORTANT SAFEGUARDS AND IMPORTANT INSTRUCTIONS FOR SAFE USE IS A MISUSE OF YOUR APPLIANCE THAT CAN VOID YOUR WARRANTY AND... -
Page 9: Initial Setup
• Use only the Instant Pot Duo Evo Plus lid with the Instant Pot Duo Evo Plus pressure cooker base. Using any other pressure cooker lids may cause injury and/or damage. The Instant Pot tempered glass lid, which can be purchased separately, may be used for non-pressure cooking. -
Page 10: Product, Parts And Accessories
Product, Parts and Accessories Duo Evo Plus 5.7 and 8 Litre Pressure Cooker Before using the Instant Pot Duo Evo Plus, verify that all parts are accounted for. Duo Evo Plus Pressure Slow Cook Cook Rice/ Sous Grain Vide Steam... - Page 11 Product, Parts and Accessories Top of Lid Steam Release Assembly Steam release assembly must be fully installed before use. Steam Release Cover Disperses and softens steam release. Steam Release Valve Regulates the cooker’s internal pressure. It fits loosely when installed, but should remain in place when the lid is turned over.
- Page 12 Product, Parts and Accessories Bottom of Lid Anti-Block Shield Prevents food particles from coming up through the steam release pipe, which assists with pressure regulation. Must be installed before use. Locking Pin Locks the lid in the closed position when the cooker is pressurised to prevent accidental opening of the lid.
- Page 13 Product, Parts and Accessories Inner Pot Fill Line Indicators Do not fill the inner pot higher than Max PC Fill when pressure cooking. Stainless Steel Inner Pot Durable 304 (18/8) stainless steel. Food must be placed in the inner pot, not the cooker base. Easy-Grip Silicone Handles Use to easily and safely lift the inner pot from the cooker base, and to hold it in place while cooking.
- Page 14 Product, Parts and Accessories Cooker Base Condensation Collector (Rear) Accumulates excess moisture from the condensation rim. Must be installed before use. Condensation Rim Collects excess condensation and directs it to the condensation collector. Lid Holder Insert lid fin into lid holder to keep it off your counter and save space.
- Page 15 Product, Parts and Accessories Lid Standing Position The Duo Evo Plus is equipped with slots on both the left and right side of the cooker base in which to rest the lid when not in use. The inner pot can easily be removed when the lid is in the standing position.
-
Page 16: Control Panel
Control Panel Duo Evo Plus Display – The LCD display includes the following: • Status Icons show cooker status as described in Progress Indicator and Status Icons below • Progress Indicator – Pre-heating/Cooking/Keep Warm • Timer displays Cooking time, time before Delay Start and time in Keep Warm •... - Page 17 Control Panel Smart Programmes – The 8 Smart Programmes provide 48 pre-set cooking times, temperatures and pressure levels to choose from. Pressure Cooking Pressure Cook Rice/Grain Bake Non-Pressure Cooking Steam Sauté Slow Cook Sous Vide Yogurt Bake (Custom/Proofing) Manual Keep Warm Control Dial Turn the dial to scroll through Smart Programmes, modify status icons, adjust time, temperature and pressure levels.
-
Page 18: Progress Indicator And Status Icons
Control Panel Progress Indicator and Status Icons Status Icons Sound On/Off icon Delay Start icon Keep Warm icon °F / °C indicator Progress Indicator When the cooker begins to heat, the progress bar indicates that Pre-heating is in progress. The display indicates On while pre-heating. When cooker reaches the pressure or temperature required by the Smart Programme, the progress bar indicates that Cooking is in progress. -
Page 19: Status Messages
Control Panel Status Messages Indicates that the cooker is plugged in and is in Standby mode. Indicates that the pressure cooker lid is not properly secured or is missing. Indicates that the cooker is in Pre-heat mode. Displays one of the following: •... -
Page 20: Smart Programme Settings
Smart Programme Settings Turn Sound On or Off With the cooker in Standby mode (display indicates OFF), press and hold the dial until the Sound icon blinks in the upper left corner of the display. Turn the dial to toggle between on and off. Press and hold the dial for 5 seconds to save the change. -
Page 21: Reset To Factory Default Settings
Smart Programme Settings To Adjust the Time During Cooking Press the dial. When the cook time flashes, turn the dial to adjust the cooking time up or down. Press Start to resume the Smart Programme. Note: Cooking will resume after 10 seconds if Start is not pressed. To Adjust the Pressure or Temperature Level During Cooking Press the dial. -
Page 22: Cleaning Before First Use
Instant Pot inner pot made for the Duo Evo Plus. Do not use an inner pot made for a different model in the Duo Evo Plus cooker base. Doing so may cause personal injury or property damage. -
Page 23: Overview Of Pressure Control Features
Illustrations in this document are for reference only and may differ from the actual product. Always refer to the actual product. Use only the Instant Pot Duo Evo Plus lid with the Instant Pot Duo Evo Plus pressure CAUTION cooker. Using any other pressure cooker lid may cause injury and/or damage. - Page 24 Overview of Pressure Control Features Open and Remove the Lid When the cooker is plugged in, it will play a jingle when the lid is opened and closed. Grip the handle and turn the lid anti-clockwise until on the lid is aligned with indicator on the rim of the cooker base.
-
Page 25: Sealing Ring
Always check for cuts, deformation and correct installation of the sealing ring prior CAUTION to cooking. Do not use a stretched or damaged sealing ring. Only use authorised Instant Pot sealing rings. Failure to follow these instructions may cause food to discharge, which may lead to personal injury or property damage. -
Page 26: The Float Valve
Overview of Pressure Control Features The Float Valve Pressurised Depressurised When the float valve is popped up, it When it is lowered into the lid, it indicates the cooker is pressurised. indicates the cooker is depressurised. Remove the Float Valve from the Lid Place one finger on the top of the float valve, then turn the lid over. -
Page 27: Pressure Cooking With The Duo Evo Plus
Pressure Cooking With The Duo Evo Plus Introduction to Pressure Cooking Pressure cooking uses steam pressure to raise the boiling point of water above 100ºC. This energy-efficient cooking method is the fastest way to thoroughly cook a variety of your favourite meals. Pressure cookers go through 3 stages when pressure cooking: 1. - Page 28 Pressure Cooking With The Duo Evo Plus 3. Depressurising After pressure cooking is complete, follow your recipe instructions to select a venting method for depressuXrising the cooker. If automatic Keep Warm is on after cooking completes, the timer counts up from 00:00 to indicate the elapsed time up to 10 hours.
-
Page 29: Depressurising The Cooker
Depressurising the Cooker Always follow recipe instructions for depressurising the cooker. Venting Methods Once cooking completes, there are several methods to release pressure: Natural Release (NR) Leave the quick release switch in the Seal position. The cooker dissipates heat so pressure releases naturally over time. Use NR to depressurise the cooker after cooking high-starch foods (e.g., soups, stews, NOTICE chilis, pasta, oatmeal and congee) or after cooking foods that expand when cooked... - Page 30 Depressurising the Cooker 10-Minute NR Typically used when cooking rice. Leave the quick release switch in the Seal position for 10 minutes after cooking has completed, then move the quick release switch into the Vent position. Steam is released continuously through the top of the steam release valve. If continuous spatter occurs while venting, set the quick release switch back to Seal and wait an additional 5 minutes before trying to QR again.
-
Page 31: Quickcool
QuickCool The Duo Evo Plus lid is equipped with QuickCool technology, which, when paired with the QuickCool Tray*, allows you to release pressure naturally up to 50% faster. To remove the QuickCool protective cover Grip the tab, push it towards the lid handle and pull up, then pull the cover towards you and off. -
Page 32: Initial Test Run
Initial Test Run Follow these steps to familiarise yourself with your Instant Pot Duo Evo Plus. Total test time: Approximately 20 minutes. 1. Remove the inner pot from the cooker base. 2. Add 750 mL of water to the inner pot. -
Page 33: Using Pressure Cooking Smart Programmes
Follow the steps below when using the Pressure Cook, Rice/Grain, or Bake pressure cooking Smart Programmes. Always inspect your Instant Pot pressure cooking lid, inner pot and cooker base carefully to ensure they are clean and in good working condition before use. - Page 34 Using Pressure Cooking Smart Programmes 5. Press the button to select the pressure cooking Smart Programme of your choice: Press Pressure Cook. Turn the dial to scroll, then press to select from one • of the 15 pre-set options (Custom, Soup, Bean, Egg, Rib, Poultry, Chili, Stew, Beef, Pork, Seafood, Broth, Sterilise, Potato or Broccoli).
- Page 35 Using Pressure Cooking Smart Programmes 13. When cooking completes, follow recipe directions to select the appropriate Depressurising the Cooker. venting method. Refer to Instant Tip: Use the steam rack to lift foods out of the cooking liquid. This ensures even heat distribution, prevent nutrients from leeching into the cooking liquid, and stop food items from scorching on the bottom of the inner pot.
-
Page 36: Using Non-Pressure Cooking Smart Programmes
Using Non-Pressure Cooking Smart Programmes The Duo Evo Plus provides 6 non-pressure cooking Smart Programmes to get you cooking with the touch of a button: Bake, Steam, Slow Cook, Sauté, Sous Vide and Yogurt. Smart Programme: Bake The no-pressure Bake Smart Programme can be used to create decadent brownies, moist banana bread, and much more. - Page 37 Using Non-Pressure Cooking Smart Programmes 11. When the custom temperature flashes, turn the dial to adjust the temperature in Celsius (ºC) or Fahrenheit (ºF). 12. Press Start to begin. The progress bar displays Pre-heating. 13. When the target temperature is reached, the progress indicator goes to Cooking and the display counts down the remaining cooking time.
-
Page 38: Smart Programme: Steam And Slow Cook
Using Non-Pressure Cooking Smart Programmes Smart Programme: Steam and Slow Cook The Steam Smart Programme functions as a traditional steamer, boiling liquid in the inner pot to cook food with hot steam. When using the Steam Smart Programme, place the steam rack on the bottom of the inner pot to ensure your food items are steamed and not boiled. - Page 39 If not, the cooker goes to Standby mode and the display indicates End. Instant Tip: If you prefer, use an authorised Instant Pot tempered glass lid with the Steam or Slow Cook Smart Programmes. Visit our store...
-
Page 40: Smart Programme: Sauté
Using Non-Pressure Cooking Smart Programmes Smart Programme: Sauté The Sauté Smart Programme is similar to using a frying pan, griddle or flat-top grill. Use Sauté to simmer, reduce and thicken liquids, stir-fry meals, and to caramelise vegetables and sear meat before or after cooking. 1. - Page 41 Using Non-Pressure Cooking Smart Programmes Delay Start and Keep Warm settings are not available on the Sauté Smart Programme. Deglazing the Inner Pot (Pressure Cooking After Sauté) Sautéing meat and vegetables before pressure cooking is the perfect way to boost flavours, as sugars caramelise from the high heat of the Sauté...
-
Page 42: Smart Programme: Sous Vide
Using Non-Pressure Cooking Smart Programmes Smart Programme: Sous Vide The term Sous Vide is French for ‘under vacuum’ and refers to the process of vacuum sealing food, bringing it to a specific temperature, and maintaining that temperature for a period of time to achieve high quality, consistently delicious results. - Page 43 Using Non-Pressure Cooking Smart Programmes 11. Once the set water temperature has been reached the cooker will display Hot. Open the lid and immerse the sealed pouches into the inner pot. Add heated water if needed. The contents of the pouches should be submerged but the seal should remain above the water line.
-
Page 44: Sous Vide Cooking Guidelines
Using Non-Pressure Cooking Smart Programmes Sous Vide Cooking Guidelines Recommended Expected Cooking Minimum Maximum Food Thickness “Doneness” Temperature* Cooking Time* Cooking Time* Beef and Lamb Tender Cuts: Rare 50°C 1 hour 4 hours Tenderloin, cutlets, sirloin, 2–5 cm Medium-rare 54°C 1.5 hours 4 hours rib-eye, rump,... - Page 45 Using Non-Pressure Cooking Smart Programmes Recommended Expected Cooking Minimum Maximum Food Thickness “Doneness” Temperature* Cooking Time* Cooking Time* Fish and Seafood Soft and 43°C 10 minutes 30 minutes buttery Translucent / 46°C 20 minutes 45 minutes starts to flake Fish 2–3 cm Medium-rare 52°C...
-
Page 46: Smart Programme: Yogurt
What You’ll Need: • Food Thermometer • Milk or a non-dairy alternative • Active yogurt culture To Make Yogurt Instant Pot Size Minimum Milk Volume Maximum Milk Volume 5.7 Litres 1000 mL 3.8 L 8 Litres 1500 mL 5.7 L Step 1 –... - Page 47 Note: Plain yogurt with active cultures can also be used as a starter. Follow a trusted Instant Pot yogurt recipe when using yogurt as a starter culture. 3. Close the lid as described in Overview of Pressure Control Features – Close Lid.
- Page 48 Using Non-Pressure Cooking Smart Programmes Using the Custom Pre-set Some recipes may require a higher or lower temperature for pasteurisation and fermentation. Always follow a recipe when using the Custom pre-set. The Custom Pre-set in the Yogurt Smart Programme offers a temperature range of 25°C–90°C.
-
Page 49: Smart Programme Overview
Smart Programme Overview Smart Pressure Temperature Pre-set Notes for Use Programme Level Range Custom, Soup, Bean, Egg, Higher pressure means higher Rib, Poultry, Chili, temperature. Pressure Stew, Beef, Pork, Low/High – Cook Use the steam rack for best Seafood, Broth, results. - Page 50 Smart Programme Overview Smart Pressure Temperature Pre-set Notes for Use Programme Level Range Low/High/ Reheat & keep food warm up to Keep Warm None 24 hours. Custom Pressure cooking Smart Programmes operate at High (9.3 – 11.6psi) or Low (4.35 – 7.25psi) pressure.
-
Page 51: Recommended Cooking Times
Recommended Cooking Times The following cooking times are recommendations only. Always follow a trusted recipe. Pressure Cooking Timetable Food Time Asparagus, Beans (Yellow and Green), 1–2 minutes Broccoli Brussels Sprouts, Cabbage (Whole or 2–3 minutes Wedges), Cauliflower (Florets) Butternut Squash 4–6 minutes Carrots (Whole or Chunks) 6–8 minutes... -
Page 52: Grain-To-Water Ratios
Recommended Cooking Times Food Time Fish (Whole) 4–5 minutes Fish (Fillet), Lobster 2–3 minutes Seafood Mussels 1–2 minutes Shrimp (Or Prawn) 1–3 minutes Seafood Stock 7–8 minutes Use a meat thermometer to ensure meat reaches a safe minimum internal CAUTION temperature. -
Page 53: Care, Cleaning And Storage
Care, Cleaning and Storage Clean your Instant Pot after each use. Always unplug the Duo Evo Plus and let it cool to room temperature before cleaning. Allow all surfaces to dry thoroughly before use and before storage. Cleaning Part Instruction... -
Page 54: Troubleshooting
Troubleshooting Register your product today. Contact Customer Care: +44 (0) 3331 230051 support@instantpot.co.uk @instantpotuk Problem Possible Reason Solution Re-position sealing ring, ensure it is snug Sealing ring not properly fitted behind sealing ring rack. Gently press the float valve downward Difficulty Float valve in the popped-up position with a long utensil. - Page 55 Troubleshooting Problem Possible Reason Solution Remove float valve from lid and clean Food debris on float valve or float valve thoroughly. Perform the Initial Test Run silicone cap check for function. Record findings and contact Customer Care. Check for scorching on bottom of inner pot;...
- Page 56 Troubleshooting Problem Possible Reason Solution Faulty sensor Contact Customer Care. Heat element has failed Contact Customer Care Add thin, water-based liquid to inner pot based on size: Not enough liquid 5.7 L: 375 mL 8 L: 500 mL Error code NoPr appears Quick release switch is in...
-
Page 57: Warranty
Warranty Limited Warranty Earlyview Ltd., an authorised distributor of Instant Brands, Inc., and Instant Brands Inc. (collectively the “Company”) warrant this appliance to be free from defects in workmanship and material, under normal household use, for a period of one (1) year from the date of original purchase. This Limited Warranty extends only to the original purchaser and use of the appliance in the UK. -
Page 58: Contact Information
A copy of the original purchase receipt with order number, model and serial number. • A description of the product defect, including any photographs or video if possible. Contact Information Instant Pot / Earlyview Ltd Unit 5 Hersham Farm Business park Kitsmead Lane Chertsey, Surrey KT16 0DN, UK Email: support@InstantPot.co.uk... - Page 59 Instant Brands Inc. 11–300 Earl Grey Dr., Suite 383 Ottawa, Ontario K2T 1C1 Canada Earlyview Ltd (Instant Pot Official Distributor) 5 Hersham Farm Business Park Kitsmead Lane, Chertsey Surrey, KT16 0DN Register your product today at: www.instantpot.co.uk/support/register Contact Customer Care: +44 (0) 3331 230051 support@instantpot.co.uk...
Need help?
Do you have a question about the DUO EVO PLUS Series and is the answer not in the manual?
Questions and answers