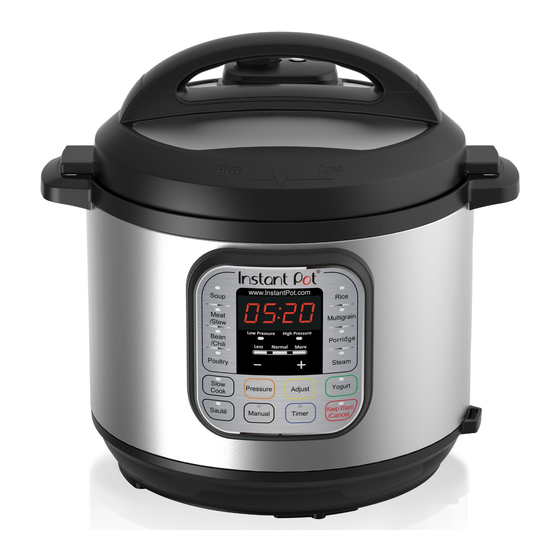
Instant Pot Duo Series User Manual
Hide thumbs
Also See for Duo Series:
- User manual (44 pages) ,
- Quick start manual (9 pages) ,
- Safety, maintenance & warranty (12 pages)
Table of Contents
Advertisement
Advertisement
Table of Contents
Troubleshooting

Related Manuals for Instant Pot Duo Series


Summary of Contents for Instant Pot Duo Series
- Page 1 Series User Manual...
-
Page 3: Table Of Contents
Table of Contents Important Safeguards 2 - 5 Overview Control and Features 7 - 11 Getting Started 12 - 14 Pressure Cooking 15 - 17 Non-Pressure Cooking 18 - 21 Cooking and Safety Tips Care and Cleaning Troubleshooting 24 - 26 Warranty 27 - 28 Pictures in manual are for reference only. -
Page 4: Important Safeguards
Important Safeguards SAVE THESE INSTRUCTIONS When using pressure cookers, basic safety precautions should always be followed. 1) Do not touch hot surfaces of pressure cooker. Use side handles for carrying. 2) Do not place the cooker on or near a hot gas or electric burner, or in a heated oven. 3) Intended for countertop use only. - Page 5 Make certain the lid is properly closed before operating. Caution: To reduce the risk of electric shock, cook only in removable containers. See “Getting Started” pages 12-14. 18) Use of accessories and parts that are not branded Instant Pot nor recommended by the ®...
- Page 6 19) Be aware that certain foods, such as applesauce, cranberries, pearl barley, oatmeal or other cereals, split peas, noodles, macaroni, rhubarb, or spaghetti can foam, froth, sputter, and clog the steam release. These foods should not be cooked under pressure cooking settings unless as directed in Instant Pot cooker recipes. ®...
- Page 7 Important Safeguards WARNING: Spilled food can cause serious burns. Keep appliance and cord away from children. Never drape cord over edge of counter, never use power outlet below counter, and never use with an extension cord. Special Cord Set Instructions As per UL safety requirements, a short power supply cord (0.6 m to 0.9 m) is provided to reduce the hazards resulting from entanglement and tripping.
-
Page 8: Overview
Overview Steam release handle Anti-block shield Lid handle Float valve To install: Position the anti-block shield in place and Lid position push down Lid fin marker Stainless steel inner pot To remove: Using your thumb, push the side of the anti-block shield towards the lid rim and Cooker Exterior pot... -
Page 9: Control And Features
Control and Features Perfect cooking results Control Panel for the DUO Series with built-in automatic programs The control panel of your Instant Pot DUO Mini/60/80 consists of a LED ® display,cooking program keys, operation keys, +/- keys to adjust time, and a key. - Page 10 Control and Features Control Panel for the DUO Series Instant Pot is a programmed smart cooker that has preset cooking times for different food ® ingredients and cooking methods. It also remembers your most recent settings per cooking program for a more personalized cooking experience. To return to the factory default...
- Page 11 Fall-off-the-bone texture. More Corresponds to Low setting Non-pressure cooking Less in some temperature program. You may also use controlled slow cookers. the Instant Pot glass lid as ® an option. Corresponds to Medium Slow Normal setting in some temperature Cook controlled slow cookers.
- Page 12 Control and Features Cooking Program Options Programs Modes Suggested Uses Notes for Users Automated cooking Less Al dente white rice. program. LED displays ‘Auto’. The +/- keys will not Normal Normal texture white rice. Rice work in this program. More Softer texture white rice.
-
Page 13: Control And Features
Control and Features Cooking Program Options Programs Modes Suggested Uses Notes for Users Default fermentation time is Less Jiu Niang, a sweet fermented 24:00 hours. You can adjust glutinous rice dessert. time based on your recipe. Normal Fermenting milk when ‘Yogt’... -
Page 14: Getting Started
Getting Started Read warning cards and warning labels. Remove all packaging materials and removable warning cards from the cooker and accessories. Clean the inner pot, lid and accessories with water and detergent before the first use. Install the condensation collector at the rear of the cooker by aligning the top of the collector with the guides on the cooker and press in. - Page 15 Getting Started Before using your Instant Pot ® To remove the lid, hold the handle, turn the lid counterclockwise and lift. Remove the inner pot from the cooker. Add food and liquids to the inner pot as the recipe directs. If required, place the steam rack on the bottom of the inner pot first.
- Page 16 • After putting the lid on, make sure the float valve on lid top drops down. • Do not put the lid on for the Sauté program. Initial Test Run To familiarize yourself with the Instant Pot and check if the cooker is working properly: ®...
-
Page 17: Pressure Cooking
Pressure Cooking The following are all pressure cooking programs: Soup/Broth, Meat/Stew, Bean/Chili, Poultry , Rice, Multigrain , Porridge, Steam, and Pressure Cook. • Do not fill the inner pot more than 2/3 full. For food that expands during cooking such as rice or dried vegetables, do not fill the inner pot more than 1/2 full. - Page 18 Pressure Cooking Optionally, personalize pressure cooking programs as follows: To do this ..Press this button... Followed by these steps... Change the cooking time Cooking Program Select between three preset cooking times, Less, Normal and More by pressing the cooking program key repeatedly + / - Add/subtract time;...
- Page 19 Pressure Cooking Release the pressure using one of the following methods (refer to recipe): Natural Release: Allow the cooker to cool down naturally until the float valve drops down. This may take 10 to 40 minutes, or even more, depending on the amount of food in the cooker.
-
Page 20: Non-Pressure Cooking
Non-Pressure Cooking The following are all non-pressure cooking programs: Sauté, Slow Cook, Yogurt and Keep Warm. Sauté Connect the power cord. The LED displays OFF, indicating that the cooker is on standby. Select the Sauté program. To change the cooking temperature, press Sauté key repeatedly to toggle between Less (for simmering or thickening sauce), Normal (for regular browning), and More (for stir-frying or blackening meat). - Page 21 Non-Pressure Cooking Slow Cook You may use the Instant Pot glass lid as an option. If using the pressure cooking lid, make ® sure the steam release handle is turned to Venting. Connect the power cord. The LED displays OFF, indicating that the cooker is on standby.
- Page 22 Non-Pressure Cooking When the cooking cycle has finished, the cooker will beep and enter the Keep Warm mode if the Keep Warm program is turned ON. The LED will display the elapsed time (such as L0:02). If Cancel is not pressed, the cooker will turn OFF after 10 hours. If the lid is on, remove it by turning counterclockwise and lifting.
- Page 23 Non-Pressure Cooking Cool Milk a) Remove the inner pot and place it on a wire rack. b) Allow the milk to cool to 115°F/46°C. Test the milk temperature with a thermometer. Add Starter Culture a) Add starter culture to the warm milk in the inner pot. b) Replace the inner pot and close the lid.
-
Page 24: Cooking And Safety Tips
Cooking and Safety Tips • Extreme caution should be taken when moving the steam release handle to the Venting position. Keep hands and face away from the steam release openings. Failure to comply may result in scalding or serious injury. •... -
Page 25: Care And Cleaning
Care and Cleaning Unplug your Instant Pot and let it cool to room temperature before cleaning. ® • All Instant Pot inner pots, pressure cooker lids, glass lids, and accessories are ® dishwasher safe. • Remove the inner pot and lid, and wash with detergent. Rinse with clear water and wipe dry with a soft cloth. -
Page 26: Troubleshooting
Troubleshooting If you experience any problems with the cooker, need technical assistance or product return information, please contact the Instant Pot support team using the methods below: • Create a support ticket: www.InstantPot.com/support/ • Email: support@instantpot.com • Call 1-800-828-7280 ext 2 for the customer care team. - Page 27 Troubleshooting Problem Possible reason Solution No sealing ring Install the sealing ring Steam leaks from the side of the lid Sealing ring damaged Replace the sealing ring Food debris attached to the Clean the sealing ring sealing ring Open then close the lid Lid not closed properly again Food debris on the float...
-
Page 28: Troubleshooting
Troubleshooting Solution Problem Possible reason All LEDs flash with a Faulty temperature sensor Contact support code appearing on Faulty temperature sensor Contact support screen and the warning beep is ON Temperature is too high Insert the inner pot because inner pot is not properly placed into the cooker base Temperature is too high... -
Page 29: Warranty
When this appliance is operated and maintained in accordance with written instructions attached to or furnished with the product, Instant Pot Company will pay for either (i) repair labor to correct defects in materials or workmanship that existed when this appliance was purchased or (ii), at its sole and exclusive discretion, replace the appliance for a period of one (1) year from the date of purchase. - Page 30 Warranty Registration and Service Please visit http://instantpot.com/support/register/ to register your new Instant Pot and validate your warranty within thirty (30) days of purchase. You will be asked to provide the store name, date of purchase and model number (found on the base of your cooker) along with your name and address.
- Page 31 Canada Telephone: +1-800-828-7280 ext 2 Fax: +1-613-800-0726 Web: www.InstantPot.com US and Canada E-mail: support@instantpot.com To enhance your experience with Instant Pot, join the official Instant Pot Community Facebook.com/groups/instantpotcommunity twitter.com/instantpot Instant Pot Free Recipe App & More ® Copyright Instant Pot Company ©...
Need help?
Do you have a question about the Duo Series and is the answer not in the manual?
Questions and answers
what is the temp on the normal yogurt setting IPDUO
The temperature on the normal yogurt setting for the Instant Pot IP-DUO is around 120°–125°F (49°–52°C).
This answer is automatically generated
Can you customize the temperature on InstaPot Duo? 100 degrees?
No, the Instant Pot Duo Series does not have a customizable temperature setting of exactly 100°C. The available temperature ranges for different functions are:
- Keep Warm: 63-78°C
- Slow Cook: Up to 99°C (More mode: 93-99°C)
- Sauté: 135-210°C
Since the highest precise temperature setting in non-pressure cooking modes is 99°C, you cannot set it exactly to 100°C.
This answer is automatically generated
What are the smart programs
The Smart Programs for the Instant Pot Series include:
1. Multigrain – Has modes like "More," which includes 45 minutes of soaking and 60 minutes of pressure cooking for tough grains and beans.
2. Porridge – Includes modes for oatmeal, white rice porridge, and porridge with various rices and beans.
3. Steam – Used for vegetables, fish, seafood, or meat, with food elevated on a steam rack.
4. Sauté – Used for simmering, thickening, pan searing, or browning meat. Lid must be off, and maximum time is 30 minutes.
5. Yogurt – Includes fermentation mode for making items like Jiu Niang with a default time of 24 hours.
Each program adjusts pressure, temperature, and time based on the selected mode and food type.
This answer is automatically generated
I want to slow cook stuffed bell peppers. Do I need to add any liquid?