
Related Manuals for Flashforge Guider 2


Summary of Contents for Flashforge Guider 2
- Page 1 Guider 2 / Guider 2s SZ11S-ZN/EN-A02 引领者 2 / 引领者 2s This guide is only applicable to FLASHFORGE Guider 2/Guider 2s 3D printer 本指南仅适用于闪铸科技 引领者2/引领者2s 3D打印机...
- Page 2 2. Take your 3D printer out of the box. 3. The bottom PE foam should contain: a spool of PLA filament, a spool holder, a solid glue, a USB cable, a filament guide tube and a accessories bag. 5. Remove the top PE foam piece, which contains one power cable, one USB Stick, one Quick start guide and a After-sales service card.
- Page 3 Power Switch 7. Tear off tape and the stretch wrap of front door. Squeeze top lid slightly from both sides to the middle so as to take top lid successfully. Remove the stretch wrap of top lid. Build 9. Tap [Tools]. Tear off the stretch wrap 11.
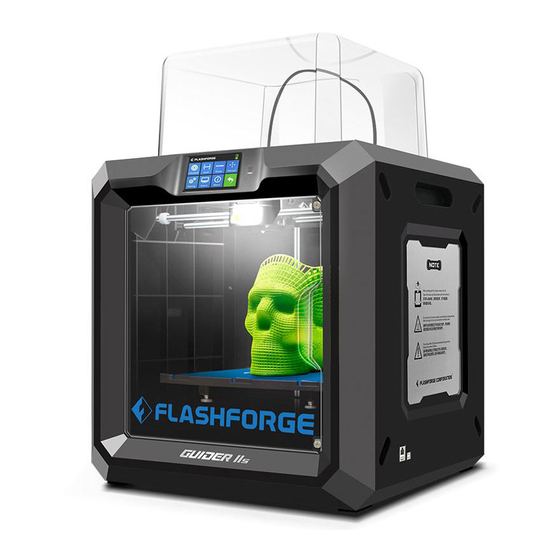
- Page 5 Getting to Know Your Guider 2 1. Z-Axis Guide Rod 2. Filament Intake 3. Y-Axis Guide Rod 4. X-Axis Guide Rod 5. Touch Screen 6. Touch Screen Button 7. Build Plate 8. Nut 9. Servo 10. Turbo Fan 11. Nozzle 12.
- Page 6 Getting to Know Your Guider 2S 1. Z-Axis Guide Rod 2. Filament Intake 3. Air-Filter 4. Y-Axis Guide Rod 5. X-Axis Guide Rod 6. Touch Screen 7. Touch Screen Button 8. Build Plate 9. Nut 10. Camera 11. Servo 12. Turbo Fan (Inside the printer) 13.
- Page 7 1. Locate the spool holder. Install the spool holder into the left quadrangular opening on the back. Filament intake Press here 5. After filament goes through guide tube, press 6. After inserting into filament intake, insert guide spring presser on the left side of extruder, and tube into extruder filament intake to fix.
-
Page 8: Leveling Build Plate
Leveling Build Plate Tools Berfore leveling, let's learn the funciton of nuts. How to use the nuts Build plate goes down Build plate goes up Rotate the nuts clockwise Rotate the nuts Anticlockwise Raise the build plate to reduce the distance Lower the build plate to increase the distance between the nozzle and build plate. - Page 9 Screw the three nuts under the platform counterclockwise until they are tight, then tap the [OK] button. 3. Please wait while the extruder and platform finish initial movements. Screw three nuts under the platform anticlockwise, then tap [OK] button. Attention: three nuts may be tightened up before going out, please skip this step if you find three nuts have been tightened up, and continue to following steps 4.
- Page 10 8. After first leveling point completed, start the other two leveling points. Attention: when starting the second and the third leveling points, just need to adjust one corresponding nut under extruder. Distance Too Small Turn the corresponding nut under Turn the corresponding nut under the platform clockwise until the platform anticlockwise until you hear the beep.
-
Page 11: Loading Filament
Loading Filament 1. Tap [Tools]. 2. Tap [Filament]. 3. Tap [Load], extruder starts to heat. Loading started, push filament vertically into extruder and press [Done] when you see filament come out of the extruder Done 4. Once heated, filament will be drawn through the extruder. Continue extruding until the extruder provides a steady flow of filament. - Page 12 1. Ensure that the build plate has been leveled before printing. 2. Ensure that the filament has been loaded in an appropriate approach. 3. Load the filament for a while to extrude all the melted filament you printed last time out of the extruder.
-
Page 13: Unloading Filament
Please follow steps below if you need to unload filament in Unloading Filament daily use. 1. Pull filament guide tube out of filament intake, 2. Tap [Tools]. leave filament 10cm to pull filament easily. Load Unload 3. Tap [Filament]. 4. Tap [Unload]. Unload started, press down on the spring lever and withdraw filament Extruder... - Page 14 Withdraw Press here Filament 6. Then pull out vertically quickly and release spring presser. Tap [Done], go back. Tap return arrow to go back to home screen.
- Page 15 2. 将打印机从纸箱中提出。 3. 在纸箱底部的泡沫块中包含有一卷耗材、 丝盘轴、固体胶、USB线、耗材导丝管和 工具包。 5. 移除打印机顶部泡沫块,上面附带有一根电 源线、一个U盘、一本《快速启动指南》和 一张《售后服务卡》。撕除固定前门的无痕 胶带。...
- Page 16 电源开关 7. 撕保护前门的无痕胶带和缠绕膜。轻轻从两 8. 取出电源线,插入打印机背部的电源接口, 侧向中间挤压顶罩,以便顺利取出顶罩。 按下图中箭头所示的电源开关,接通电源。 撕除包裹顶罩的缠绕膜。 Build 9. 开机后在液晶屏上点击[Tools]。 撕除此处 的缠绕膜 11. 按住“Z-”将打印平台上升至机身中部。 12. 取出下方的两块泡沫块,撕除固定打印 点击触摸屏右侧的开关返回主界面。 平台的缠绕膜。...
- Page 18 引领者2 部件介绍 1. Z轴导轨 2. 喷头进丝孔 3. Y轴导轨 4. X轴导轨 5. 触摸屏 6. 开关 7. 打印平台 8. 调平螺母 9. 调平舵机 10. 涡轮风扇 11. 喷嘴 12. 导风嘴 13. 网线接口 14. U盘接口 15. USB线接口 16. 丝盘轴插口 17. 电源开关 18. 电源线接口...
- Page 19 引领者2s 部件介绍 1. Z轴导轨 2. 喷头进丝孔 3. 空气过滤装置 4. Y轴导轨 5. X轴导轨 6. 触摸屏 7. 开关 8. 打印平台 9. 调平螺母 10. 摄像头(打印机内侧) 11. 调平舵机 12. 涡轮风扇 13. 喷嘴 14. 导风嘴 15. 网线接口 16. U盘接口 17. USB线接口 18. 丝盘轴插口 19. 电源开关 20.
- Page 20 2. 丝盘轴插入丝盘轴插口后,让丝盘轴底部向下 贴住打印机背部。 按下压板 进丝孔 5. 耗材穿过导丝管后,按下喷头左侧的压板, 6. 耗材插入进丝孔后,再将导丝管插入喷头进丝 然后将耗材垂直插入喷头进丝孔中,直到 孔固定。 耗材无法继续插入。...
- Page 21 Tools 1. 设备在出厂时默认操作语言为英文,请根据上图步骤切换至中文:在触摸屏上依次点击[Tools]、 [Setting]、[Language]、[简体中文]。 2. 语言设置完成后,点击返回键返回主界面,准备开始调平。在开始调平之前,让我们先了解一 下调平螺母的作用。 打印平台下降 打印平台上升 换 丝 调 平 回 零 手动调节 打 印 设 置 状 态 关 于 1. 在触摸屏上点击[工具]。 2. 点击[调平]。...
- Page 22 3. 待初始化运动完成后逆时针拧紧底板下的三颗螺母,点击[确认]。 请注意:在出厂前的测试中,三颗螺母可能已经被拧紧,如发现螺母已处于拧紧状态,请跳过 拧紧螺母这一步骤,继续进行后续操作。 4. 点击[确认]后,喷头开始移向第一个调平点, 5. 根据触摸屏提示,顺时针调节平台下的三颗螺 开始验证喷嘴与平台之间的距离。 母一致的圈数,直到听到持续稳定的提示声。 点击【确认】按钮 开始下一个点的调平。 6. 听到持续稳定的提示声,之后点击[验证] 7. 若距离合适,点击[确认]进行下一步骤。若距 进行确认。 离依然不合适,请继续按触摸屏提示操作, 直至调平成功。...
- Page 23 8. 在第一点调平完成后,开始剩余两点调平。 请注意:在第二点和第三点调平时,只需要调节喷头下方对应的一颗螺母即可。 距离太小 顺时针调节平台下对应螺母, 逆时针调节平台下对应螺母, 直到听到持续稳定的提示音。 直到听到持续稳定的提示音。 9. 根据触摸屏提示的方向,调节平台下对应的螺母,直到听到持续稳定的提示声。 点击【确认】按钮 调平完成! 开始下一个点的调平。 完成 10. 若距离合适,点击[确认]进行第三点调平。 11. 第三点调平按照第二点调平的方法。 若距离依然不合适,请继续按触摸屏提示 三个点调平完成后,按返回键回到首界面。 操作,直至调平成功。...
- Page 24 填装耗材 1. 在触摸屏上点击[工具]。 2. 点击[换丝]。 3. 点击[进丝]后,喷头开始加热。 开始进丝,请将丝料垂直插入,看到喷头有丝料挤出 时请点击[完成] 完成 4. 喷头加热到预定的温度后会自动开始进丝。看到喷嘴开始出丝时请勿立即停止进丝, 直到耗材均匀出丝为止。点击触摸屏右侧的开关返回主界面。 注意:若长时间喷头未出丝,请检查填装耗材时是否正确将耗材插入喷头底部。...
- Page 25 1. 打印开始前请确保打印机已经过调平; 2. 打印开始前请确保耗材安装正确,没有打结 或卡住; 3. 喷头内可能残留少量耗材,请进丝一段时间, 确保上一次打印的耗材已全部挤出; 4. 打印开始前请将喷头耗材清理干净; 5. 不可以在长时间无人看守的情况下使用 3D打印机; 1. 将随机附带的U盘插入打印机右侧的U盘接口。 在触摸屏上点击[打印]。 FlashPrint切片软件 Quick Start Guide 快启 Test Files 测试文件 User Guide说明书 2. 点击[U盘]。 3. 点击[测试文件]。 4. 点击测试模型进行打印测试。 5. 点击[打印]。 6. 打印机开始加热,加热完成后自动开始打印。...
- Page 26 退丝操作 在日常使用中,如果需要更换耗材,请按下列步骤操作。 拔出导丝管 1. 将导丝管从喷头进丝口拔出,露出10厘米 2. 在触摸屏上点击[工具]。 耗材,方便拔出耗材。 3. 点击[换丝]。 4. 点击[退丝]。 开始退丝,按下压板, 同时按压丝料3秒后垂直拔出 完成 向下按压耗材3秒 按下压板 5. 喷头加热到预定温度后开始退丝,按下喷头 侧边的压板,同时向下按压耗材3秒,直到 看到耗材从喷嘴被挤出。...
- Page 27 快速垂直拔出耗材 按下压板 6. 快速垂直拔出。点击[完成]返回上一级, 点击返回键返回首界面。...
- Page 28 电话: 4008866023 官方网站:www.sz3dp.com 地址:浙江省金华市仙源路518号...
Need help?
Do you have a question about the Guider 2 and is the answer not in the manual?
Questions and answers