Table of Contents
Advertisement
Quick Links
OWNER'S /
OPERATOR'S
MANUAL
MODEL NO.
SSGB-8
CAUTION
For Safe Operation
Read Rules And
Instructions Carefully
SINO LEEINGLES, PIDA AYUDA
A AIGUIEN QUE SI LO LEA
PARA QUE LE TRADUZCA LAS
MEDIDAS DE SEGURIDAD.
THE FOLLOWING SAFETY PRECAUTIONS SHOULD BE THOROUGHLY UNDERSTOOD
1. Select an area for assembly that is clean and free of any
debris which might cause persons working on the
assembly to trip.
2. Do not lift heavy parts or assemblies. Use crane, jack,
tackle, fork trucks or other mechanical devices.
3. Preview the assembly instructions in your operator's
manual before proceeding further.
4. If the assembly instructions call for parts or assemblies to
be blocked up, use only blocking material that is in good
condition and is capable of handling the weight of the
assembly to be blocked. Also insure that the blocking
material is on a clean, dry surface.
5. Never put hands, or any part of body, under blocked up
assemblies if at all possible.
SKID STEER MOUNTED
Safety Instructions
Tractor Preparation
Operating Instructions
CAUTION
BEFORE ATTEMPTING TO BEGIN ASSEMBLING THIS MACHINE
GRADER BLADE
6. After completing assembly, thoroughly inspect the
machine to be sure that all nuts, bolts, hydraulic fittings
or any other fastened assemblies have been thoroughly
tightened.
7. Before operating the machine, thoroughly read the
operation section of your operator's manual.
8. Before operating, read the maintenance section of your
operator's manual to be sure that any parts requiring
lubrication, such as gearboxes, are full, to avoid any
possible damage.
9. Before operating equipment – If you have any
questions regarding the proper assembly or
operation, contact your dealer or representative.
Assembly & Mounting
Maintenance
Repair Parts
Advertisement
Table of Contents

Related Manuals for Worksaver SSGB-8B

Summary of Contents for Worksaver SSGB-8B
- Page 1 OWNER’S / OPERATOR’S MANUAL MODEL NO. SSGB-8 SKID STEER MOUNTED CAUTION GRADER BLADE For Safe Operation Read Rules And Instructions Carefully SINO LEEINGLES, PIDA AYUDA Safety Instructions Assembly & Mounting A AIGUIEN QUE SI LO LEA Tractor Preparation Maintenance PARA QUE LE TRADUZCA LAS MEDIDAS DE SEGURIDAD.
-
Page 3: Table Of Contents
Like all mechanical products, it will require cleaning and upkeep. Lubricate the Grader Blade as specified. Use only genuine Worksaver, Inc. service parts. Substitute parts will void the warranty and may not meet standards required for safe and satisfactory operation. Record the model and serial number of your Grader Blade... -
Page 4: Warranty
2. If the unit has been subjected to misapplication, abuse, misuse, negligence, fire or other accident. 3. If parts not made or supplied by Worksaver have been used in connection with the unit, if, in sole judge- ment of Worksaver such use affects its performance, stability, or reliability. -
Page 5: Safety Information
To the Owner/Operator/Dealer All implements with moving parts are potentially hazardous. There is no substitute for a cautious, safe-minded opera- tor who recognizes the potential hazards and follows reasonable safety practices. The manufacturer has designed this implement to be used with all its safety equipment properly attached to minimize the chance of accidents. BEFORE YOU START!! Read the safety messages on the implement and shown in your manual. - Page 6 SAFETY INSTRUCTIONS (continued) EQUIPMENT SAFETY GUIDELINES Safety of the operator is one of the main concerns in designing and developing a new piece of equipment. Designers and manufacturers build in as many safety features as possible. However, every year many accidents occur which could have been avoided by a few seconds of thought and a more careful approach to handling equipment.
- Page 7 SAFETY INSTRUCTIONS (continued) SAFETY SIGNS Keep safety signs clean and legible at all times. Replace safety signs that are missing or have become illegible. Replaced parts that displayed a safety sign should also display the current sign. Safety signs are available from your Distributor or Dealer Parts Department or the factory. How to Install Safety Signs: Be sure that the installation area is clean and dry.
- Page 8 SAFETY INSTRUCTIONS (continued) STARTING AND STOPPING SAFETY Be certain the skid steer is in neutral or park position before starting engine. Do not leave the skid steer or the attachment unattended with the engine running. Grader blade operating power is supplied from skid steer hydraulic system. Refer to your skid steer manual for hydraulic engagement and disengagement instructions.
- Page 9 SAFETY INSTRUCTIONS (continued) OPERATIONAL SAFETY (continued) Before you operate the grader blade, check over all pins, bolts and connections to be sure all are securely in place. Replace any damaged or worn parts immediately. Consult local utility companies to make certain there are no buried gas lines, electrical cables, etc., in the work area before beginning operation.
- Page 10 SAFETY INSTRUCTIONS (continued) OPERATIONAL SAFETY (continued) Operate grader blade from operator’s seat only. Remain at controls until operating cycle is complete. Stop skid steer loader gradually when lowering or lifting loads. Operate skid steer and grader blade controls smoothly, avoid jerky operation. Allow for additional length of loader arms and attachment on skid steer while turning.
- Page 11 SAFETY INSTRUCTIONS (continued) MAINTENANCE SAFETY Before working on this machine, drive to a level area, relieve hydraulic pressure, lower implement (or if work- ing underneath, raise and block securely), shut off the engine, set the brakes, and remove the ignition keys. Relieve hydraulic pressure prior to doing any maintenance.
- Page 12 SAFETY INSTRUCTIONS (continued) TRANSPORT SAFETY Comply with state and local laws governing highway safety and movement of machinery on public roads. The use of flashing amber lights is acceptable in most localities. However, some localities prohibit their use. Local laws should be checked for all highway lighting and marking requirements. Always be sure the attachment is in the proper raised position for transport.
-
Page 13: Safety Signs
SAFETY SIGNS WARNING Stand clear 101027 REMEMBER: If Safety Signs have been damaged, removed, become illegible or parts replaced without Signs, new Safety Signs must be applied. New Safety Signs are available from your authorized distributor or factory. - Page 14 SAFETY SIGN LOCATION The types of safety signs and locations on the equipment are shown in the illustration below. Good safety requires that you familiarize yourself with various safety signs, the type of warning and the area, or particular function related to that area, that requires your SAFETY AWARENESS.
-
Page 15: Preparation Instructions
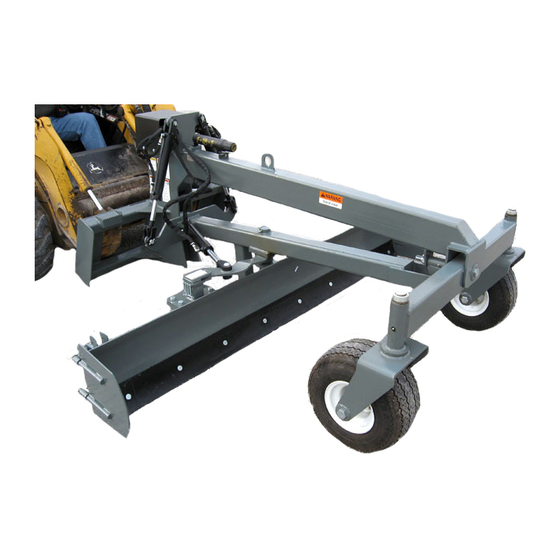
INSTRUCTIONS SKID STEER REQUIREMENTS Refer to the “exploded view” of the skid steer mounted grader blade on page 22 of this manual. Become famil- AND PREPARATION —————————————————— iar with the relationship of the various components and parts shown. The Model SSGB- Grader Blade is designed to fit skid steer units with the “Universal”... - Page 16 INSTRUCTIONS (continued) GRADER INSTALLATION / 13. Mount grader control panel to skid steer with hard- ware provided. REMOVAL (continued) —————————————————— 14. Connect black battery wire from grader to skid steer 10. Attach the grader hydraulic hose with the female con- negative battery terminal.
-
Page 17: Operating Instructions
OPERATING INSTRUCTIONS PRE-OPERATION CHECKLIST TO GRADE —————————————————— —————————————————— (OWNER/OPERATOR RESPONSIBILITY) 1. Activate auxiliary control in skid steer (see skid steer manufacturer’s operation manual). ____ Review and follow safety rules and safety signs on 2. Raise grader blade using the left and right-side lift pages 3 through 12. - Page 18 OPERATING INSTRUCTIONS (continued) HYDRAULIC VALVES When Travelling To Another Work Area: —————————————————— The Model SSGB- grader blade is equipped with a 1. Tilt adjustment plate backward to place the front tires proportional current (PC) type hydraulic valve. This valve of the skid steer back on the ground. provides smoother movement...
-
Page 19: Service & Maintenance
OWNER SERVICE MAINTENANCE Replace any worn or damaged parts immediately. Do —————————————————— not use attachment with any damaged parts. The information in this section is written for operators Replace safety signs and instruction decals if damaged who possess basic mechanical skills. If you need help, or missing. - Page 20 SERVICE INSTRUCTIONS (continued) GREASE LOCATIONS GRADER LUBRICATION STORAGE —————————————————— —————————————————— Thoroughly clean the grease zerks before servicing. Dirt • At the end of the working season or when the Grader mixed with lubricant will rapidly wear parts. Keep it clean. Blade will not be used for a long period, it is good Use a lithium grease of No.
-
Page 21: Trouble-Shooting
TROUBLE-SHOOTING GUIDE PROBLEM POSSIBLE CAUSE POSSIBLE REMEDY Grader does not sit 1. Obstruction between grader and 1. Check to see that the attachment properly on skid attachment plate. plate is free of foreign obstacles. steer attachment Make sure attachment plate pins are plate. - Page 22 TROUBLE-SHOOTING GUIDE (continued) PROBLEM POSSIBLE CAUSE POSSIBLE REMEDY Hydraulic oil 1. Oil level low. 1. Check oil level in power unit reservoir. overheats. 2. Dirty filters. 2. Change oil and filters in power unit per manufacturer’s recommendations. 3. Reservoir of power unit too small. 3.
-
Page 23: Parts Lists
B GRADER BLADE HYDRAULIC DIAGRAM & PARTS LIST Parts List Item Qty. Part Number Description 2505663 Hydraulic Cylinder 2 x 12 2504239 Seal Kit (for 2 x 12 Hydraulic Cylinder) 2505692 Hose, Hydraulic 1/4" x 23" 2505696 Adapter, Hyd. 90 Deg. Adj. Elbow 7/16" 2505694 Hose, Hydraulic 1/4"... - Page 24 SSGB-8 GRADER BLADE PARTS DRAWING...
- Page 25 GRADER BLADE PARTS LIST Ref. Part No. Description Req'd. 811905 Main Frame Weldment 811920 Torsion Tube Weldment 811931 Moldboard Weldment 8 Ft. 811941 Front Axle Weldment 811955 Caster Fork Weldment 811960 Torsion Tube Pivot Weldment 811951 Shaft Support Plate Weldment 811981 Arm Weldment, Moldboard Position 350105...
- Page 26 B GRADER BLADE WIRING DIAGRAM & PARTS LIST Item Part No. Description 2507019 Remote Control Switch Box 2507021 Hydraulic Valve Cable Harness 2507022 Interface Cable Harness Extension 2507024 Battery Cable Harness (Incl. in Item 1) Incl. in Item 1 10 Amp Fuse...
-
Page 27: Wiring & Electrical Schematic
GRADER BLADE WIRING CONNECTION INSTRUCTIONS... - Page 28 GRADER BLADE ELECTRICAL SCHEMATIC...
-
Page 29: End Plate Option
B GRADER BLADE OPTIONAL END PLATE KIT PARTS DRAWING & LIST Optional End Plate Kit Part No. 8 Item Qty. Part Number Description 811971 Endplate Weldment 811968 Endplate Bracket 2503088 Bolt, 5/8"-11NC x 2-1/2" Hex Head Gr.5 2502007 Washer 5/8" Spring Lock 2500013 Nut 5/8"-11NC Ful Hex 590034... -
Page 30: Laser Pole Option
Laser Pole Kit Part No. 8 Item Qty. Part Number Description 811995 Laser Pole 2503072 Bolt, Hex 3/8"-16NC x 3" Gr.5 2500081 Nut, Hex 3/8"-16NC Whiz Flange... -
Page 31: Specifications
SKID STEER GRADER BLADE SPECIFICATIONS Item ..........#8119 Model . -
Page 32: Bolt Torque Chart
BOLT TORQUE CHART... - Page 33 NOTES...
- Page 34 NOTES...
- Page 36 1. PART NUMBER 2. PART DESCRIPTION 3. MODEL NUMBER 4. NAME OF ITEM MODEL NO. SSGB- 8 MAKE EVERY DAY A HOLIDAY FROM ACCIDENTS! WORKSAVER, INC. P.O. BOX 100 LITCHFIELD, IL 62056-0100 (217) 324-5973 WEB: http:// www.worksaver.com E-MAIL: sales@worksaver.com WS-SSA005-OG...
Need help?
Do you have a question about the SSGB-8B and is the answer not in the manual?
Questions and answers