Advertisement
Advertisement
Table of Contents

Subscribe to Our Youtube Channel
Related Manuals for Royal Sovereign RSAC-1217S


Summary of Contents for Royal Sovereign RSAC-1217S
- Page 1 Mini-Split Air Conditioner RSAC-1217S RSAC-1817S RSAC-2417S OPERATING MANUAL...
-
Page 2: Table Of Contents
Thank you for purchasing the Royal Sovereign Mini-Split Air Conditioner, RSAC-1217S / RSAC-1817S / RSAC-2417S. This manual will provide you with safety information, instructions for optimal use, and proper care and maintenance for your product. Please read this manual carefully before operating. -
Page 3: Safety Instructions
SAFETY INSTRUCTIONS Always be careful when using the machine. To reduce the risk of fire, electrical shock, or other injuries, keep these safety considerations in mind when installing, using, and maintaining your machine. WARNING The air conditioner must be properly grounded on a level surface. Do not connect the earth wire to the gas pipeline, water pipeline, lightning rod, or telephone earth wire. - Page 4 SAFETY INSTRUCTIONS Always be careful when using the machine. To reduce the risk of fire, electrical shock, or other injuries, keep these safety considerations in mind when installing, using, and maintaining your machine. CAUTION Do not open windows and doors for a long time when the air conditioner is running. This will cause the cooling or heating capacity to be weakened.
-
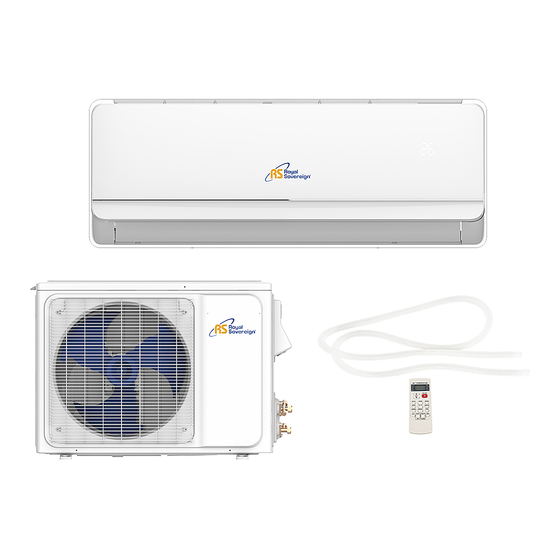
Page 5: Box Contents
BOX CONTENTS Indoor Unit Accessories Outdoor Unit PRODUCT VIEW Indoor Unit Outdoor Unit... - Page 6 NOTICE FOR INSTALLATION Important Notices • Before installing, please contact with the local authorized maintenance center. If the unit is not installed by the authorized maintenance center, the malfunction may not be solved, due to discommodious contact. • The air conditioner must be installed by professionals according to the national wiring rules and this manual.
- Page 7 NOTICE FOR INSTALLATION Electrical Safety Requirements • Be sure to use the rated voltage and air conditioners dedicated circuit for the power supply, and the power cord diameter must meet the national requirements. • When the maximum current of air conditioner is ≥ 16A, it must use the air switch or leakage protection switch equipped with protection devices.
- Page 8 NOTICE FOR INSTALLATION Requirements for operations at raised height • When carrying out installation at 6.6 ft. or higher above the base level, safety belts must be worn and ropes of sufficient strength be securely fastened to the outdoor unit, to prevent falling that could cause personal injury or death as well as property loss.
- Page 9 INSTALLATION: INDOOR UNIT Dimension Drawing of Indoor Unit Installation Mounting Plate 1. The wall for installation of the indoor unit shall be hard and firm, so as to prevent vibration. 2. Use the “+” type screw to fasten the peg board.
- Page 10 INSTALLATION: INDOOR UNIT Route of Pipeline 1. Depending on the position of the unit, the piping may be routed sideways from the left or the right (Fig 1), or vertically from the back (Fig 2) (depending on the pipe length of the indoor unit). In the case of sideway routing, cut off the outlet cutting stock of the opposite side.
- Page 11 INSTALLATION: INDOOR UNIT Fixing the Indoor Unit 1. Hang the indoor unit on the peg board, and move the unit from left to right to ensure that the hook is properly positioned in the peg board. 2. Push toward the lower left side and the upper right side of the unit toward the peg board, until the hook is embedded in the slot and makes a “click”...
- Page 12 INSTALLATION: OUTDOOR UNIT Dimension Drawing of Outdoor Unit Installation Install the Connection Pipe Connect the Outdoor Unit with Connecting Pipe: • Aim the counter-bore of the connecting pipe at the stop valve, and tighten the taper nut with fingers. Then tighten the taper nut with a torque wrench.
- Page 13 INSTALLATION: OUTDOOR UNIT Wiring Connection 1. Loosen the screws and remove the E-parts cover from the unit. 2. Connect the cables respectively to the corresponding terminals of the terminal board of the outdoor unit (see the wiring diagram), and if there are signals connected to the plug, just conduct a butt joint.
- Page 14 INSTALLATION: OUTDOOR UNIT Expelling the Air Outdoor Unit Refrigerant Discharging Method: • After the pipe side connection is complete, proceed as follows. Vacuum Pumping Method: (R410A refrigerant evacuation must use the Vacuum Pumping Method) • Before working on the air conditioner, remove the cover of the stop valve (gas and liquid valves) and be sure to retighten afterward.
-
Page 15: Installation
INSTALLATION: OUTDOOR UNIT Outdoor Condensation Drainage (Heat pump type only) • When the unit is heating, the condensing water and defrosting water can be drained out reliably through the drain hose. Installation: • Install the outdoor drain elbow in 25 hole on the base plate, and joint the drain hose to the elbow, so that the waste water formed in the outdoor unit can be drained out to a... -
Page 16: Test Operation
TEST OPERATION Test Operation Preparation • Verify that all piping and connection cables are well connected. • Confirm that the values at the gas side the liquid-side are fully open. • Connect the power cord to an independent power socket. •... - Page 17 NOTICES FOR USE Notes for Heating • The fan of the indoor unit will not start running immediately after the heating is started to avoid blowing out cool air. • When it is cold and wet outside, the outdoor unit will develop frost over the heat exchanger which will compromise the heating capacity.
-
Page 18: Machine Maintenance
MACHINE MAINTENANCE Warning • Before the cleaning of the air conditioner, it must be shut down and the electricity must be cut off for more than 5 minutes, otherwise there might be the risk of electric shocks. • Do not wet the air conditioner, which can cause an electric shock. Make sure not to rinse the air conditioner with water under any circumstances. - Page 19 MACHINE MAINTENANCE Mount the Air Filter 1. Reinstall the dried filter in reverse order of removal, then cover and lock the panel. Check Before Use 1. Check whether all the air inlets and outlets of the units are unblocked. 2. Check whether there is blocking in the water outlet of the drain pipe, and immediately clean it up if any.
-
Page 20: Troubleshooting
NOTE: Do not attempt to repair the unit by yourself. For all replacements and repairs that need to be made, contact Royal Sovereign Customer Service at +1) 800-397-1025 or contact a qualified service technician. -
Page 21: Specifications
SPECIFICATIONS MODEL RSAC-1217S RSAC-1817S RSAC-2417S Cooling Capacity 12,000 BTU Cooling 18,000 BTU Cooling 24,000 BTU Cooling Heating Capacity 12,300 BTU Heating 18,500 BTU Heating 24,000 BTU Heating SEER Rating Room Size (Sq. ft.) 300-500 600-800 900-1,200 Voltage / Frequency 115V / 60 Hz... -
Page 22: Warranty
ONE YEAR LIMITED WARRANTY Royal Sovereign International, Inc. warranties this product to be free from defects in material and workmanship for a period of one (1) year. This warranty is extended to the original purchaser only. This warranty only covers products that are properly installed, properly maintained, and properly operated in accordance with the instructions provided.
Need help?
Do you have a question about the RSAC-1217S and is the answer not in the manual?
Questions and answers