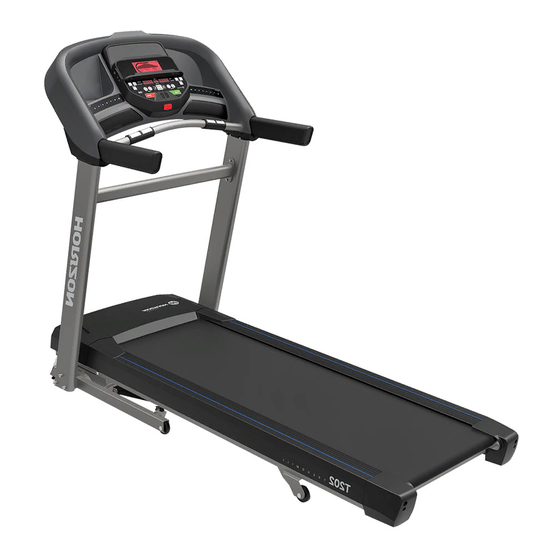
Johnson Horizon Fitness T202 Service Manual
Hide thumbs
Also See for Horizon Fitness T202:
- Troubleshooting manual (2 pages) ,
- Troubleshooting manual (2 pages)

Related Manuals for Johnson Horizon Fitness T202


Summary of Contents for Johnson Horizon Fitness T202
- Page 1 Issue date Edition Doc No. SM-TM-AF-001 JOHNSON Revision Edition time Page date Johnson Industries (Shanghai) Co.,Ltd T202 Service Manual Approval Review Editor...
-
Page 3: Table Of Contents
Contents CHAPTER 1: SERIAL NUMBER LOCATION......................CHAPTER 2: PREVENTATIVE MAINTENANCE 2.1 Preventative Maintenance............................ 2.2 Tension and Centering the Running Belt......................CHAPTER 3: CONSOLE INSTRUCTION 3.1 Console Overview..............................3.2 Display Window Indication..........................10 3.3 Getting Started & Program Information......................11 CHAPTER 4: ENGINEERING MODE 4.1 Engineering Mode.............................. - Page 4 CHAPTER 6: PART REPLACEMENT GUIDE 6.1 Motor Cover Replacement..........................26 6.2 Rear Roller Replacement..........................27 6.3 Side Rail Replacement............................28 6.4 Running Deck Replacement..........................29 6.5 Front Roller Replacement..........................30 6.6 Running Belt Replacement..........................31 6.7 Motor Control Board (MCB) Replacement.....................
-
Page 5: Chapter 1: Serial Number Location
CHAPTER 1: Serial Number Location 1.1 Serial Number Location... -
Page 6: Chapter 2: Preventative Maintenance
CHAPTER 2: Preventative Maintenance 2.1 PREVENTATIVE MAINTENANCE Preventative maintenance is the key to smoothly operating equipment, as well as keeping the user’s liability to a minimum. Equipment needs to be inspected at regular intervals. Defective components must be replaced immediately. Improperly working equipment must be kept out of use until it is repaired. Ensure that any person(s) making adjustments or performing maintenance or repair of any kind is qualified to do so. - Page 7 CHAPTER 2: Preventative Maintenance Failure to do so may result in premature failure of key electrical components. • Vacuum and wipe down the belt with a damp cloth. Vacuum any black / white particles that may accumulate around the unit. These particles may accumulate from normal treadmill use. 2.1 PREVENTATIVE MAINTENANCE-CONTINUED EVERY 6 MONTHS OR 150 MILES It is necessary to lubricate your treadmill running deck every...
-
Page 8: Tension And Centering The Running Belt
CHAPTER 2: Preventative Maintenance 2.2 TENSIONING & CENTERING THE RUNNING BELT If you can feel a slipping sensation when running on the treadmill, the running belt must be tightened. In most cases, the belt has stretched from use, causing the belt to slip. This is a normal and common adjustment. To eliminate this slipping, turn the treadmill off and tension both the rear roller bolts using the supplied Allen wrench, turning them ¼... -
Page 9: Chapter 3: Console Instruction
CHAPTER 3: Console Instruction 3.1 CONSOLE OVERVIEW CONSOLE OPERATION Note: There is a thin protective sheet of clear plastic on the overlay of the console that should be removed before use. A) LCD DISPLAY WINDOWS: Incline, Speed, Time, Distance, Calories, Heart Rate B) LED DISPLAY: Incline, Speed, Time, Distance, Calories, Heart Rate C) WORKOUT QUICK KEYS: press to select your workout. -
Page 10: Display Window Indication
Q) TABLET/READING RACK: holds tablet or reading material. R) BLUETOOTH INDICATOR LIGHT: informs user that the Bluetooth connection as been made. S) HEART RATE PULSE GRIPS: used to measure heart rate. DISPLAY WINDOWS 1) TIME: Shown as minutes : seconds. View the time remaining or the time elapsed in your workout. 2) DISTANCE: Shown as miles. -
Page 11: Getting Started & Program Information
WORKOUT PROFILES 1. MANUAL: Adjust your speed and incline manually during your workout. 2. INTERVALS: Improves your strength, speed and endurance by increasing and decreasing the speed throughout your workout to involve your heart and other muscles. Includes 10 levels. Speed changes and segments repeat 90 seconds and 30 seconds. - Page 12 TARGET 2 – CALORIES: Set goals for burning calories. Calories burned are calculated using weight input of user profile. TO RESET THE CONSOLE Hold STOP key for 3 seconds. FINISHING YOUR WORKOUT When your workout is complete, the unit will beep. Your workout information will stay displayed on the console for 30 seconds and then reset.
-
Page 13: Chapter 4: Engineering Mode
CHAPTER 4: Engineering Mode 4.1 ENGINEERING MODE 1. The key combination to enter engineering menu and eng8 menu is different regarding to different machine types. 1.2 TM with powered elevation motor: incline up + speed down 1.3 TM without powered elevation motor: speed up + speed down 1.4 BK,EP and ascent trainer without powered elevation motor: resistance up + resistance down 1.5 EP and ascent trainer with powered elevation motor: incline up + resistance down. -
Page 14: Engineering Mode Overview
CHAPTER 4: Engineering Mode... -
Page 15: Chapter 5: Troubleshoting
CHAPTER 5: Troubleshooting 5.1 Electrical Diagram... -
Page 16: Mcb Wiring Instructions
CHAPTER 5: Troubleshooting 5.2 MCB WIRING INSTRUCTIONS CN1------- AC power cable socket CN2------- Elevation motor cable socket CN3------- Console set cable socket CN4------- AC motor cable socket... -
Page 17: Troubleshooting - No Power To The Console
CHAPTER 5: Troubleshooting 5.3 TROUBLESHOOTING – NO POWER TO THE CONSOLE POWER THE CONSOLE SYMPTOM: a. Turn on the power switch, but the console will not light up. SOLUTION: a. Check if the power cord connected well. - If the power cord connected well but console doesn’t turn on, try another one. b. -
Page 18: Troubleshooting - No Function For Safety Key
CHAPTER 5: Troubleshooting 5.4 TROUBLESHOOTING – NO FUNCTION FOR SAFETY KEY NO FUNCTION FOR SAFETY KEY SYMPTOM: a. The safety key inserted in console, but display window still shows “safety key off”. SOLUTION: a. Check if the safety key totally inserted in the console. - If no, take off and insert again. -
Page 19: Troubleshooting - No Response For Machine (Console&Motor)
CHAPTER 5: Troubleshooting 5.5 TROUBLESHOOTING – NO RESPONSE FOR MACHINE (CONSOLE&MOTOR) THE POWER IS ON, BUT MACHINE RESPONSE SYMPTOM: a. The power is on and the console lights up, but the treadmill does not run when keys are pressed. SOLUTION: a. -
Page 20: Troubleshooting - Incline Motor Issues
CHAPTER 5: Troubleshooting 5.6 TROUBLESHOOTING - INCLINE MOTOR ISSUES INCLINE MOTOR ISSUES SYMPTOM: a. The incline motor does not lift up or down. SOLUTION: a. Enter Engineering Mode, and scroll to ENG 1 (Hardware Test). Press the key “ENTER” first and then the key ”START”. -
Page 21: Troubleshooting - Noise Issues
CHAPTER 5: Troubleshooting 5.7 TROUBLESHOOTING - NOISE ISSUES NOISE ISSUES SYMPTOM: a. Thumping noise twice per rotation on new machine. b. Rubbing / grinding noise. c. High pitched “bell-like” sound from under the motor cover. d. Banging or clunking sound. e. - Page 22 CHAPTER 5: Troubleshooting 5.7 TROUBLESHOOTING - NOISE ISSUES-CONTINUED - Check that the running deck is tightly attached to the frame. - Check the deck shocks for detioration or crumbling. Replace if needed. - Check to see if the air shock is making this noise, lubricate or replace if needed. f.
-
Page 23: Troubleshooting - Speaker / Audio Issues
CHAPTER 5: Troubleshooting 5.8 TROUBLESHOOTING - SPEAKER / AUDIO ISSUES Speaker / Audio Issues SYMPTOM: a. No sound through the speakers but headphones work. b. No sound through headphones but the speakers work. c. No sound through speakers or headphones. d. - Page 24 CHAPTER 5: Troubleshooting 5.8 TROUBLESHOOTING - SPEAKER / AUDIO ISSUES-CONTINUED - Replace the speaker wiring. - Replace the speakers. e. The speaker or speaker wiring is bad. - Check the speaker wire connections. - Switch the speaker connections from one speaker to the other to see if sound switches sides. - If the sound does not switch sides, replace the speaker board.
-
Page 25: Troubleshooting - Heart Rate Function Issues
CHAPTER 4: Troubleshooting 5.9 TROUBLESHOOTING-HEART RATE FUNCTION ISSUE Heart rate function does not work or is reading incorrectly 1) SYMPTOM: a. The chest strap being used is not making good contact with the user's chest. b. The chest strap is at a low battery status. c. -
Page 26: Chapter 6: Part Replacement Guide
CHAPTER 6: Part Replacement Guide 6.1 MOTOR COVER REPLACEMENT 1) Remove the 2 screws holding the motor cover to the frame (Figures A&B). 2) The cover is secured to the frame with velcro, so you will have to pull up with some force FIGURE A FIGURE B 3) Figure C shows the motor area with the motor cover removed. -
Page 27: Rear Roller Replacement
CHAPTER 6: Part Replacement Guide 6.2 REAR ROLLER REPLACEMENT 1) Remove the rear end caps (Figure A). 2) Remove both roller adjustment screws (Figure B). FIGURE A FIGURE B 3) Remove the roller (Figure C) FIGURE C... -
Page 28: Side Rail Replacement
CHAPTER 6: Part Replacement Guide 6.3 SIDE RAIL REPLACEMENT 1) Remove the rear end cap (Figure A). 2) Slide the rail off the back of the treadmill (Figures B). FIGURE A FIGURE B 4) Reverse Steps 1-2 to install a new side rail. NOTE: After reinstalling the side rail, make sure the rear end cap is on first before tightening the screws for proper gap spacing. -
Page 29: Running Deck Replacement
CHAPTER 6: Part Replacement Guide 6.4 RUNNING DECK REPLACEMENT 1) Remove the motor cover as outlined in Section 6.1. 2) Remove the side rail as outlined in Section 6.3. 3) Remove the end cap 4) Remove the running deck screws (Figure A). FIGURE A FIGURE B 5) Remove the running deck from the running belt (Figure B) -
Page 30: Front Roller Replacement
CHAPTER 6: Part Replacement Guide 6.5 FRONT ROLLER REPLACEMENT 1 Remove the motor cover as outlined in Section 6.1. 2 Loosen both of the rear roller screws to remove tension from the running belt (Figure A). FIGURE A FIGURE B 3 Remove the drive belt.from the front roller 4 Remove the roller from the running belt. -
Page 31: Running Belt Replacement
CHAPTER 6: Part Replacement Guide 6.6 RUNNING BELT REPLACEMENT 1) Remove the motor cover as outlined in Section 6.1. 2) Remove the rear roller as outlined in Section 6.2. 3) Remove the running deck as outlined in Section 6.4. 4) Remove the front roller as outlined in Section 6.5. 5) Remove the running belt (Figures A). -
Page 32: Motor Control Board (Mcb) Replacement
CHAPTER 6: Part Replacement Guide 6.7 MOTOR CONTROL BOARD (MCB) REPLACEMENT 1) Turn off power and disconnect the cord from the machine. 2) Remove the motor cover as outlined in Section 6.1. 3) Disconnect the wire connectors at the MCB. 4) Remove the 2 screws holding each side of the MCB to the frame (Figures A). -
Page 33: Motor Replacement
CHAPTER 6: Part Replacement Guide 6.8 MOTOR REPLACEMENT 1.Turn off power to the treadmill and disconnect the power cord. 2.Remove the motor cover as outlined in Section 6.1. 3.Disconnect the motor cable ground wire from the grounding post. 4.Disconnect the motor cable from the MCB. 5.Remove the 4 screws holding the motor to the frame (Figure A). -
Page 34: Drive Belt Replacement
CHAPTER 6: Part Replacement Guide 6.9 DRIVE BELT REPLACEMENT 1.Turn off power to the treadmill and disconnect the power cord. 2.Remove the motor cover as outlined in Section 6.1. 3.Loosen the rear roller screws to relieve tension on the running belt. 4.Remove the two 8 mm screws from front roller 5.Lift the roller and remove the old drive belt 6.Reverse Steps 1-8 to install a new drive belt. -
Page 35: Incline Motor
CHAPTER 6: Part Replacement Guide 6.10 INCLINE MOTOR REMOVAL 1) Turn off power to the treadmill and disconnect the power cord. 2) Remove the motor cover as outlined in Section 6.1. 3) Fold the treadmill. 4) Remove the screws from the elevation rack (Figure A). Figure A Figure B 5) Disconnect the incline motor from the top mounting bracket (Figure B). -
Page 36: Console Replacement
CHAPTER 6: Part Replacement Guide 6.11 CONSOLE REPLACEMENT 1) Turn off power to the treadmill and disconnect the power cord. 2) Remove the 4 screws holding the console from the console mast (Figure A). FIGURE A FIGURE B 3) Remove the 5 screws holding the back of console (Figure B). 4) Disconnect the wires connections from the console (Figure C). -
Page 37: Heart Rate Board
CHAPTER 6: Part Replacement Guide 6.12 HEART RATE BOARD REPLACEMENT 1) Turn off power to the treadmill and remove the power cord. 2) Remove the console as outlined in Section 6.12. 3) Loose the screws which fix the heart rate sensor (Figure A). FIGURE A 4) Disconnect the wires connections that go to the heart rate board (Figure B).
Need help?
Do you have a question about the Horizon Fitness T202 and is the answer not in the manual?
Questions and answers