
Related Manuals for SHOWTEC Polar 100 Beam


Summary of Contents for SHOWTEC Polar 100 Beam
- Page 1 MANUAL ENGLISH Polar 100 Beam IP65 Moving Head Order code: 40100 Highlite International B.V. – Vestastraat 2 – 6468 EX – Kerkrade – the Netherlands...
-
Page 2: Table Of Contents
Polar 100 Beam IP65 Moving Head Table of contents Warning ....................................3 Safety Instructions ................................. 3 Operating Determinations ............................5 Rigging .................................... 5 Connection with the Mains ............................7 Return Procedure ................................7 Claims ....................................7 Description of the Device ..............................8 Features .................................. - Page 3 Polar 100 Beam IP65 Moving Head 6.2. Reset ...................................31 7. Info ..................................32 7.1. System Error ................................32 8. Service ...................................33 DMX Channels ................................34 12 Channels (Basic) ..............................34 15 Channels (Standard) ............................37 18 Channels (Extended) ............................40 Maintenance ..................................43 Replacing the Fuse ..............................43 Gobo Wheel and Color Wheel ..........................44...
-
Page 4: Warning
Your shipment includes: ● Showtec Polar 100 Beam IP65 Moving Head ● Schuko to PowerCON True1 power cable (1,5 m) ●... - Page 5 ● If your Showtec device fails to work properly, discontinue the use immediately. Pack the unit securely (preferably in the original packing material), and return it to your Showtec dealer for service.
-
Page 6: Operating Determinations
Polar 100 Beam IP65 Moving Head ● Repairs, servicing and electric connection must be carried out by a qualified technician. ● WARRANTY: Till one year after date of purchase. Operating Determinations ● This device is not designed for permanent operation. Consistent operation breaks will ensure that the device will serve you for a long time without defects. - Page 7 Polar 100 Beam IP65 Moving Head Fig. 01 The Polar can be placed on a flat stage floor or mounted to any kind of truss with the quick-lock brackets and clamps. The quick-lock brackets can be positioned on the base of the Polar in two ways, as shown on Fig. 02.
-
Page 8: Connection With The Mains
Polar 100 Beam IP65 Moving Head Connection with the Mains Connect the device to the mains with the power-plug. Always check if the right color cable is connected to the right place. International EU Cable UK Cable US Cable BROWN... -
Page 9: Description Of The Device
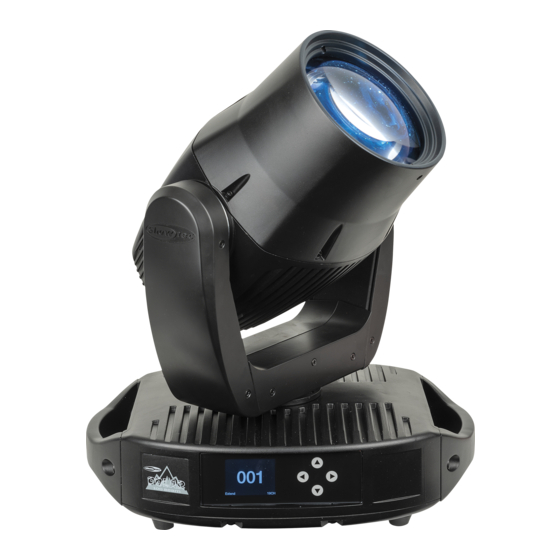
Polar 100 Beam IP65 Moving Head Description of the Device Features The Polar100 Beam is a moving head with high output and great effects. ● Input voltage: 100–240 V AC, 50/60 Hz ● Power consumption: 180 W ● Light source: 100 W LED Module ●... -
Page 10: Front View
Polar 100 Beam IP65 Moving Head Front View Fig. 04 01) 100 W LED Module 02) Control panel: LCD display and control buttons Back View Fig. 05 03) IP-65 rated power connector True1 IN 04) Fuse T6,3 A/250 V 05) IP-65 rated RJ45 connector... -
Page 11: Installation
Polar 100 Beam IP65 Moving Head Installation Remove all packing materials from the Polar 100 Beam IP65 Moving Head. Check if all foam and plastic padding is removed. Connect all cables. Do not supply power before the whole system is set up and connected properly. -
Page 12: Multiple Polars (Master/Slave Control)
Polar 100 Beam IP65 Moving Head Multiple Polars (Master/Slave Control) 01) Fasten the effect light onto firm trussing or mount it on flat surface. Leave at least 1,3 m on all sides for air circulation. 02) Secure the device with a safety cable (order code 70454 / 70456). -
Page 13: Multiple Polars (Dmx/Rdm Control)
Polar 100 Beam IP65 Moving Head Multiple Polars (DMX/RDM Control) 01) Fasten the effect light to a firm trussing or mount it on flat surface. Leave at least 1,3 m on all sides for air circulation. 02) Secure the device with a safety cable (order code 70454 / 70456). -
Page 14: Multiple Polars (Art-Net/Sacn Control)
Note: Link all cables before connecting electric power Note: The Polar 100 Beam supports Art-Net to DMX, which means that you can connect the first device to your computer using a CAT-5/CAT-6 cable and the rest of the devices can be linked using a DMX cable. -
Page 15: Multiple Polars (Wireless Dmx Control)
Polar 100 Beam IP65 Moving Head Multiple Polars (Wireless DMX Control) 01) Install multiple Polars at the desired positions (maximum distance to transceiver: 250 m). 02) In order for the Polars to receive a wireless DMX signal properly, activate W-DMX on all Polars (see 4.5. -
Page 16: Connect The Polar To The Wireless Dmx Signal Transmitter
Polar 100 Beam IP65 Moving Head Sweden 2.4 GHz Wireless communication module Communication distance: Depending on the transmitting power or transmitter module Test conditions: W-DMX TRx Transmitter module, 2 dBi Antenna, transmitting power 20 dBm (100 mW) Range indoor: 60 m (approx. through three concrete walls) -
Page 17: Connecting To A Network
Polar 100 Beam IP65 Moving Head Connecting to a Network Art-Net Settings 01) Install any Art-Net-based software on your PC (Windows or Mac) or use a light controller which supports Art-Net. 02) Connect the power supply to the Polar. 03) Connect the device’s RJ45 connector to the RJ45 connector of the lighting controller/network switch, using a CAT-5/CAT-6 cable. -
Page 18: How To Make A Data Cable
Polar 100 Beam IP65 Moving Head How to Make a Data Cable A standard ETHERNET cable can be used to replace the data cable required to transmit the data. Please follow the instructions below in order to create an extra network cable. -
Page 19: Fixture Linking
Polar 100 Beam IP65 Moving Head Fixture Linking You will need a serial data link to run light shows of one or more fixtures using a DMX-512 controller or to run synchronized shows of two or more fixtures set to a master/slave operating mode. The combined number of channels required by all the fixtures on a serial data link determines the number of fixtures the data link can support. -
Page 20: Control Panel
Polar 100 Beam IP65 Moving Head The Polar 100 Beam IP65 Moving Head can be operated with controller or without controller in stand- alone mode. Control Panel A) UP touch button ENTER touch button C) DOWN touch button D) BACK touch button LCD display Fig. -
Page 21: Menu Overview
Polar 100 Beam IP65 Moving Head Menu Overview Order code: 40100... - Page 22 Polar 100 Beam IP65 Moving Head Order code: 40100...
- Page 23 Polar 100 Beam IP65 Moving Head Order code: 40100...
- Page 24 Polar 100 Beam IP65 Moving Head Order code: 40100...
-
Page 25: Start-Up
Polar 100 Beam IP65 Moving Head Start-up After powering up, the fixture will perform a reset and the display will show the following splash screen: When the resetting is completed, the device is ready to be operated. The display will show the start screen: The start screen provides information about the active run mode of the device. -
Page 26: Main Menu Options
Polar 100 Beam IP65 Moving Head Main Menu Options The Main Menu has the following options: 01) Press the UP/DOWN buttons to navigate through the Main Menu. 02) Press the ENTER button to open the submenus. Note: Some of the submenus require a password. The default password is pressing the UP/DOWN buttons in the following order: UP, DOWN, UP, DOWN. - Page 27 Polar 100 Beam IP65 Moving Head ● CUSTOM2: The device will run Custom Program 2. See 5. Edit on page 29 for more information on how to edit the custom program. 02) Press the ENTER button to confirm your choice.
-
Page 28: Dimmer
Polar 100 Beam IP65 Moving Head 4.1. Dimmer In this submenu you can adjust the dimmer speed. 01) Select DIMMER and press the ENTER button to open the submenu. 02) Press the UP/DOWN buttons to choose one of the following options: ●... -
Page 29: Network
Polar 100 Beam IP65 Moving Head 4.4. Network In this submenu you can adjust the network settings. 01) Press the UP/DOWN buttons to scroll through the following 4 options: 02) Press the ENTER button to confirm your choice. The available options are: ●... -
Page 30: Signal
Polar 100 Beam IP65 Moving Head 4.5. Signal In this submenu you can enable W-DMX and set the signal preferences. 01) Press the UP/DOWN buttons to scroll through the following 5 options: 02) Press the ENTER button to confirm your choice. -
Page 31: Manual
Polar 100 Beam IP65 Moving Head 06) Press the ENTER button to confirm the selection. 07) Press the UP/DOWN buttons to increase/decrease the values. ● PAN: Pan position adjustment (0–255) ● TILT: Tilt position adjustment (0–255) ● PT SPEED: Pan/tilt speed (0–255) ●... -
Page 32: Channel
Polar 100 Beam IP65 Moving Head 6.1. Channel In this menu you can manually adjust the device’s parameters. 01) Press the UP/DOWN buttons to scroll through the following 11 options. 02) Press the ENTER button to select the parameter. 03) Press the UP/DOWN buttons to increase/decrease the values. -
Page 33: Info
Polar 100 Beam IP65 Moving Head 7. Info In this menu you can view the device’s parameters. 01) Press the UP/DOWN buttons to scroll through the following 7 options: 02) Press the ENTER button to confirm your choice and view the parameter. -
Page 34: Service
Polar 100 Beam IP65 Moving Head The displayed parameters are: ● MEMORY IC ● ANGLE SENSOR ● PAN SENSOR ● PAN ENCODER ● PAN DRIVE IC ● TILT SENSOR ● TILT ENCODER ● TILT DRIVE IC ● TEMPERATURE ● COLOR RESET ●... -
Page 35: Dmx Channels
Polar 100 Beam IP65 Moving Head DMX Channels 12 Channels (Basic) Channel 1 – Horizontal movement (Pan) Push the slider up, in order to move the head horizontally (PAN). Gradual horizontal rotation of the head from 0° to 540° (0–255). - Page 36 Polar 100 Beam IP65 Moving Head Channel 5 – Rotating Gobo Wheel CH10 must be open 0–10 Open 11–16 Gobo 1 17–22 Gobo 2 23–28 Gobo 3 29–34 Gobo 4 35–40 Gobo 5 41–46 Gobo 6 47–52 Gobo 7 53–58 Gobo 8 59–66...
- Page 37 Polar 100 Beam IP65 Moving Head Channel 11 – Strobe CH10 must be open 0–9 No function 10–99 Strobe flash rate, from low to high frequency (0–25 Hz) 100–109 No function 110–179 Pulse strobe, from low to high rate 180–189 No function 190–255...
-
Page 38: Channels (Standard)
Polar 100 Beam IP65 Moving Head 15 Channels (Standard) Channel 1 – Horizontal movement (Pan) Push the slider up, in order to move the head horizontally (PAN). Gradual horizontal rotation of the head from 0° to 540° (0–255). The head can be stopped at any position. - Page 39 Polar 100 Beam IP65 Moving Head Channel 7 – Rotating Gobo Wheel CH12 must be open 0–10 Open 11–16 Gobo 1 17–22 Gobo 2 23–28 Gobo 3 29–34 Gobo 4 35–40 Gobo 5 41–46 Gobo 6 47–52 Gobo 7 53–58 Gobo 8 59–66...
- Page 40 Polar 100 Beam IP65 Moving Head Channel 13 – Dimmer Fine CH12 must be open 0–255 Fine adjustment of the brightness, from low to high intensity (0–100 %) Channel 14 – Strobe CH12 must be open 0–9 No function 10–99 Strobe flash rate, from low to high frequency (0–25 Hz)
-
Page 41: Channels (Extended)
Polar 100 Beam IP65 Moving Head 18 Channels (Extended) Channel 1 – Horizontal movement (Pan) Push the slider up, in order to move the head horizontally (PAN). Gradual horizontal rotation of the head from 0° to 540° (0–255). The head can be stopped at any position. - Page 42 Polar 100 Beam IP65 Moving Head Channel 8 – Rotating Gobo Wheel CH15 must be open 0–10 Open 11–16 Gobo 1 17–22 Gobo 2 23–28 Gobo 3 29–34 Gobo 4 35–40 Gobo 5 41–46 Gobo 6 47–52 Gobo 7 53–58 Gobo 8 59–66...
- Page 43 Polar 100 Beam IP65 Moving Head Channel 15 – Master Dimmer 0–255 Gradual adjustment of the brightness, from low to high intensity (0–100 %) Channel 16 – Dimmer Fine CH15 must be open 0–255 Fine adjustment of the brightness, from low to high intensity (0–100 %) Channel 17 –...
-
Page 44: Maintenance
03) Mechanically moving parts like axles, eyes and others may not show any traces of wearing. 04) The electric power supply cables must not show any damages or material fatigue. The Polar 100 Beam IP 65 Moving Head requires almost no maintenance. However, you should keep the unit clean. -
Page 45: Gobo Wheel And Color Wheel
Suspect three potential problem areas as: the power supply, the LEDs, the fuse. 01) Power supply. Check if the unit is plugged into an appropriate power supply. 02) The LEDs. Return the Polar to your Showtec dealer. 03) The fuse. Replace the fuse. See page 43 for replacing the fuse. - Page 46 Polar 100 Beam IP65 Moving Head Problem Probable cause(s) Solution ● Check if power is switched on and No power to the fixture One or more fixtures cables are plugged in do not function at all Primary fuse blown ●...
-
Page 47: Product Specifications
Polar 100 Beam IP65 Moving Head Product Specifications Model: Polar 100 Beam IP65 Moving Head Input voltage: 100–240 V AC, 50/60 Hz Power consumption: 180 W DMX linking: 30 pcs Fuse: T6,3 A/250 V Dimensions: 482 x 410 x 295 mm (L x W x H) -
Page 48: Dimensions
Polar 100 Beam IP65 Moving Head Dimensions Order code: 40100... -
Page 49: Notes
Polar 100 Beam IP65 Moving Head Notes Order code: 40100... - Page 50 Polar 100 Beam IP65 Moving Head Order code: 40100...
- Page 51 Polar 100 Beam IP65 Moving Head Order code: 40100...
- Page 52 ©2020 Showtec...
Need help?
Do you have a question about the Polar 100 Beam and is the answer not in the manual?
Questions and answers