Advertisement
Quick Links
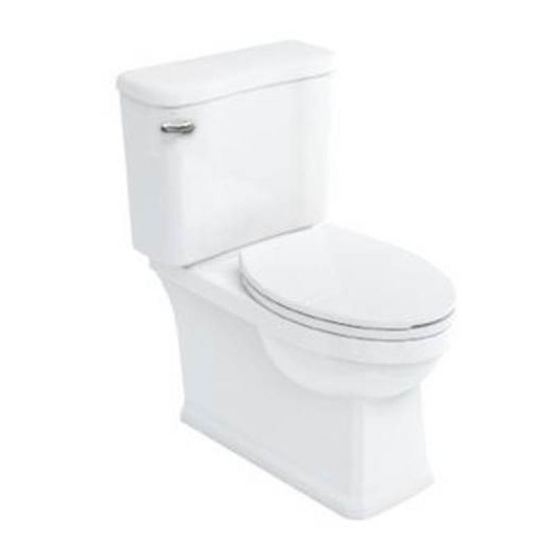
Finished Wall
3-3/8"
2"
2-3/4"
28-1/8"
7-1/8"
11-3/8"
12"~11-3/8"
US-BL6005CW - Belgravia/Arcade bowl
US-BL7005CW - Belgravia tank
Finished Wall
4-7/8"
2-1/8"
8"
17-1/8"
11-3/8"
Finished Floor
US-BL6005CW - Belgravia/Arcade bowl
US-AL7005CW - Arcade tank
1 - 7
Arcade Tank
Belgravia Tank
Belgravia/Arcade Bowl
28-1/8"
12"~11-3/8"
US-AL7005CW
US-BL7005CW
US-BL6005CW
19-5/8"
Finished Floor
Advertisement

Related Manuals for Crosswater US-AL7005CW


Summary of Contents for Crosswater US-AL7005CW
- Page 1 Finished Wall 3-3/8" 2" 4-7/8" 2-3/4" 2-1/8" 28-1/8" 19-5/8" 8" 28-1/8" 17-1/8" 7-1/8" 11-3/8" 11-3/8" 12"~11-3/8" 12"~11-3/8" Finished Floor Finished Floor US-BL6005CW - Belgravia/Arcade bowl US-BL6005CW - Belgravia/Arcade bowl US-BL7005CW - Belgravia tank US-AL7005CW - Arcade tank 1 - 7...
-
Page 2: Installation Instructions
Installation Instructions PARTS SUPPLIED: Check to make sure that all these parts are included in the package: Nut - qty. 2 Clip - qty. 2 Bolt - qty. 2 Protector sleeve Washer - qty. 2 Cap - qty. 2 Screw - qty. 2 qty. - Page 3 Figure 1 1) Clean any debris out of the closet flange (not supplied), then install the mounting bolts into the slot of the flange head down with the threaded shank of the bolt pointed upward as shown (see Figure 1). Slide each bolt until the end of slot.
- Page 4 Fill & Flush Valve Installation Instructions TANK LEVER REFILL TUBE REFILL CLIP FLOAT FILL VALVE OVERFLOW BODY PIPE LOCK TANK SHOULD RING LOOK LIKE THIS SHANK WHEN SET-UP FLAPPER IS COMPLETE FLUSH VALVE Flush Valve Installation Instructions Slide new tank-to-bowl Before installing the gasket over the nut with flush valve in the tank,...
- Page 5 Connect the Remove the flapper from the flush flapper chain valve by pulling up the frame of to the tank flapper one side at a time. lever. Allow for The flapper is adjustable from 0 1/2" of slack to 10. 0 is a quick flush, 10 is a in the chain long flush, allowing you to adjust when the flapper...
-
Page 6: Code Compliance
Adjusting Tank Water Level With the water turned on, set the float cup to the desired level by turning the water level adjustment screw. Make the adjustment while the tank is filling. To adjust the tank water, turn the adjustment screw clockwise to raise the water level, or counter clockwise to lower the water level. - Page 7 Do not use in-tank cleaners as they can seriously damage the fittings in the tank. This damage could cause leakage and result in property damage. Crosswater London shall not be responsible or liable for any damage that occurs as a result of the use of in-tank cleaners.
Need help?
Do you have a question about the US-AL7005CW and is the answer not in the manual?
Questions and answers