Advertisement
Quick Links
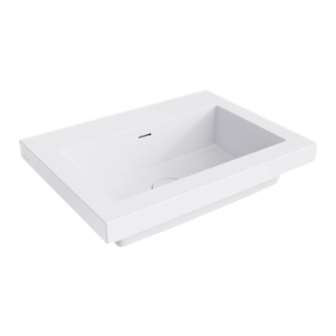
Smith Basins
24" Top (square)
28" Top (square)
39" Top (Square)
48" Top (Square)
Installation Instructions
Introduction
This product has been fully inspected throughout the production
process and only leaves our factory after a 15-step QC process.
Carefully remove the basin from the box and check that all parts have
been supplied.
Before beginning installation of the basin please check for any
damage that may have occurred during transport. Note: Damage
claims cannot be made during or after installation.
Improper installation shall result in loss of warranty in case of damage
caused by impacts or rubbing against rough surfaces.
Prior to installing the basin prepare a connection of water inlet/outlet.
The customer may choose the type and location of the faucets,
installation instructions should be supplied by the faucet manufacturer.
The installation procedure of the basin may differ from that described
in the installation instructions, depending on the installation site.
IMPORTANT: Please read these instructions carefully before
beginning and retain for future reference.
We do not accept responsibility for any problems that may occur
through incorrect installation.
RECOMMENDATIONS:
It is recommended to remove the protective packaging after
installation of the basin.
23 5/8"
9"
2 1/8"
Parts supplied
basin waste
27 1/2"
9"
2 1/8"
Tools required
Installation notes
The installation must comply with all plumbing codes including local
codes and be installed by a licensed plumbing contractor.
Store the basin in a safe place until installation begins to avoid any
damage.
The new basin must be unpacked and inspected before removing the
old fixture.
Assemble the basin on a mat to protect against damage to the basin
surface.
Avoid getting cement, grit, sand or masonry products on to the surface.
Protect and cover the products during the installation period to
prevent damage from occurring.
IMPORTANT: Turn off the main water supply before connecting to
any existing pipe work or doing any maintenance.
WARNING! Please check for any hidden pipes and cables, electric
or otherwise before drilling holes in a wall or floor.
Dimensions
39 3/8"
9"
2 1/8"
Safety
Tape
glasses
measure
Pencil
47 1/4"
9"
2 1/8"
Set
square
Spirit
Silicone
level
sealant
Advertisement

Related Manuals for Crosswater Smith Basin 24 Top SMI-BT24-WH


Summary of Contents for Crosswater Smith Basin 24 Top SMI-BT24-WH
- Page 1 Smith Basins 24" Top (square) 28” Top (square) 39" Top (Square) 48" Top (Square) Installation Instructions Introduction Installation notes This product has been fully inspected throughout the production The installation must comply with all plumbing codes including local process and only leaves our factory after a 15-step QC process. codes and be installed by a licensed plumbing contractor.
- Page 2 Warranty - This Crosswater London product is covered by a limited lifetime warranty. For full details, terms and conditions please visit our website. For further information contact: Crosswater London, 393 Fortune Blvd., Milford, MA 01757 www.crosswaterlondon.com...
- Page 3 Warranty - This Crosswater London product is covered by a limited lifetime warranty. For full details, terms and conditions please visit our website. For further information contact: Crosswater London, 393 Fortune Blvd., Milford, MA 01757 www.crosswaterlondon.com...
Need help?
Do you have a question about the Smith Basin 24 Top SMI-BT24-WH and is the answer not in the manual?
Questions and answers