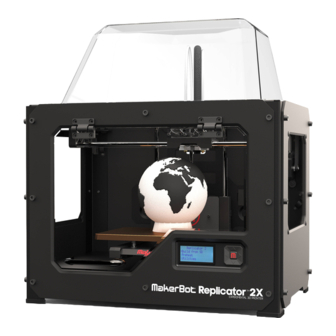
MakerBot Replicator 2X Quick Start Manual
Replacing the extruders
Hide thumbs
Also See for Replicator 2X:
- User manual (116 pages) ,
- Troubleshooting and maintenance (40 pages) ,
- Replacement manual (5 pages)
Table of Contents
Advertisement
Quick Links
Replacing the Extruders on a MakerBot Replicator 2X
These are instructions for removing the extruders on the MakerBot Replicator
2X Experimental 3D Printer and replacing them with new ones. To complete this
part replacement, you will need the 2.5 mm hex wrench that came with your
MakerBot Replicator 2X, some masking tape, a marker and possibly a small
flathead screwdriver.
Before you start working on your MakerBot Replicator 2X:
•
Unload any filament.
•
Turn off the MakerBot Replicator 2X
•
Remove the filament guide tubes from the extruders
•
Unplug power and USB cables
1. Remove the enclosure lid from the Replicator 2X
Open the enclosure door to gain access to the inside of your MakerBot
Replicator 2X. Use the 2.5 mm hex wrench that came with your 3D printer to
remove the bolts at the lower edge of the left extruder fan. Pull the bolts, fan
guard, fan, spacers and heat sink off of the extruder as one piece, and rest them
on the frame of the MakerBot Replicator 2X.
3. Detach the extruder cable from the MakerBot Replicator 2X
The extruder cable is secured with zip ties to the plastic guide at the back of the
extruder carriage and to another guide at the top of the MakerBot Replicator
2X's back panel. Snip both zip ties to free the cable. Be careful -- make sure you
clip only the zip ties and avoid any of the wires going into the extruder cable.
4. Remove the extruders from the extruder carriage
Use the 2.5 mm hex wrench to remove the two bolts on the underside of the
extruder carriage. There is one bolt all the way at the right of the extruder
Advertisement
Table of Contents

Related Manuals for MakerBot Replicator 2X


Summary of Contents for MakerBot Replicator 2X
- Page 1 Open the enclosure door to gain access to the inside of your MakerBot Replicator 2X. Use the 2.5 mm hex wrench that came with your 3D printer to remove the bolts at the lower edge of the left extruder fan. Pull the bolts, fan guard, fan, spacers and heat sink off of the extruder as one piece, and rest them on the frame of the MakerBot Replicator 2X.
- Page 2 5. Turn the MakerBot Replicator 2X onto its left side To access the Mightyboard, you will need to remove the electronics cavity cover. Carefully turn your MakerBot Replicator 2X onto its left side so you have a clear view of the underside of your 3D printer.
- Page 3 Use the 2.5 mm hex wrench to thread the fan assembly bolts back into the extruder motor. 10. Set the extruders aside The extruders are now completely detached from your MakerBot Replicator 2X. Set them aside and unpack the new extruders. 11. Separate the extruder wires into two bundles Separate the wires coming from the right extruder from the wires coming from the left extruder.
- Page 4 2.5 mm hex wrench. 18. Push the extruder cable into place Push the extruders all the way to the front left of the MakerBot Replicator 2X to ensure that there’s enough slack. Then push the cable into the brackets at the back of your 3D printer.
Need help?
Do you have a question about the Replicator 2X and is the answer not in the manual?
Questions and answers