Table of Contents

Related Manuals for Unigas PBY90


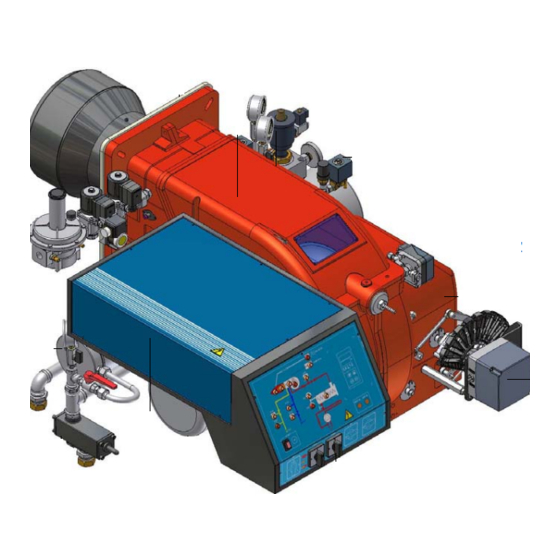
Summary of Contents for Unigas PBY90
- Page 1 PBY90 - PBY91 - PBY92 PBY510 - PBY515 PBY520 - PBY525 Progressive, Fully-modulating Heavy oil Burners MANUAL OF INSTALLATION - USE - MAINTENANCE BURNERS - BRUCIATORI - BRULERS - BRENNER - QUEMADORES - ГОРЕЛКИ M03993CH Rel. 7.3 06/2010...
-
Page 2: Table Of Contents
TABLE OF CONTENTS WARNINGS ................................3 PART I: INSTALLATION ............................5 GENERAL FEATURES ................................... 5 Burner model identification ................................6 Technical Specifications ................................. 6 Performance Curves ..................................7 Overall dimensions ..................................8 INSTALLING THE BURNER 10 Packing ......................................10 Handling the burner ..................................10 Fitting the burner to the boiler ............................... -
Page 3: Warnings
WARNINGS THIS MANUAL IS SUPPLIED AS AN INTEGRAL AND ESSENTIAL PART OF THE PRODUCT AND MUST BE DELIVERED TO THE USER. INFORMATION INCLUDED IN THIS SECTION ARE DEDICATED BOTH TO THE USER AND TO PERSONNEL FOLLOWING PRO- DUCT INSTALLATION AND MAINTENANCE. THE USER WILL FIND FURTHER INFORMATION ABOUT OPERATING AND USE RESTRICTIONS, IN THE SECOND SECTION OF THIS MANUAL. - Page 4 DIRECTIVES AND STANDARDS 3b) FIRING WITH GAS, LIGHT OIL OR OTHER FUELS Gas burners GENERAL European directives: The burner shall be installed by qualified personnel and in com- - Directive 90/396/CEE - Gas Appliances; pliance with regulations and provisions in force; wrong installation Directive 2006/95/EC on low voltage;...
-
Page 5: Part I: Installation
C.I.B. UNIGAS - M03993CH PART I: INSTALLATION GENERAL FEATURES This particular burner series has been studied to use compressed air or alternatively steam, to atomize heavy oil. In this way we have achieved higher efficiency compared to mechanical atomization. These burners are equipped with a low pressure nozzle which permits to save fuel and, above all, to preserve the whole system. -
Page 6: Burner Model Identification
Burners are identified by burner type and model. Burner model identification is described as follows. Type PBY90 Model (1) BURNER TYPE PBY90 - PBY91 - PBY92 - PBY510 - PBY515 - PBY520 - PBY525 (2) FUEL H - heavy oil, max viscosity 4000cSt (530°E) @ 50°C (3) OPERATION (Available versions) -
Page 7: Performance Curves
C.I.B. UNIGAS - M03993CH Performance Curves PBY90 PBY91 1200 1600 2000 2400 2800 1000 1400 1800 2200 PBY92 PBY510 1200 1600 2000 2400 2800 3200 1000 1500 2000 2500 3000 3500 4000 4500 5000 5500 PBY515 PBY520 1 000 1 500 2000 2500 3000 3500 4000 4500 5000 5500 6000 6500... -
Page 8: Overall Dimensions
Overall dimensions (mm) boiler recommended drilling template PBY90 1258 237 464 M12 417 228 180 PBY91 1262 237 464 M12 417 228 180 PBY92 1265 237 464 M12 417 228 180... - Page 9 boiler recommended drilling template A(*S) A(*L) B(*S) B(*L) PBY510 1364 1544 1014 1072 827 245 PBY515 1364 1544 1014 1072 827 276 PBY520 1364 1544 1014 1072 827 300 PBY525 1408 1058 1142 827 300 *S = measure referred to burner fitted with standard blast tube *L = measure referred to burner fitted with extended blast tube...
-
Page 10: Installing The Burner
Packing Burners are despatched in wooden crates whose dimensions are: PBY90-91-92: 1730 mm x 1280 mm x 1020 mm(L x P x H) PBY510-515-520-525: 1730 mm x 1430 mm x 1130 mm(L x P x H) Packing cases of this kind are affected by humidity and are not suitable for stacking. The fol- lowing are placed in each packing case: burner;... - Page 11 C.I.B. UNIGAS - M03993CH SIDE UP SIDE DOWN 1 Burner flange (upper side indicated) 2 Bracket 3 Pre-heating tank on the burner...
-
Page 12: Electrical Connections
C.I.B. UNIGAS - M03993CH Electrical connections Respect the basic safety rules. Make sure of the connection to the earthing system. Do not reverse the phase and neutral connections. Fit a differential thermal switch adequate for connection to the mains. ATTENTION: before executing the electrical connections, pay attention to turn the plant’s switch to OFF and be sure that the burner’s main switch is in 0 position (OFF) too. -
Page 13: Fan Motor And Pump Motor Direction
C.I.B. UNIGAS - M03993CH Fan motor and pump motor direction Once the electrical connection of the burner is performed, remember to check the rotation of the motor. The motor should rotate accor- ding to the arrow shown on the next picture. In the event of incorrect rotation reverse the three-phase supply and check again the rota- tion of the motor. -
Page 14: Pipe Heating Systemï
C.I.B. UNIGAS - M03993CH Pipe heating system Pipe heating system must be provided, that is a system to heat pipes and plant components to mantain the viscosity in the pumping lim- its. Higher the oil viscosity and lower the ambient temperature, more necessary the pipe heating system. - Page 15 C.I.B. UNIGAS - M03993CH Viscosity units conversion table Saybolt Cinematics Saybolt Redwood Engler Degrees Seconds Redwood Seconds viscosity Seconds Seconds no.1 (°E) Universal no..2 (Admiralty) Centistokes (cSt) Furol (SSF) (Standard) (SSU) 2.56 1.16 32.1 1.31 36.2 1.58 44.3 5.83 10.3 1.88...
- Page 16 C.I.B. UNIGAS - M03993CH VISCOSITY vs TEMPERATURE DIAGRAM FOR COMBUSTIBLE OILS 1000 PUMPING LIMIT TEMPERATURE (°C) LIGHT OIL 1,3°E AT 20°C HEAVY OIL 2,4°E AT 50°C HEAVY OIL 4°E AT 50°C HEAVY OIL 7,5°E AT 50°C HEAVY OIL 10°E AT 50°C HEAVY OIL 13°E AT 50°C...
- Page 17 C.I.B. UNIGAS - M03993CH Indicative diagram showing the oil temperature at burner pump inlet vs. oil viscosity Example: if the oil has a 50°E @ 50°C viscosity, the oil temperature at the pump inlet should be 80°C (see diagram). OIL TEMPERATURE FOR PUMP FEEDING TEMPERATURE (°C)
-
Page 18: Hydraulic Diagrams
HYDRAULIC DIAGRAMS Fig. 13 - Hydraulic diagram 3ID0024... - Page 19 3ID0024 KEYS OIL TRAIN Main tank OIL PUMPING UNIT Manual valve Filter Pump coupled to electrical motor Safety valve One-way valve Manual valve Pressure gauge High pressure switch - PO MAX DAILY TANK Daily tank Heating device Electrical resistor Pressure gauge High pressure switch - PO MAX Low pressure switch - PO MIN Low thermostat - TCN...
- Page 20 Fig. 14 - Hydraulic diagram 3I2D01...
- Page 21 3I2D-01 KEYS 3I2D-01 KEYS OIL TRAIN PILOT GAS TRAIN Filter Pressure governor with filter Pump coupled to an electrical motor Pressure switch - PGP Flexible hose Solenoid valve Manual valve Flexible hose Pressure gauge Pilot burner Pressure governor Pressure governor for L.P.G. tank Manual valve COMBUSTION AIR TRAIN Thermostat - TR...
-
Page 22: Pilot Gas Train
C.I.B. UNIGAS - M03993CH Pilot gas train The connection to the pilot gas train must be done according to the following scheme. BURNER MANUFACTURER INSTALLER L.P.G. Fig. 15 Gas solenoid valve Gas pressure switch Pressure governor with filter Bellows unit... -
Page 23: Heavy Oil Pumps
C.I.B. UNIGAS - M03993CH Heavy oil pumps The pump provided with the burner must be installed according to the hydraulic diagram. Cucchi FMG25 pumps Capacity 1500l/h Power consumption: 0.75kW Speed: 1400 rpm Max outlet pressure: 10bar Max inlet pressure: 2bar Min inlet pressure: -0.4bar... -
Page 24: Connecting The Oil Flexible Hoses To The Burner
C.I.B. UNIGAS - M03993CH Connecting the oil flexible hoses to the pump To connect the flexible oil hoses to the pump, proceed as follows, according to the pump provided: remove the closing nuts A (on the pump inlet) and B (from pump to the burner);... -
Page 25: Adjusting Air And Fuel Rate
C.I.B. UNIGAS - M03993CH Hydraulic connections Cleaning air Fig. 17 ADJUSTING AIR AND FUEL RATE ATTENTION: before starting the burner up, be sure that the manual cutoff valves are open. Be sure that the mains switch is closed. .ATTENTION: During commissioning operations, do not let the burner operate with insufficient air flow (danger of formation of carbon monoxide);... -
Page 26: Oil Thermostat Adjustment
C.I.B. UNIGAS - M03993CH Oil thermostat adjustment All thermostats are located inside the control panel. To set the temperature use a small screwdriver. Such temperature must be set during burner operation, checking temperature in the thermometer mounted on the pre-heating tank. We suggest a thermometer with scale up to 200°... -
Page 27: Oil Flow Rate Settings By Means Of Berger Stm30../Siemens Sqm40.. Actuator
C.I.B. UNIGAS - M03993CH Oil Flow Rate Settings by means of Berger STM30../Siemens SQM40.. actuator with the electrical panel open, prime the oil pump acting directly on the related contactor CP (see next picture): check the pump motor rotation (see “Fan motor and pump motor direction” on page 13) and keep pressing for some seconds until the oil circuit is charged;... - Page 28 C.I.B. UNIGAS - M03993CH oil pressure gauge compressed air pressure gauge Fig. 20 Set the atomising air pressure switch PA (Fig. 21) at 0.5 bar 10 Set the pilot gas pressure switch PG (Fig. 22) at 50 mbar. Fig. 22 - Gas pressure switch Fig.
-
Page 29: Adjustment By The Siemens Sql33.. Actuator
C.I.B. UNIGAS - M03993CH 13 The atomising air flow rate and pressure can be adjusted with the VA screw (Fig. 23). Too low a pressure produces poor atomising with smoke in the flue. Too high a pressure produces instability and the flame can be cut off. - Page 30 C.I.B. UNIGAS - M03993CH Before starting the burner up, drive the high flame actuator microswitch matching the low flame one (in order to let the burner ope- rates at the lowest output) to safely achieve the high flame stage. Turn the burner on by means of its main switch A (see next picture): if the burner locks (LED B on in the control panel) press the RESET button (C) - See “OPERATION”...
- Page 31 C.I.B. UNIGAS - M03993CH oil pressure gauge compressed air pressure gauge Fig. 27 10 Set the atomising air pressure switch PA (Fig. 28) at 0.5 bar 11 Set the pilot gas pressure switch PG (Fig. 29) at 50 mbar. Fig. 29 - Gas pressure switch Fig.
-
Page 32: Calibration Of Air Pressure Switch
C.I.B. UNIGAS - M03993CH far from the shaft the air damper closes and the air flow rate decreases. Note: once the procedure is perfomed, be sure that the blocking nut RA is fasten. Do not change the position of the air damper rods. -
Page 33: Evl Air Valve For Gun Cleaning
C.I.B. UNIGAS - M03993CH CMF = 0 stop at the current position CMF = 1 high flame operation CMF = 2 low flame operation CMF = 3 automatic operation EVL air valve for gun cleaning After the flame is off, an automatic system provides the compressed air to clean the gun. -
Page 34: Part Ii: Operation
C.I.B. UNIGAS - M03993CH PART II: OPERATION LIMITATIONS OF USE THE BURNER IS AN APPLIANCE DESIGNED AND CONSTRUCTED TO OPERATE ONLY AFTER BEING CORRECTLY CON- NECTED TO A HEAT GENERATOR (E.G. BOILER, HOT AIR GENERATOR, FURNACE, ETC.), ANY OTHER USE IS TO BE CONSI- DERED IMPROPER AND THEREFORE DANGEROUS. -
Page 35: Control Panel
C.I.B. UNIGAS - M03993CH Control panel High flame lamp Low flame lamp Ignition transformer lamp Fan motor thermal cutout lamp Burner lockout lamp Burner stand-by lamp Solenoid valve lamp Compressed air pressure switch lamp Compressed air solenoid valve lamp Heating resistors safety thermostat lamp... -
Page 36: Part Iii: Maintenance
C.I.B. UNIGAS - M03993CH PART III: MAINTENANCE At least once a year carry out the maintenance operations listed below. In the case of seasonal servicing, it is recommended to carry out the maintenance at the end of each heating season; in the case of continuous operation the maintenance is carried out every 6 months. -
Page 37: Removing The Combustion Head
C.I.B. UNIGAS - M03993CH filter slots Fig. 36 - threaded body Fig. 37 Removing the combustion head Remove the cover H. Slide the photoresistor out of its housing. Unscrew the flexible hoses from the gun (burner side) and remove the whole assembly as shown on Fig. 38. -
Page 38: Removing The Oil Gun, Replacing/Adjusting The Nozzle And The Ignition Electrode
C.I.B. UNIGAS - M03993CH Removing the oil gun, replacing/adjusting the nozzle and the ignition electrode ATTENTION: avoid the electrode to get in touch with metallic parts (blast tube, head, etc.), otherwise the boiler operation would be compromised. Check the electrode position after any intervention on the combustion head. -
Page 39: Checking The Detection Current
C.I.B. UNIGAS - M03993CH Checking the detection current LA L2 ... To measure the detection signal follow the diagram in Fig. 39. If the signal is not in the advised range, check the electrical contacts, the cleaning of the combustion head, the position of the photoresistor and if necessary replace it. -
Page 40: Burner Exploded View
BURNER EXPLODED VIEW PBY90-PBY91-PBY92 ITEM DESCRIPTION ITEM DESCRIPTION AIR INLET CONE 17.3 AIR INTAKE BURNER HOUSING 17.4 LOUVER SHAFT GENERATOR GASKET 17.5 LOUVER SHAFT PLUG 17.6.1 ADJUSTING CAM SCREW 17.6.1.1 ADJUSTING CAM FOIL GAS FLEXIBLE HOSE 17.6.2 ACTUATOR FLEXIBLE HOSE 18.1... - Page 42 PBY510 - PBY515 - PBY520 - PBY525 ITEM DESCRIPTION ITEM DESCRIPTION ITEM DESCRIPTION AIR INLET CONE 20.11 OIL MANIFOLD 26.10.3 ACTUATOR BURNER HOUSING 21.1 BRACKET 26.10.4 ACTUATOR SHAFT COVER 21.2 NOZZLE HOLDER ROD 26.10.5 BRACKET PRESSURE GOVERNOR WITH FILTER 21.3 NOZZLE 27.1 GASKET...
-
Page 44: Spare Parts
SPARE PARTS PBY90 PBY91 PBY510 DESCRIPTION PBY92 PBY515 PBY520 PBY525 2020420 2020420 2020420 2020420 2020420 2020420 2020420 CONTROL BOX 20802A7 20802A7 20802A7 20802A7 20802A7 20802A7 20802A7 PILOT ELECTRODE 2090236 2090236 2090236 2090236 2090236 2090236 2090236 OIL FILTER 2110048 2110048 2110048... -
Page 45: Appendix
APPENDIX t3’ Long preignition time: «Z» connected to terminal 15. Postignition time: SIEMENS LAL.. CONTROL BOX - «Z» must be connected to terminal 15 - With short preignition, «Z» remains on until «TSA» has elapsed connec- Control and supervision of oil atomization burners tion to terminal 16. - Page 46 During burner off times, the flame supervision circuit is live. Lockout indication Startup sequence b-b’ Idle step (with no contact confirmation) b(b’)-a Postpurge program Burner control can immediately be reset after lockout: Do not press the lockout reset button for more than 10 seconds The sequence switch always travels to the start position first After resetting After rectification of a fault that led to shutdown...
- Page 47 Sequence diagram Control output at terminal t3" t3 n t1 6 V II V III X II t10* X III X IV Lockout position indication Prepurge time with air damper fully open Safety time Preignition time, short («Z» connected to terminal 16) T3’...
- Page 48 C.I.B. UNIGAS S.p.A. Via L.Galvani, 9 - 35011 Campodarsego (PD) - ITALY Tel. +39 049 9200944 - Fax +39 049 9200945/9201269 web site: www.cibunigas.it - e-mail: cibunigas@cibunigas.it Note: specifications and data subject to change without notice. Errors and omissions excepted.
Need help?
Do you have a question about the PBY90 and is the answer not in the manual?
Questions and answers