Table of Contents
Advertisement
Quick Links
Advertisement
Table of Contents

Related Manuals for HIKVISION DS-D5022 Series


Summary of Contents for HIKVISION DS-D5022 Series
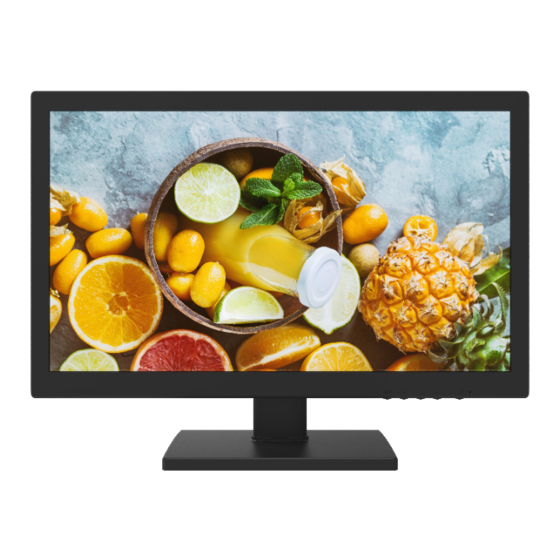
- Page 1 22-inch LCD Display Unit User Manual M6MGEC2131HK01...
- Page 2 Thank you for purchasing our product. If there is any question or request, please do not hesitate to contact us. This manual may contain several technically incorrect places or printing errors, and the content is subject to change without notice. The updates will be added into the new version of this manual. We will readily improve or update the products or described in the manual.
- Page 3 Regulatory Information 2002/96/EC (WEEE directive): Products marked with this symbol cannot be disposed of as unsorted municipal waste in the European Union. For proper recycling, return this product to your local supplier upon the purchase of equivalent new equipment, or dispose of it at designated collection points. For more information see: www.recyclethis.info.
- Page 4 The content of this manual is furnished for informational use only, is subject to change without notice, and should not be construed as a commitment by Hikvision Digital Technology Co., Ltd. (Hikvision). Hikvision assumes no responsibility or liability for any errors or inaccuracies that may appear in the book.
-
Page 5: Table Of Contents
TABLE OF CONTENTS Important safeguards ................2 Introduction ....................4 Features ..................... 5 Assembling the monitor ................6 Wall hanging Standard ................7 The function of the interface ..............7 Front panel controls ................. 8 Control panel ....................8 Changing a monitor parameter ..............9 Hot keys .................... -
Page 6: Important Safeguards
IMPORTANT SAFEGUARDS 1. Installation cautions • Do not block any ventilation openings. • Always ensure that the monitor is located in a well-ventilated area to preventthe unit from overheating. • Only use accessories specified by the manufacturer or those sold with the product •... - Page 7 IMPORTANT SAFEGUARDS 8. Mains plug (2 pin/3 pin) • Do not remove the grounding or earth connection from the power supply / mains plug. • Always remember to unplug the monitor from the power supply under the following circumstances if the monitor will not be used for a long period of time, if the power supply cable or plug/connector is damaged or if the monitor housingis damaged or broken.
-
Page 8: Introduction
INTRODUCTION This manual explains how to correctly install, operate and get the bestperformance from your monitor. Please read this user manual carefully before installing your monitor then keep it near your monitor for quick reference. First, please check that the contents of the box correspond with the following checklist: Display Unit •... -
Page 9: Features
FEATURES • The monitor is designed for use in a small work area or for those who need more work space on the desk. • The convenient and user-friendly onscreen display allows for easy and accurate adjustments of screen size, position and screen color. •... -
Page 10: Assembling The Monitor
ASSEMBLING THE MONITOR The monitors are designed for use on a desktop. The arm of the monitor stand is shipped preinstalled on the monitor. To assemble the monitor: 1. Put a smooth pad or cloth on a level surface. Place the monitor on it facing downwards. -
Page 11: Wall Hanging Standard
WALL HANGING STANDARD The monitor’s installation surface is compatible with other types of VESA standard stands. Hole spacing: 100 x 100 mm Screw length: 8 to12 mm THE FUNCTION OF THE INTERFACE 1. DC 12V Input . 2. CAM OUT:VIDEO signal output. 3. -
Page 12: Front Panel Controls
FRONT PANEL CONTROLS Control panel 1. POWER indicator Show both normal operation and power management status with power LED 2. POWER Switch the monitor on and off. 3. MENU Turn the OSD window on. Secondary Function: Turns the OSD window off and moved from sub menu to top menu in the OSD window. -
Page 13: Changing A Monitor Parameter
FRONT PANEL CONTROLS Changing a monitor parameter Press the MENU button on the front panel to obtain the OSD menu screen. 1. Use Left - Right buttons to select the menu. 2. Use AUTO button to select the submenus. 3. Use Left- Right buttons to select a submenu function. 4. -
Page 14: Adjustment Procedure
ADJUSTMENT PROCEDURE... -
Page 15: Osd Function
OSD FUNCTION Configure the monitor using the on-screen display (OSD) menus and submenus. Changes are immediately saved and implemented. VGA menu ● Video (Advanced Control) (Auto Config) - Page 16 OSD FUNCTION 1. Brightness Adjust the brightness of the image. 2. Contrast Adjust the contrast of the image, the difference between light and dark areason the screen. 3. Color Temperature Choose a different preset color temperature or set your own customized color parameters.(Normal/ Warm/ Cool/ User).
- Page 17 OSD FUNCTION ● Sound 1. Sound Mode Choose a different preset sound mode or your own customized sound. (Standard/ Speech/ Music/ Personal) 2. Balance Adjust the sound balance of the left and right speakers. 3. Bass When you select User mode, adjust the bass sound.
- Page 18 OSD FUNCTION ● Setting 1. Menu Language Select language for the OSD. 2. Backlight Adjust the brightness of the image. 3. Menu Time out Adjust the display of the OSD menu (20 to 60 seconds). 4. Menu Transparency Adjust the OSD transparency. 5.
- Page 19 OSD FUNCTION Child Lock 1. Keypad Lock Turn the keypad lock on or off. Keyboard lock unlock method:Long press "MENU" key for about 8 seconds, can be unlocked.
-
Page 20: Cam Menu
OSD FUNCTION Cam menu ● Video Standard Normal (Advanced Control) 1. Auto Picture Select the picture mode (Standard/Movie/ECO/Personal/ Vivid). 2. Brightness Adjust the brightness of the image. 3. Contrast Adjust the contrast of the image, the difference between light and dark areason the screen. - Page 21 OSD FUNCTION 6. Tint Adjust tint of the image. Only for NTSC signal. 7. Color Temperature Choose a different preset color temperature or set your own customizedcolor parameters (Normal/ Warm/ Cool/ User). 8. Advanced Control 8-1 Noise Reduction Reduce the noise in the picture due to poor reception or poor picture quality. (Middle/ High/Off/ Low) 8-2 DCR Turn DCR on or off.
- Page 22 OSD FUNCTION ● Audio 1. Sound Mode Choose a different preset sound mode or your own customized sound. (Standard/ Music/ Speech/ Personal) 2. Balance Adjust the sound balance of the left and right speakers. 3. Bass When you select Personal mode, adjust the bass sound. 4.
- Page 23 OSD FUNCTION ● Setting 1. Menu Language Select the OSD language. 2. Backlight Adjust the brightness of the image. 3. Menu Time Out Adjust the display time of the OSD menu (20 to 60 seconds). 4. Menu Transparency Adjust the OSD transparency. 5.
- Page 24 OSD FUNCTION ● Child Lock 1. Keypad Lock Turn the keypad lock on or off. Keyboard lock unlock method:Long press "MENU" key for about 8 seconds, can be unlocked.
-
Page 25: Hdmi Menu
OSD FUNCTION HDMI menu ● Video (Advanced Control) 1. Auto Picture Select the picture mode (Standard/Movie/ECO/Personal/ Vivid). 2. Brightness Adjust the brightness of the image. 3. Contrast Adjust the contrast of the image, the difference between light and dark areason the screen. - Page 26 OSD FUNCTION 6. Color Temperature Choose a different preset color temperature or set your own customizedcolor parameters (Normal/ Warm/ Cool/ User). 7. Advanced Control 7-1 Noise Reduction Reduce the noise in the picture due to poor reception or poor picturequality.(Off/ Low/ Middle/ High).
- Page 27 OSD FUNCTION ● Audio 1. Sound Mode Choose a different preset sound mode or your own customized sound. (Music/ Speech/ Personal/ Standard) 2. Balance Adjust the sound balance of the left and right speakers. 3. Bass When you select Personal mode, adjust the bass sound. 4.
- Page 28 OSD FUNCTION ● Setting 1. Menu Language Select the OSD language. 2. Backlight Adjust the brightness of the image. 3. Menu Time Out Adjust the display time of the OSD menu (20 to 60 seconds). 4. Menu Transparency Adjust the OSD transparency. 5.
- Page 29 OSD FUNCTION ● Child Lock 1. Keypad Lock Turn the keypad lock on or off. Keyboard lock unlock method:Long press "MENU" key for about 8 seconds, can be unlocked.
-
Page 30: Self-Diagnosis
SELF-DIAGNOSIS If there is no image, the Self-Diagnosis screen will be displayed. The self-diagnosis function checks if the status of the monitor screen is No Signal, Out of Range or None Supported. The No Signal screen is displayed when the D-Sub signal connector is connected but the status of the monitor is on DPMS mode. -
Page 31: Troubleshooting
TROUBLESHOOTING Symptom Check Adjust Clock to set the screen position and adjust the Clock Picture is jittery value carefully until there is no noise displayed. Check if the power switch and computer power switch are in the On position. Check if the signal cable is correctly connected to thevideo No picture card. -
Page 32: Specifications
SPECIFICATIONS Device Model DS-D5022 Series Display Type TFT-LED Backlight Screen Size 21.5" Dot Pitch 0.248×0.248 mm Max Resolution 1920×1080 Best Operation Resolution 1920×1080@60Hz Brightness 250cd/m² Contrast 1000:1 Response Time Color 16.7M Viewable Area 477×268mm Viewing Angle Horizontal 170°, Vertical 160º... - Page 33 SPECIFICATIONS 511mm...
Need help?
Do you have a question about the DS-D5022 Series and is the answer not in the manual?
Questions and answers