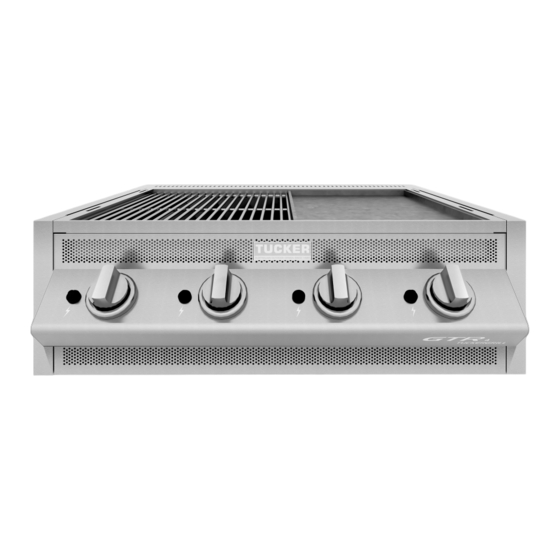
Tucker Barbecues GTR Series Assembly And Installation Instructions Manual
Barbecue insulation jacket
Hide thumbs
Also See for GTR Series:
Table of Contents
Advertisement
Quick Links
ASSEMBLY AND INSTALLATION INSTRUCTIONS
FOR GTR BARBECUE INSULATION JACKET
MODELS:
GTR3, GTR4, GTR5, GTR6.
GTR3 SS, GTR4 SS, GTR5 SS, GTR6 SS.
GTR3 S, GTR4 S, GTR5 S, GTR6 S.
IMPORTANT – PLEASE READ ALL INSTRUCTIONS
BEFORE YOU ASSEMBLE, INSTALL OR
OPERATE THIS APPLIANCE.
V11.03.19
Advertisement
Table of Contents

Related Manuals for Tucker Barbecues GTR Series


Summary of Contents for Tucker Barbecues GTR Series
- Page 1 ASSEMBLY AND INSTALLATION INSTRUCTIONS FOR GTR BARBECUE INSULATION JACKET MODELS: GTR3, GTR4, GTR5, GTR6. GTR3 SS, GTR4 SS, GTR5 SS, GTR6 SS. GTR3 S, GTR4 S, GTR5 S, GTR6 S. IMPORTANT – PLEASE READ ALL INSTRUCTIONS BEFORE YOU ASSEMBLE, INSTALL OR OPERATE THIS APPLIANCE.
- Page 2 CONTENTS GENERAL WARNINGS INSULATION JACKET ASSEMBLY INSTRUCTIONS INSTALLATION INSTRUCTIONS & WARNINGS DIMENSIONS...
-
Page 3: Important Safety Instructions
IMPORTANT SAFETY INSTRUCTIONS • Tucker GTR Barbecues are approved for • Read all instructions carefully before outdoor use only. assembly and usage of the barbecue. • Remove all plastic protection film from • Do not use or store flammable materials in or stainless steel components before assembly. - Page 4 INSULATION JACKET ASSEMBLY JACKET ASSEMBLY 1. Attach left and right hand side panels to the base panel with 6 bolts. Tools required for assembly – Phillips head We recommend you remove the insulation screwdriver and shifting spanner. wool from the panels for this process and have the side panels flat and the base panel •...
- Page 5 3. Now attach rear back panel to the left and right hand side panels using the bolts attached to the rear of the side panels. In the back of each side panel there is a plate with nuts welded into it of which is used to attach the bolts to the side panels.
- Page 6 6.1. Once you have drilled the hole then you have to attach the small hose cover panel to the base panel. 4.2. Once the back panel is adjusted, then tighten all the bolts. 5. Before securing the Insulation Jacket to the cabinetry or bench you will need place 6.2.
- Page 7 10. Do not secure the BBQ to the jacket if the jacket is going to be inserted between two cabinets, this will allow you to simply place the BBQ into the Jacket and if need be, allow you to remove the BBQ from the jacket later on if servicing is required.
- Page 8 INSTALLATION INSTRUCTIONS & WARNINGS BARBECUE INSTALLATION INSTRUCTIONS At least 30% of the remaining wall area is • open and unrestricted. READ THE IMPORTANT INFORMATION • In the case of balconies, at least 20% of the ON THE FRONT OF THE BARBECUE. total of the side, back and front wall areas shall be and remain open and unrestricted.
- Page 9 FIGURE F3 – OUTDOOR AREA – EXAMPLE 3 FIGURE F5 – OUTDOOR AREA – EXAMPLE 5 Both ends open Open side at least 30% or more in total 25% of total wall area of the remaining wall FIGURE 4 OUTDOOR AREA –EXAMPLE 4 area is open and unrestricted.
- Page 10 DIMENSIONS DIMENSIONS OF A GTR BARBECUE IN AN INSULATION JACKET (Measurements are in mm) Model Model GTR SS GTR 3+1 1020 GTR 3 GTR 4+1 1180 GTR 4 GTR 5+1 1340 GTR 5 GTR 6+1 1500 GTR 6 1080...
- Page 11 RECOMMENDED CUT-OUT SIZES FOR GTR BBQS WITH INSULATION JACKET FITTED (Measurements are in mm) Model Model GTR SS GTR3SS 1025 GTR3 GTR4SS 1185 GTR4 GTR5SS 1345 GTR5 GTR6SS 1505 GTR6 1085 Minimum clearance to combustible wall surfaces Tucker cannot be held liable for discolouration above the cooking surface is as follows: or distortion of any building materials or cabinetry used to surround the GTR BBQ when it...
- Page 12 TUCKER AUSTRALIA PTY LTD. 138 Silverwater Road Silverwater NSW 2128 AUSTRALIA. PHONE: (+612) 9748 8368 FAX: (+612) 9748 8138 WEB SITE: www.tuckerbbq.com.au EMAIL: mail@tuckerbbq.com.au...
Need help?
Do you have a question about the GTR Series and is the answer not in the manual?
Questions and answers