Tucker Barbecues GTR Series Assembly, Installation And Operating Instructions
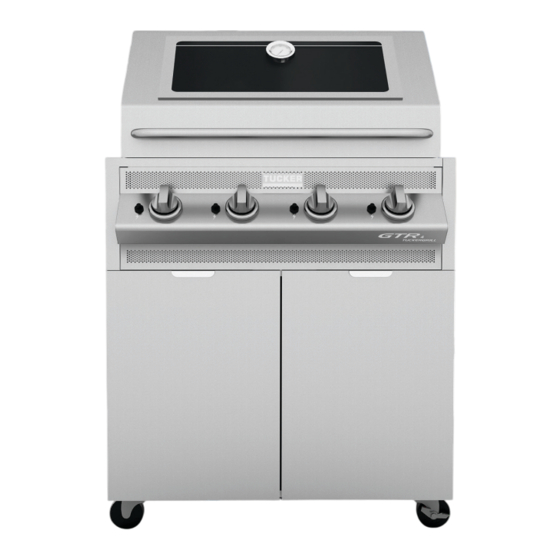
Cabinet trolley
Hide thumbs
Also See for GTR Series:
Advertisement
ASSEMBLY , INSTALLATION
AND OPERATING INSTRUCTIONS
FOR R CLASS & GTR SERIES
CABINET TROLLEY
R CLASS MODELS:
1R, 2R, 3R, 4R, 5R, 6R.
1RS, 2RS, 3RS, 4RS, 5RS.
1RSS, 2RSS, 3RSS, 4RSS, 5RSS.
1FR, 2FR, 3FR, 4FR, 5FR, 6FR.
1FRS, 2FRS, 3FRS, 4FRS, 5FRS.
1FRSS, 2FRSS, 3FRSS, 4FRSS, 5FRSS.
IMPORTANT – PLEASE READ ALL
INSTRUCTIONS BEFORE YOU ASSEMBLE,
INSTALL OR OPERATE THIS APPLIANCE.
GTR MODELS:
GTR3, GTR4, GTR5, GTR6.
GTR3 SS, GTR4 SS, GTR5 SS, GTR6 SS.
GTR3 S, GTR4 S, GTR5 S, GTR6 S.
V27.11.19
Advertisement

Related Manuals for Tucker Barbecues GTR Series


Summary of Contents for Tucker Barbecues GTR Series
- Page 1 ASSEMBLY , INSTALLATION AND OPERATING INSTRUCTIONS FOR R CLASS & GTR SERIES CABINET TROLLEY R CLASS MODELS: GTR MODELS: 1R, 2R, 3R, 4R, 5R, 6R. GTR3, GTR4, GTR5, GTR6. 1RS, 2RS, 3RS, 4RS, 5RS. GTR3 SS, GTR4 SS, GTR5 SS, GTR6 SS.
-
Page 2: Table Of Contents
CONTENTS GENERAL WARNINGS CABINET TROLLEY ASSEMBLY INSTRUCTIONS INSTALLATION INSTRUCTIONS & WARNINGS SPECIFICATIONS DIMENSIONS GAS INSTALLATION AND LEAK TEST PROCEDURE SERVICE & MAINTENANCE WARRANTY... -
Page 3: General Warnings
IMPORTANT SAFETY INSTRUCTIONS • Tucker BBQs are approved for outdoor use • Do not use or store flammable materials in or only. near this appliance. • Remove all plastic protection film from • Always leak test /check hose connections stainless steel components before assembly. after filling cylinders. -
Page 4: Cabinet Trolley Assembly Instructions
CABINET TROLLEY ASSEMBLY INSTRUCTIONS TOOLS REQUIRED FOR ASSEMBLY Only hand tighten nuts and bolts during 17mm & 10mm spanner assembly, than tighten all bolts and nuts just before placing the BBQ in the trolley. Phillips head screwdriver x8 Long Bolts Cabinet Hose Hole Hinges... - Page 5 BARBECUE CABINET TROLLEY ASSEMBLY 3. Attach the two side panels of the cabinet to the base and the large back panel. 1. First attach 4 wheels or feet to the base panel of the cabinet with a 17mm spanner. 2. Now attach the large back panel of the cabinet on the base panel.
- Page 6 4b. Bolt Side Panels to the Small rear panel. 6. Now place the flip up, grease tray fascia found in the BBQ. Insert both pins on either side into the front holes on both side panels. 5a. Now attached the top panel of the cabinet to the two slide panels and back panel. The side panels are pre-threaded.
- Page 7 8. Attach the four hinges to the front of the side panels with the 8 small bolts. 9. Now push the clip on the back of the hinges and remove the hinge leaving the plate attached to the cabinet side panels and bolt the hinges to the doors with 8 small bolts.
- Page 8 DOOR HINGE SET UP/TUNING 10. Now attach the doors onto the cabinet sides by sliding the door hinges onto the hinge First you have to check if the cabinet trolley plates attached to the cabinet sides. wheels are all same height. Than if the doors are still not correctly leveled, than you have to fine tune them by The door hinges have a hook, that needs...
- Page 9 12. Place the hose hole cover plate over the BBQ gas inlet and then re-attach the hose to Step 3 the BBQ gas inlet by screwing the hose onto If the gap from the side view, between the the thread of the inlet, then using a 19mm trolley and the doors is too wide or close, spanner to tighten it on.
- Page 10 13b. There are locating tabs on the back of the BBQ, which are designed to locate into the slots in the rear of the BBQ cabinet so as to ensure that the BBQ is correctly positioned. 13a. Now pick up the BBQ remove the grease tray then place the BBQ into the cabinet, feed the hose + regulator through the hose hole, make sure to check the cover plate...
-
Page 11: Installation Instructions & Warnings
INSTALLATION INSTRUCTIONS & WARNINGS INSTALLATION INSTRUCTIONS INSTALLATION WARNINGS READ THE IMPORTANT INFORMATION Do not use this appliance indoors or on marine ON THE FRONT OF THE BARBECUE. craft. This BBQ is designed and approved for outdoor This appliance shall only be used in an above use only. - Page 12 DIAGRAMMATICAL REPRESENTATIONS OF FIGURE 4 OUTDOOR AREA –EXAMPLE 4 OUTDOOR AREAS The following figures are diagrammatical representations of outdoor areas. The areas used in the figures below are examples – the same principles apply to any other shaped area. FIGURE F1 – OUTDOOR AREA – EXAMPLE 1 Open side at least 30% or more in total 25% of total wall area...
-
Page 13: Specifications
SPECIFICATIONS TUCKER PRODUCTS APPROVAL TUCKER R Class BARBECUES ARE MADE AND APPROVED TO AUSTRALIAN STANDARDS A.G.A. APPROVAL NO. AGA 8236-G For LP Gas connections, an approved 2.75 KPA regulator and hose assembly connection to the appliance is fitted by the manufacturer. The appliance inlet is 3/8 S.A.E. male and is located in the base of the BBQ, on the right hand side at the front. -
Page 14: Dimensions
DIMENSIONS DIMENSIONS OF R CLASS BARBECUES WITH A DROP DOWN LID INSTALLED ON CABINET TROLLEY (Measurements are in mm) V8+1 V10+1 Model V6 (3R) V8 (4R) V10 (5R) V12 (6R) (V4RSS) (V5RSS) 1574 679mm 1574mm 35mm 930mm 610mm... - Page 15 DIMENSIONS OF R CLASS BARBECUES WITH ROASTING HOODS INSTALLED ON CABINET TROLLEYS (Measurements are in mm) V8+1 V10+1 Model V6 (3R) V8 (4R) V10 (5R) V12 (6R) (V4RSS) (V5RSS) 1080 1500 1340 1500 600mm 560mm 285mm 1460mm 1185mm 610mm...
- Page 16 DIMENSIONS OF GTR BARBECUES WITH A FLAT LID INSTALLED ON CABINET TROLLEY (Measurements are in mm) Model GTR SS GTR3 GTR3 SS GTR4 GTR4 SS GTR5 GTR5 SS GTR6 GTR6 SS 1020 1180 1340 1080 1500 635mm 540mm 35mm 1440mm 935mm 900mm 550mm...
- Page 17 DIMENSIONS OF GTR BARBECUES WITH ROASTING HOODS INSTALLED ON CABINET TROLLEYS (Measurements are in mm) Model GTR SS GTR3 GTR3 SS GTR4 GTR4 SS GTR5 GTR5 SS GTR6 GTR6 SS 1020 1180 1340 1080 1500 635mm 470mm 320mm 1370mm 1220mm 900mm 550mm...
- Page 18 R Class Barbecue Model Information GTR Barbecue Model Information The R Class Roasting Hood if fitted is 285 high The GTR Roasting Hood if fitted is 320mm when shut and 560mm high when open. high from the top of the Cooking Surface when shut and 410mm high when open. The back of the R Class Roasting Hood is flush with the back of the BBQ when open The back of the GTR Roasting Hood is flush and does protrude past the back of the...
-
Page 19: Gas Installation And Leak Test Procedure
GAS INSTALLATION AND LEAK TEST PROCEDURE CONNECTION OF A GAS CYLINDER TO THE BARBECUE IS AS FOLLOWS The hose assembly connection to the appliance is fitted by the manufacturer. There must be no naked flames in the area when connecting the BBQ to a gas supply. Photo of what a typical leak looks like. •... - Page 20 GAS INSTALLATION It is recommended that an isolation valve and union be fitted before the BBQ; refer AS5601/ AG601 for correct pipe sizing to ensure Check that the hose is not kinked or adequate gas is supplied to the appliance. under tension. For natural gas check the pressure of the Apart from the connection point the hose must regulator and adjust it if necessary to the not be touching any part of the BBQ or Wok pressure shown on the data plate.
-
Page 21: Service & Maintenance
SERVICE & MAINTENANCE TAKE CARE OF THE APPLIANCE 8. Check hose and regulator regularly and replace if damaged. 1. Before each use remove any accumulated 9. It is recommended that the hose and grease and other cooking residue. Fat/ regulator be replaced every 5 years. grease fires are not covered by warranty. -
Page 22: Warranty
WARRANTY TUCKER CABINET TROLLEY WARRANTY 5. Proof of purchase together with this warranty must be provided to verify purchase date WARRANTY PERIOD and establish the warranty period. Only the original purchaser is covered under this Stainless steel body 10 years warranty.
Need help?
Do you have a question about the GTR Series and is the answer not in the manual?
Questions and answers