VIGO VG06041 Installation Manual
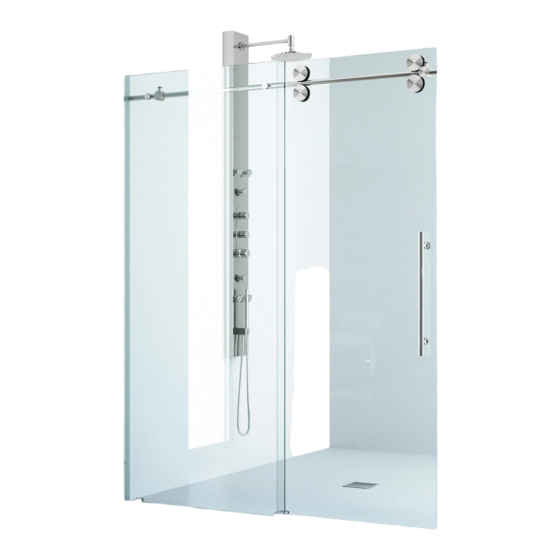
Shower door
Hide thumbs
Also See for VG06041:
- Installation manual (23 pages) ,
- Installation manual (17 pages) ,
- Manuallines for installation (42 pages)
Table of Contents
Advertisement
Quick Links
VIGO INDUSTRIES INSTALLATION GUIDE FOR
SHOWER DOOR (MODEL VG06041)
SAFETY PRECAUTIONS
This Installation Guide uses the following symbols to indicate important information.
Always observe the instructions indicated by these symbols.
WARNING
Instructions that, if ignored, could result in death or serious personal injury caused by
incorrect handling or installation of the product. These instructions must be observed for
safe installation.
CAUTION
Instructions that, if ignored, could result in personal injury or material damage caused by
improper handling or installation of the product. These instructions must be observed for
safe installation.
IMPORTANT
Maintenance and other important non-personal injury and non-material damage instructions
or statements that should be observed.
Advertisement
Table of Contents

Subscribe to Our Youtube Channel
Related Manuals for VIGO VG06041


Summary of Contents for VIGO VG06041
- Page 1 VIGO INDUSTRIES INSTALLATION GUIDE FOR SHOWER DOOR (MODEL VG06041) SAFETY PRECAUTIONS This Installation Guide uses the following symbols to indicate important information. Always observe the instructions indicated by these symbols. WARNING Instructions that, if ignored, could result in death or serious personal injury caused by incorrect handling or installation of the product.
-
Page 2: Packing List
VIGO INDUSTRIES INSTALLATION GUIDE FOR SHOWER DOOR (MODEL VG06041) PACKING LIST: 1. Wall mount bracket (2pc) 8. Door bottom guide (1pc) 14. Threshold extension clip (1pc) 2. Fixed panel holders (2pc) 9. Door threshold (1pc) 15. Phillips screw 2” (2pc) 3. - Page 3 MODEL VG06041...
-
Page 4: Before Starting
Apply a bead of silicone between the walls and base of the stall. • For optimum performance, you should install the shower door perfectly level on a level surface. MODEL VG06041 HAS A REVERSIBLE DOOR AND CAN THEREFORE BE INSTALLED TO EITHER THE RIGHT OR LEFT SIDE (SEE CONFIGURATION DIAGRAM BELOW) - Page 5 3. Screw the structural rail (#11) to the fixed panel (#4) with the fixed panel holders (#2). [SEE FIG.3] 4. Place seal strip (#12) to the fixed panel from the side of the wall. 5. Position the fixed panel and structural rail assembly in the shower door opening. [SEE FIG.4] MODEL VG06041...
- Page 6 3. Remove the wall mount bracket assembly (#1) from the structural rail assembly. Unscrew the plate from the bracket assembly body. [SEE FIG.5] 4. Place plates to the wall opposite to the plastic anchors. Screw plates in with 2” screws (#15). [SEE FIG.6] MODEL VG06041...
- Page 7 7. Place bracket body back on the rail. 8. Place the fixed panel with the structural rail assembly in its proper position and screw the bracket body to the plates. 9. Tighten the hex screws on the brackets with the hex key (supplied). MODEL VG06041...
-
Page 8: Installing The Door
3. Verify that the bottom of the door aligns with the notch in the bottom door guide (#8). 4. Screw the bottom rollers (#3) to the door. 5. Adjust the stoppers’ positions on the structural rail and tighten the hex screws. MODEL VG06041... -
Page 9: Installing The Handle
(supplied) on each side of the door. [SEE FIG.9] 3. Tighten the handle nuts from inside the shower. F. INSTALLING THE WATER SEAL STRIP Place the seal strip (#12, #13) to the door and to the fixed panel, respectively. [SEE FIG.10] MODEL VG06041... - Page 10 • Do NOT use abrasive cleaners, scrapers, metal brushes, or any items/products that would scratch and/or dull surface. • Do NOT allow surface to come into contact with acetone (nail polish remover), dry cleaning solution, lacquer thinner, gasoline, or any other similar product. MODEL VG06041...
-
Page 11: Limited Warranty
VIGO warrants faucets to be free from defects in workmanship and materials under normal use and service for a period of one (1) years from the initial date of purchase by the owner or end-user, contractor, or builder, from an authorized dealer.
Need help?
Do you have a question about the VG06041 and is the answer not in the manual?
Questions and answers