Fisher & Paykel RGV2 Series User Manual
Hide thumbs
Also See for RGV2 Series:
- Installation manual (25 pages) ,
- User manual (60 pages) ,
- User manual (57 pages)
Table of Contents
Advertisement
Quick Links
Advertisement
Table of Contents

Subscribe to Our Youtube Channel
Related Manuals for Fisher & Paykel RGV2 Series


Summary of Contents for Fisher & Paykel RGV2 Series
- Page 1 PROFESSIONAL RANGE RGV2 & RDV2 models USER GUIDE US CA...
-
Page 3: Table Of Contents
CONTENTS Safety and warnings Introduction First use Conditioning the oven Seasoning the griddle Oven use Positioning the shelves Using your oven for baking and roasting Using your oven for broiling Using your oven for proofing dough Oven cooking guidelines Oven modes Baking charts Cooktop use Using the cooktop burners... -
Page 6: Safety And Warnings
SAFETY AND WARNINGS IMPORTANT SAFETY INSTRUCTIONS! Read all the instructions before using the appliance. Use the appliance only for ● its intended purpose as described in these instructions. Proper installation – Be sure your appliance is properly installed and grounded ●... - Page 7 SAFETY AND WARNINGS IMPORTANT SAFETY INSTRUCTIONS! Safe food handling: leave food in the oven for as short a time as possible before ● and after cooking. This is to avoid contamination by organisms which may cause food poisoning. Take particular care during warmer weather. Clean only the parts listed in this manual.
-
Page 8: Introduction
INTRODUCTION 48” MODELS RGV2-488 RGV2-486GD RDV2-488 RDV2-486GD RGV2-485GD RGV2-486GL RDV2-485GD RDV2-486GL... - Page 9 INTRODUCTION 36” MODELS RGV2-366 RGV2-364GD RDV2-366 RDV2-364GD 30” MODELS RGV2-305 RGV2-304 RDV2-305 RDV2-304...
- Page 10 INTRODUCTION Before you start 1 Make sure that the anti-tip bracket at the right rear of the range has been properly installed. 2 Open the main oven door and find the model and serial numbers on the label in the bottom right-hand corner of the oven frame (see the drawing opposite). Note these numbers down for future reference in the space provided in section ‘Warranty and service’.
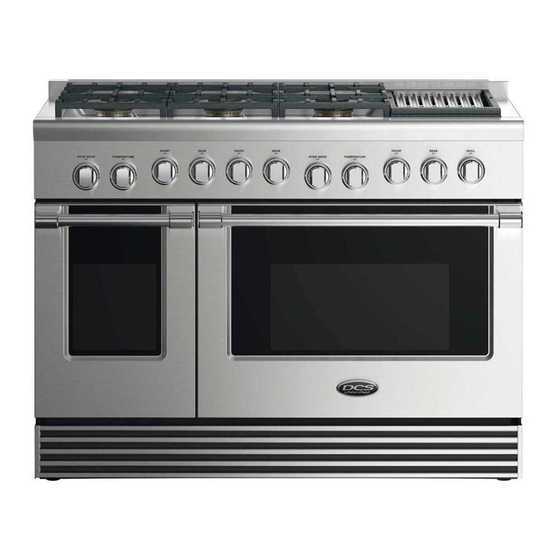
- Page 11 INTRODUCTION Grill/Griddle cover Model may vary Grill grate (Alternative to griddle) (some models only) Oven vents Back trim Burner grates Grease drip-pans Griddle Cooktop burner knobs Secondary oven temperature knob Griddle vents Secondary oven mode knob Oven frame Oven door gasket Side racks Main oven mode and temp knobs...
-
Page 12: First Use
FIRST USE Conditioning the oven Conditioning will burn off any manufacturing residues and ensure that you get the best results right from the start. 1 Insert all the shelves. See ‘Positioning the shelves’ for instructions. 2 Turn on the ventilation hood above your range on high. 3 Heat the empty oven at 450 F / 232 C for:... -
Page 13: Oven Use
OVEN USE Positioning the shelves Shelf positions are numbered from the bottom. ● Position the shelves you will need before turning the oven on. ● For advice on which shelf position to use, see sections ‘Oven modes’, ‘Oven cooking ● guidelines’, and ‘Cooking charts’. - Page 14 OVEN USE To insert the shelves – MAIN OVEN Guard rail 1 Make sure the guard rail is at the 2 Hold the shelf firmly with both hands, back, facing up and the slides are not making sure you grip the wire shelf too extended.
-
Page 20: Oven Cooking Guidelines
COOKING GUIDE Oven cooking guidelines IMPORTANT! Use all the oven modes with the oven door closed. ● Never use aluminum foil to cover the oven shelves or to line the floor of the oven. ● The trapped heat can irreversibly damage the enamel and may even cause fire. Do not place water, ice, or any dish or tray directly on the oven floor, as this will ●... - Page 21 COOKING GUIDE Oven cooking guidelines ROASTING The broil rack and broil pan are ideal for broiling and roasting. Place meat on ● the broil rack (on top of the broil pan) to allow hot air to circulate around it. This gives more even browning and a result similar to a rotisserie. Boneless, rolled or stuffed roasts take longer than roasts containing bones.
- Page 22 COOKING GUIDE Oven cooking guidelines REHEATING Use BAKE or BAKE CONVECTION to reheat food. ● BAKE mode is particularly good for reheating pastry based items, as the base heat ● will help re-crisp the pastry case. Always reheat food to piping hot. This reduces the risk of contamination by harmful ●...
- Page 26 COOKING CHARTS Shelf positions are counted from the base up ● (1 is the lowest, 5 is the highest). Position shelves before you turn the oven on. For best results preheat the oven to the required temperature. ● The broil element may come on while the oven is heating up. ●...
- Page 27 COOKING CHARTS The information in these charts are guidelines only. Refer to your recipe or the packaging and be prepared to adjust the cooking times and settings accordingly. RECOMMENDED SHELF TEMP (°F) TEMP (°C) TIME (MINS) MODE POSITIONS Bake Convection 400 - 425 210 - 220 8 - 10...
- Page 30 COOKING CHARTS BROILING FOOD SHELVES Beef Steak Rare Single Medium Single Hamburger Single (ground - patties) Meatballs Single (ground) Lamb Chops Medium Single Well done Single Chops (well done) Single Pork Ham steak Single Bacon Single Chicken Boneless pieces Single Bone In Pieces Single Sausages...
- Page 31 COOKING CHARTS RECOMMENDED SHELF TEMP (°F) TEMP (°C) TIME (MINS) MODE POSITIONS Broil 8 - 10 Broil 10 - 15 Broil 12 - 15 Broil 12 - 15 Broil 15 - 20 Broil 20 - 25 Broil 15 - 20 Broil 15 - 20 Broil...
-
Page 35: Cooktop Use
COOKTOP USE Grill cooking guidelines IMPORTANT! Never leave the grill unattended during use. Grease drippings may cause short ● flare-ups or even sustained flaming. If left unattended, these may cause fire. Make sure you have your ventilation hood set on maximum during grilling. ●... -
Page 36: Care And Cleaning
CARE AND CLEANING DON’TS Read these cleaning instructions and the Do not use aerosol cleaners until ● ● ‘Safety and warnings’ section before you the range has completely cooled. start cleaning your range. The propellant substance in these ● Before cleaning or removing any part, cleaners could catch fire in the ●... - Page 37 CARE AND CLEANING WHAT? HOW? IMPORTANT! HOW OFTEN? 1 Wipe with a damp cloth using a Control knobs Do not use stainless ● solution of mild detergent and hot steel cleaner on these water. Oven handles parts, as doing so may 2 Dry thoroughly with microfiber cloth.
-
Page 40: Using The Grill
CARE AND CLEANING WHAT? HOW? IMPORTANT! HOW OFTEN? 1 Check that the grill has been Grill grate The grill grate should be ● turned off. cleaned immediately after 2 Put on barbecue mitts for use (while it is still hot), protection against steam and heat. - Page 41 CARE AND CLEANING WHAT? HOW? IMPORTANT! HOW OFTEN? Griddle To remove light soiling after each use: Take extreme care while ● 1 While the griddle is still hot, use a cleaning a hot griddle: square-edged spatula or brass brush wear barbecue mitts and to clean the griddle of grease and be careful of steam and food particles.
- Page 43 CARE AND CLEANING To replace the oven door Hinge slot Hinge tongue 1 Hold the door firmly in an approximately 2 Align the hinge tongue with the hinge halfway open position. slots and push the door until you feel the latches locate into position on each side.
-
Page 47: Using The Clean Cycle
CARE AND CLEANING Using the CLEAN cycle About the CLEAN cycle Main ovens in RDV2 models feature a self-cleaning cycle (CLEAN) which takes ● care of the mess and grime that is traditionally associated with oven cleaning. During self-cleaning, the oven reaches very high temperatures. This burns off and breaks down food soils and grease deposits. -
Page 50: Troubleshooting
TROUBLESHOOTING If you can’t find an answer to your problem in the chart below, or if the problem cannot be fixed, you will need technical help. Contact your Authorized Service Center or Customer Care. PROBLEM POSSIBLE CAUSES WHAT TO DO OVEN The oven doesn’t work No power supply (oven light... - Page 51 TROUBLESHOOTING PROBLEM POSSIBLE CAUSES WHAT TO DO OVEN Food has high moisture Condensation is normal. Condensation around content or local climate You can wipe the drops off oven (eg on control (temperature, humidity) is the control panel. If there panel or top of oven contributing to condensation.
- Page 52 TROUBLESHOOTING PROBLEM POSSIBLE CAUSES WHAT TO DO OVEN The door is locked because See section ‘Using the The oven door a CLEAN cycle is underway or CLEAN cycle’ in ‘Care and won’t open the oven has not yet cooled cleaning’ for information. to a cooking temperature after a CLEAN cycle.
- Page 53 TROUBLESHOOTING PROBLEM POSSIBLE CAUSES WHAT TO DO COOKTOP BURNERS Burner parts or ignitors may Check that the burner parts Some burners be wet, dirty, or misaligned are clean, dry, and correctly will not light assembled. Check that the ignitors are clean and dry. Flames do not burn See ‘Care and cleaning’...
- Page 54 TROUBLESHOOTING PROBLEM POSSIBLE CAUSES WHAT TO DO COOKTOP BURNERS The ignitor keeps Dirty or wet ignitor(s) Clean the ignitor(s). clicking (continuous See ‘Care and cleaning’ for instructions. spark) even when a burner has lit GRIDDLE Oils cook onto the surface This is normal and doesn’t The surface is discolored in patches...
-
Page 55: Alerts
ALERTS ALERT POSSIBLE CAUSES WHAT TO DO Electronics fault Disconnect and reconnect the The OVEN MODE knob oven to the power supply. is flashing orange If the fault persists contact your Authorized Service Center or Customer Care. Electronics fault Disconnect and reconnect the The TEMPERATURE oven to the power supply. -
Page 56: Warranty And Service
WARRANTY AND SERVICE Before you call for service or assistance ... Check the things you can do yourself. Refer to the installation instructions and your user guide and check that: 1 Your product is correctly installed. 2 You are familiar with its normal operation. If after checking these points you still need assistance or parts, refer to the Service &... - Page 57 FISHERPAYKEL.COM © Fisher & Paykel Appliances 2018. All rights reserved. The product specifications in this booklet apply to the specific products and models described at the date of issue. Under our policy of continuous product improvement, these specifications may change at any time. You should therefore check with your Dealer to ensure this booklet correctly describes the product currently available.
Need help?
Do you have a question about the RGV2 Series and is the answer not in the manual?
Questions and answers