Fisher & Paykel RGV2 Series Installation Manual
Hide thumbs
Also See for RGV2 Series:
- User manual (57 pages) ,
- Installation manual (49 pages) ,
- Installation manual (48 pages)

Subscribe to Our Youtube Channel
Related Manuals for Fisher & Paykel RGV2 Series


Summary of Contents for Fisher & Paykel RGV2 Series
- Page 1 PROFESSIONAL RANGE RDV2 & RGV2 models INSTALLATION GUIDE US CA 591090E 07.18...
-
Page 2: What To Do If You Smell Gas
WARNING! If the information in this manual is not followed exactly, a fire or explosion may result causing property damage, personal injury or death. Do not store or use gasoline or other flammable vapors and liquids in the vicinity of this or any other appliance. -
Page 3: Safety And Warnings
SAFETY AND WARNINGS IMPORTANT SAFETY INSTRUCTIONS! WARNING! Save these instructions for the local inspectors use. ● Electrical shock hazard To avoid hazard, follow these instructions carefully before installing or using this appliance. ● Before carrying out any work on the electrical section of the appliance, Please make this information available to the person installing the appliance –... -
Page 4: Model Identification
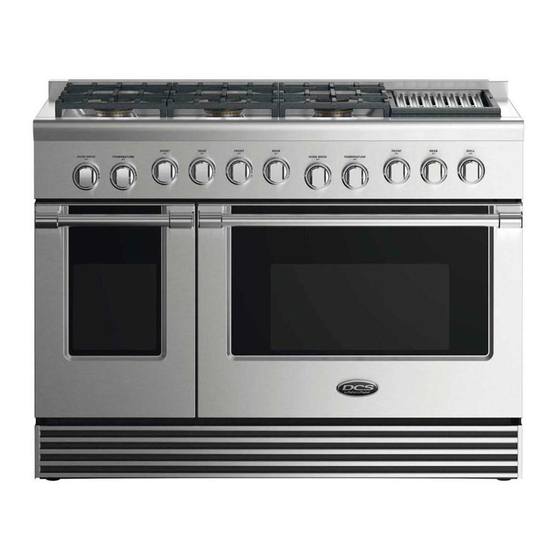
MODEL IDENTIFICATION 48” MODELS RGV2-488 RGV2-485GD RGV2-486GD RGV2-486GL RDV2-488 RDV2-485GD RDV2-486GD RDV2-486GL 36” MODELS 30” MODELS RGV2-305 RGV2-304 RGV2-366 RGV2-364GD RDV2-305 RDV2-304 RDV2-366 RDV2-364GD... - Page 5 PARTS SUPPLIED FOR INSTALLATION Anti-tip bracket (1) #10 x 2” 5/16” x 1 1/2” Lag bolts and wood screws (4) sleeve anchors (2) washers (2) UNPACKING AND HANDLING THE RANGE Unpacking and handling Inspect the product to verify that there is no shipping damage. If any damage is detected, call the shipper and initiate a damage claim. Fisher & Paykel is not responsible for shipping damage. ●...
-
Page 6: Product Dimensions
PRODUCT DIMENSIONS – 30” MODELS RGV2-305 shown for Illustration purposes only FRONT PROFILE 30” MODELS PRODUCT DIMENSIONS inches (mm) Overall height of range min 35 3/4’’ (908) (from floor to cooktop, excluding max 36 3/4’’ (933) pan supports and vent trim) Overall width of range 29 7/8”... - Page 7 PRODUCT DIMENSIONS – 36” MODELS RGV2-364GD shown for Illustration purposes only FRONT PROFILE 36” MODELS PRODUCT DIMENSIONS inches (mm) Overall height of range min 35 3/4’’ (908) (from floor to cooktop, excluding max 36 3/4’’ (933) pan supports and vent trim) Overall width of range 35 7/8”...
- Page 8 PRODUCT DIMENSIONS – 48” MODELS RGV2-486GD shown for Illustration purposes only FRONT PROFILE 48” MODELS PRODUCT DIMENSIONS inches (mm) Overall height of range min 35 3/4’’ (908) max 36 3/4’’ (933) (from floor to cooktop, excluding pan supports and vent trim) Overall width of range 47 7/8”...
- Page 9 CLEARANCE DIMENSIONS – ALL MODELS COOKING SURFACE Electrical & Gas (see diagrams following) FRONT Notes 30” MODELS 36” MODELS 48” MODELS CLEARANCE DIMENSIONS If the range is to be placed adjacent ● inches (mm) inches (mm) inches (mm) to cabinets, the clearances shown are required.
- Page 10 INSTALLATION SCENARIOS AND USE OF BACKGUARDS 1/2” WALL INSTALLATION Wall Mount 1 5/16” Wall Mount (13mm) (33mm) Non-combustible High Backguard High Backguard surface* Low Shelf Non-combustible Non-combustible Combustible High Shelf (required) surface* surface* Surface (required) (required) Non-combustible 1/2” surface* Range Mount (13mm) Low Backguard 28 3/8”...
- Page 11 INSTALLATION SCENARIOS AND USE OF BACKGUARDS Important notes All ranges come fitted standard with with an Integral Flat Vent Trim ● There are three different backguards available for purchase: ● Range Mount Low Backguard ● Wall Mount High Backguard with Low Shelf ●...
-
Page 12: Ventilation Requirements
VENTILATION REQUIREMENTS A suitable ventilation hood must be installed above the range. The following chart indicates the minimum blower capacity recommended for hood ventilation. VENTILATION STANDARD WALL INSTALLATION ISLAND INSTALLATION UNIT RECOMMENDATONS RECOMMENDATONS 30” (762mm) 23” (584mm) HOOD 23” (548 mm) Deep x 30”... - Page 13 REMOVE FROM SKID & PLACE ON DOLLY The ranges have shipping weights varying from 420 to 630lbs less approx. 50lbs after ● Left Rear removal of packing material. It is recommended that the oven door(s), pan supports Shipping Screws RGV2 and front kick panel be removed to facilitate handling, reducing the weight and to pass model shown through some doorways:...
- Page 14 TO REMOVE THE OVEN DOOR(S) IMPORTANT! Do not lift oven door by the handle – this will cause damage. Be sure the oven and door are cool before you begin to remove the door. Lock Hinge 1 Open the door completely. 2 Unlock the door hinges by rotating the lock forward.
- Page 15 LOCATION OF ELECTRICAL & GAS SUPPLY RDV2 MODELS Final position of range against wall SUPPLY AREA DIMENSIONS RDV2 REGULATOR* Distance from either edge of range 1 1/2” (38mm) to supply area Height of gas and electrical supply 6” (152mm) areas (from floor) Depth of supply areas 2”...
-
Page 16: Electrical Connection
ELECTRICAL CONNECTION ALL MODELS RDV2 MODELS The rating label is located A neutral supply wire must be provided from the power source (breaker panel) because ● on the back of IMPORTANT! critical range components, including the surface burner spark reignition module, require the range This range must be connected to the mains 120/240 VAC to operate safely and properly. - Page 17 ELECTRICAL CONNECTION RDV2 MODELS Dual Fuel models must be connected to the power supply utilizing one of the following methods. For all methods of connection, the length of the cord or conduit/wiring must allow the unit ● to be slid completely out of the cabinet without having to unplug or disconnect the unit from the power supply. Recommended minimum free length of cord or conduit is 4ft (1.2m). Electrical installations and grounding must be in accordance with all local codes and ordinances, and/or the National Electric Code, as applicable.
-
Page 18: Gas Connection
GAS CONNECTION Gas requirements Verify the type of gas supplied to the location. The range is shipped from the factory set up and adjusted for Natural Gas or LP, depending on the specific model ordered. Verify that the range is compatible with gas supply at the installation site before proceeding further. Return the range to the dealer if the unit is not set for the gas supplied at the site. NATURAL GAS Connection: 1/2”... -
Page 19: Leak Testing
LEAK TESTING Make sure all oven and burner knobs are set to OFF before connecting range to gas supply. ● After final gas connection is made, turn gas supply on and test all connections in gas supply piping for gas leaks with a soapy water solution. ●... - Page 20 GRILL AND GRIDDLE BURNERS (SOME MODELS ONLY) Each valve and air shutter is individually tested and adjusted prior to shipment. Normally adjustment is not required, however, ● vibration during transit, gas conversion or variations in the local gas supply may make minor adjustments necessary. Air shutter Check for the proper burner flame characteristics and adjust air shutters if necessary.
- Page 21 MOVING RANGE INTO POSITION Prior to final positioning Ensure the doors and kick panel are securely in place, if removed previously. ● Ensure any backguard is fitted prior to final positioning. ● Ensure all electrical and gas connections have been done as per instructions. ●...
- Page 22 INSTALLING THE ANTI-TIP BRACKET WARNING! All ranges must have an anti-tip device correctly installed as per the following To reduce the risk of tipping the appliance, the appliance must instructions. If you pull the range out from the wall for any reason, make sure be secured by properly installed anti-tip device packed with the that the device is properly engaged when you push the range back against appliance.
-
Page 23: Final Checklist
FINAL CHECKLIST TO BE COMPLETED BY THE INSTALLER ELECTRICAL GENERAL Receptacle with properly rated over-current protection is provided for service cord Placement of unit. connection. Specified clearance maintained to cabinet surfaces. Adequate ground connection. ...
Need help?
Do you have a question about the RGV2 Series and is the answer not in the manual?
Questions and answers