
Subscribe to Our Youtube Channel
Related Manuals for Kanto FMX1


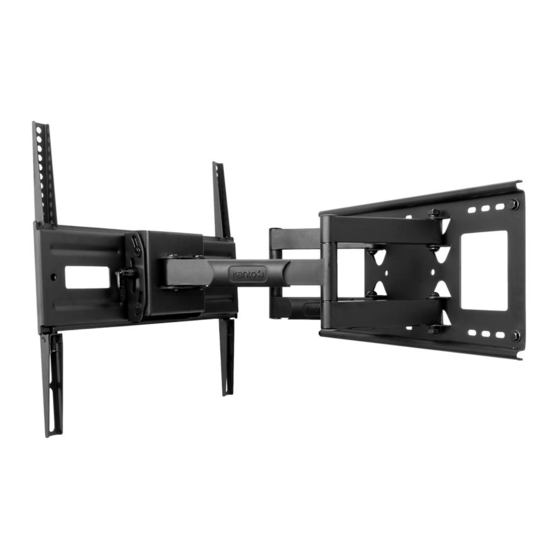
Summary of Contents for Kanto FMX1
- Page 1 English User Manual FMX1 TV Mount FULL MOTION FLAT PANEL TV MOUNT 75 x 75 ±15° 400 x 400 150 lbs 37” - 50” ±80° 3.6–19.5” (68 kg) VESA (9–50cm) COMPLIANT ™ Supporting your digital lifestyle...
- Page 2 Setup - Step 1 ......4 Other Kanto Products ..... . 8 Setup - Step 2 .
-
Page 3: Supplied Parts And Hardware
Supplied Parts and Hardware Wall Plate A: M5 x 12mm B: M6 x 12mm C: M8 x 16mm D: M5 x 30mm Screw Screw Screw Screw E: M6 x 35mm F: M8 x 40mm G: M5 Plastic H: M6/M8 Screw Screw Spacer Plastic Spacer... - Page 4 Step 1.1 Select the correct size of bolt Step 1.2 Attach TV brackets to the back of the TV Kanto provides 3 bolt diameters (Metric sizes M5, M6 and Now that you have selected the correct bolt length, M8) in various lengths.
- Page 5 Step 2: Mount Wall Plate Wood Stud Wall Brick or Concrete Wall The Wall Plate must be mounted to two wood studs. Use Using the Wall Plate as a template, mark six holes at your a stud sensor to locate the two studs, clearly marking the desired height (four toward the outer edge of the Wall outer edges of the studs.
- Page 6 Diagram E Step 4: Level the TV The FMX1 comes pre-tensioned at the factory to allow you to level the TV ±2° by simply holding the TV and twisting right or left, as shown in Diagram F. If you need...
- Page 7 Step 5: Tilt the TV The FMX1 will tilt ±15° to provide the ideal viewing angle. Loosen the tilt lever on the right side by rotating Flip it counter-clockwise from bottom to top as shown in Loosen Tighten Diagram H. (Loosen the tilt lever on the left side by rotating it counter-clockwise from top to bottom).
- Page 8 The information in the owner’s manual has been carefully checked and is believed to be accurate. However, Kanto assumes no responsibility for any inaccuracies that may be contained in the manual. In no event will Kanto, be liable for direct, indirect, special, incidental, or consequential damages resulting from any defect or omission in this manual, even if advised of the possibility of such damages.
Need help?
Do you have a question about the FMX1 and is the answer not in the manual?
Questions and answers