
Subscribe to Our Youtube Channel
Related Manuals for Kanto FMX2


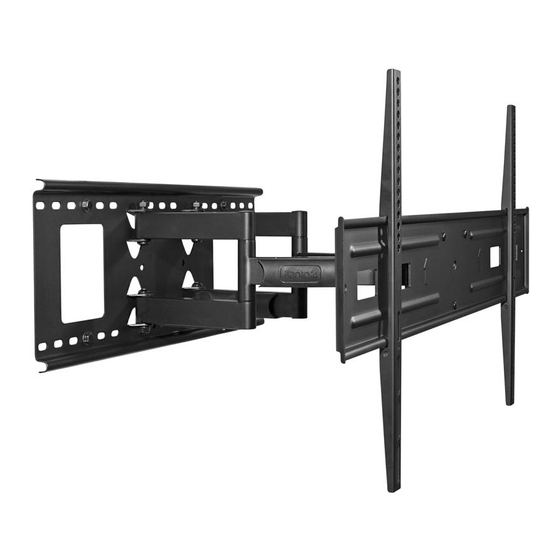
Summary of Contents for Kanto FMX2
- Page 1 English User Manual FMX2 TV Mount FULL MOTION FLAT PANEL TV MOUNT +14°/-8° 75 x 75 800 x 450 130 lbs ±80° 3.2– 20” (59 kg) VESA (8.2– 51 cm) COMPLIANT ™ Supporting your digital lifestyle...
- Page 2 Setup - Step 1 ......4 Other Kanto Products ..... . 8 Setup - Step 2 .
-
Page 3: Supplied Parts And Hardware
Supplied Parts and Hardware A: M5 x 12mm B: M5 x 30mm C: M6 x 12mm D: M6 x 35mm E: M8 x 20mm Bolt Bolt Bolt Bolt Bolt F: M8 x 35mm G: M8 x 50mm H: M5/M6 I: M5/M6/M8 Bolt Bolt 14mm Plastic Spacer... - Page 4 If your TV has a curved back or the mounting holes are recessed, you can use a combination of spacers (H, I or Kanto provides 3 bolt diameters (Metric sizes M5, M6 and J, depending on the selected bolt) to ensure a proper fi t.
- Page 5 Step 2: Mount Wall Plate Before you start drilling, attach the Wall Plate Template to your wall. It will make marking and drilling level pilot holes easier, and catch a lot of the dust. Remember to remove it before you attach the wall plate! Wood Stud Wall Brick or Concrete Wall The Wall Plate must be mounted to two wood studs.
- Page 6 Diagram E Step 4: Level the TV The FMX2 comes pre-tensioned at the factory to allow you to level the TV ±5° by simply holding the TV and twisting up or down, as shown in Diagram F. If you need to tighten or loosen the level mechanism, use a crescent wrench to tighten the two top nuts, as shown in Diagram G.
-
Page 7: Step 6: Cable Management
Step 5: Tilt the TV The FMX2 will tilt to provide the ideal viewing +14°/-8° angle. Loosen the tilt lever on the right side by rotating it counter-clockwise from bottom to top as shown in Diagram H. (Loosen the tilt lever on the left side by rotating it counter-clockwise from top to bottom). - Page 8 5 years. If equipment fails because of such defects and Kanto is notifi ed within 5 years from the date of shipment with proof of original invoice from an authorized reseller, Kanto will, at its option, provide replacement parts or replace the equipment, provided that the equipment has not been subjected to mechanical, electrical, or other abuse or modifi...
Need help?
Do you have a question about the FMX2 and is the answer not in the manual?
Questions and answers